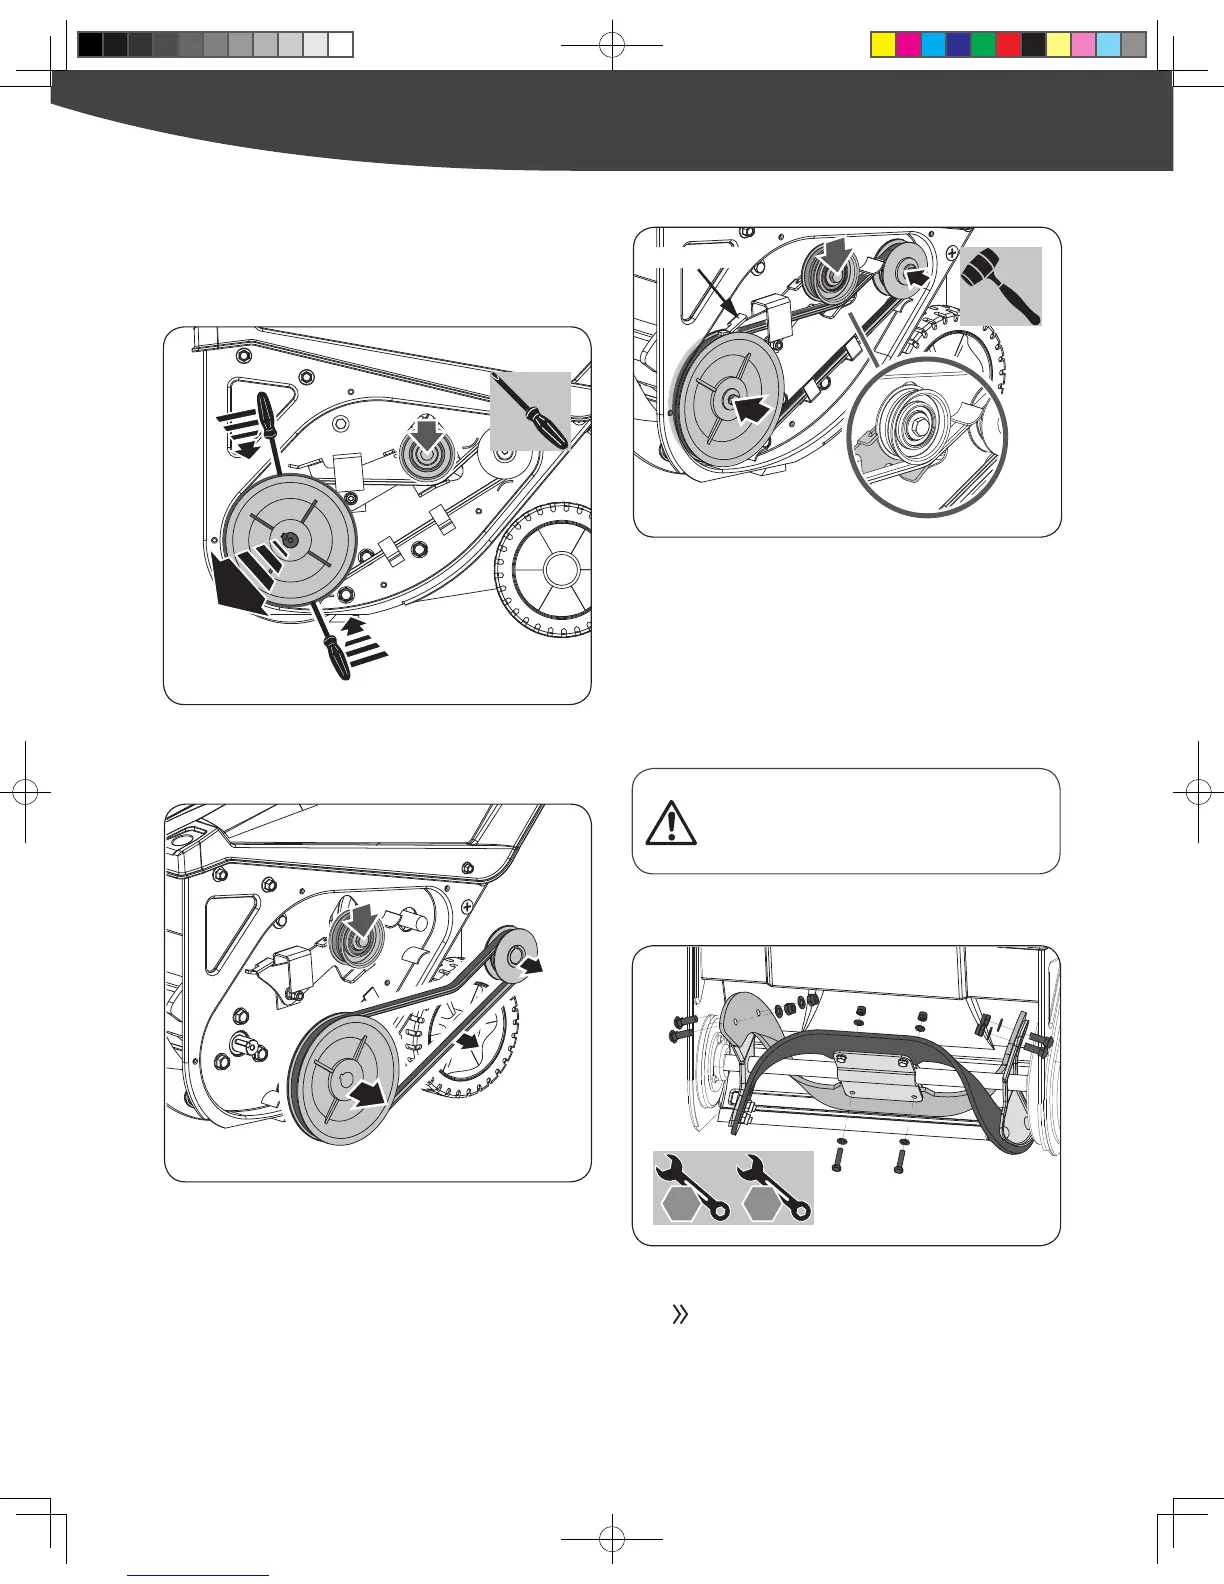
8. Replace the screws and washers and tighten securely. Turn the
auger to ensure no interference.
9. Reinstall the belt cover removed earlier.
The snow thrower auger’s rubber paddles are subject to wear and
should be replaced if any signs of excessive wear are present.
1. Remove the existing rubber paddles by loosening the screws
and nuts which secure them to the auger.
2. Secure the replacement rubber paddles to the auger using the
hardware removed earlier.
AUGER PADDLES REPLACEMENT
Do not allow the auger’s rubber paddles to wear to the
point where portions of the metal auger itself can come
in contact with the pavement. Doing so can result in
serious damage to the snow thrower.
13
mm
10
mm
X 2
6. Route the new belt around the drive pulley and under the idler
pulley.
7. Route the end of the new belt around the auger pulley and
slide the pulley back on to the auger shaft. It may be necessary
to push down on the idler pulley to get the auger pulley under
the belt keeper. Make sure the grooves in the auger pulley and
drive pulley in line with a hammer.
5. Remove the auger pulley and drive pulley with belt.
X 2
The auger paddles should be replaced one at a time so
that the auger still attached can be used as an example
for positioning and re-installing the new auger.
4. With the help of another pushing down the belt tension idler
to keep the idler bracket away from the auger pulley, use two
screwdrivers to pry the auger pulley as shown, so that auger
pulley becomes loose and away from the axle. (See Figure 10c)
17
|
Service
Figure 10d
Figure 10e
Figure 10c
Figure 11
30230US25M100.indd 17 2016/9/3 11:04:18