SKID SHOES
3
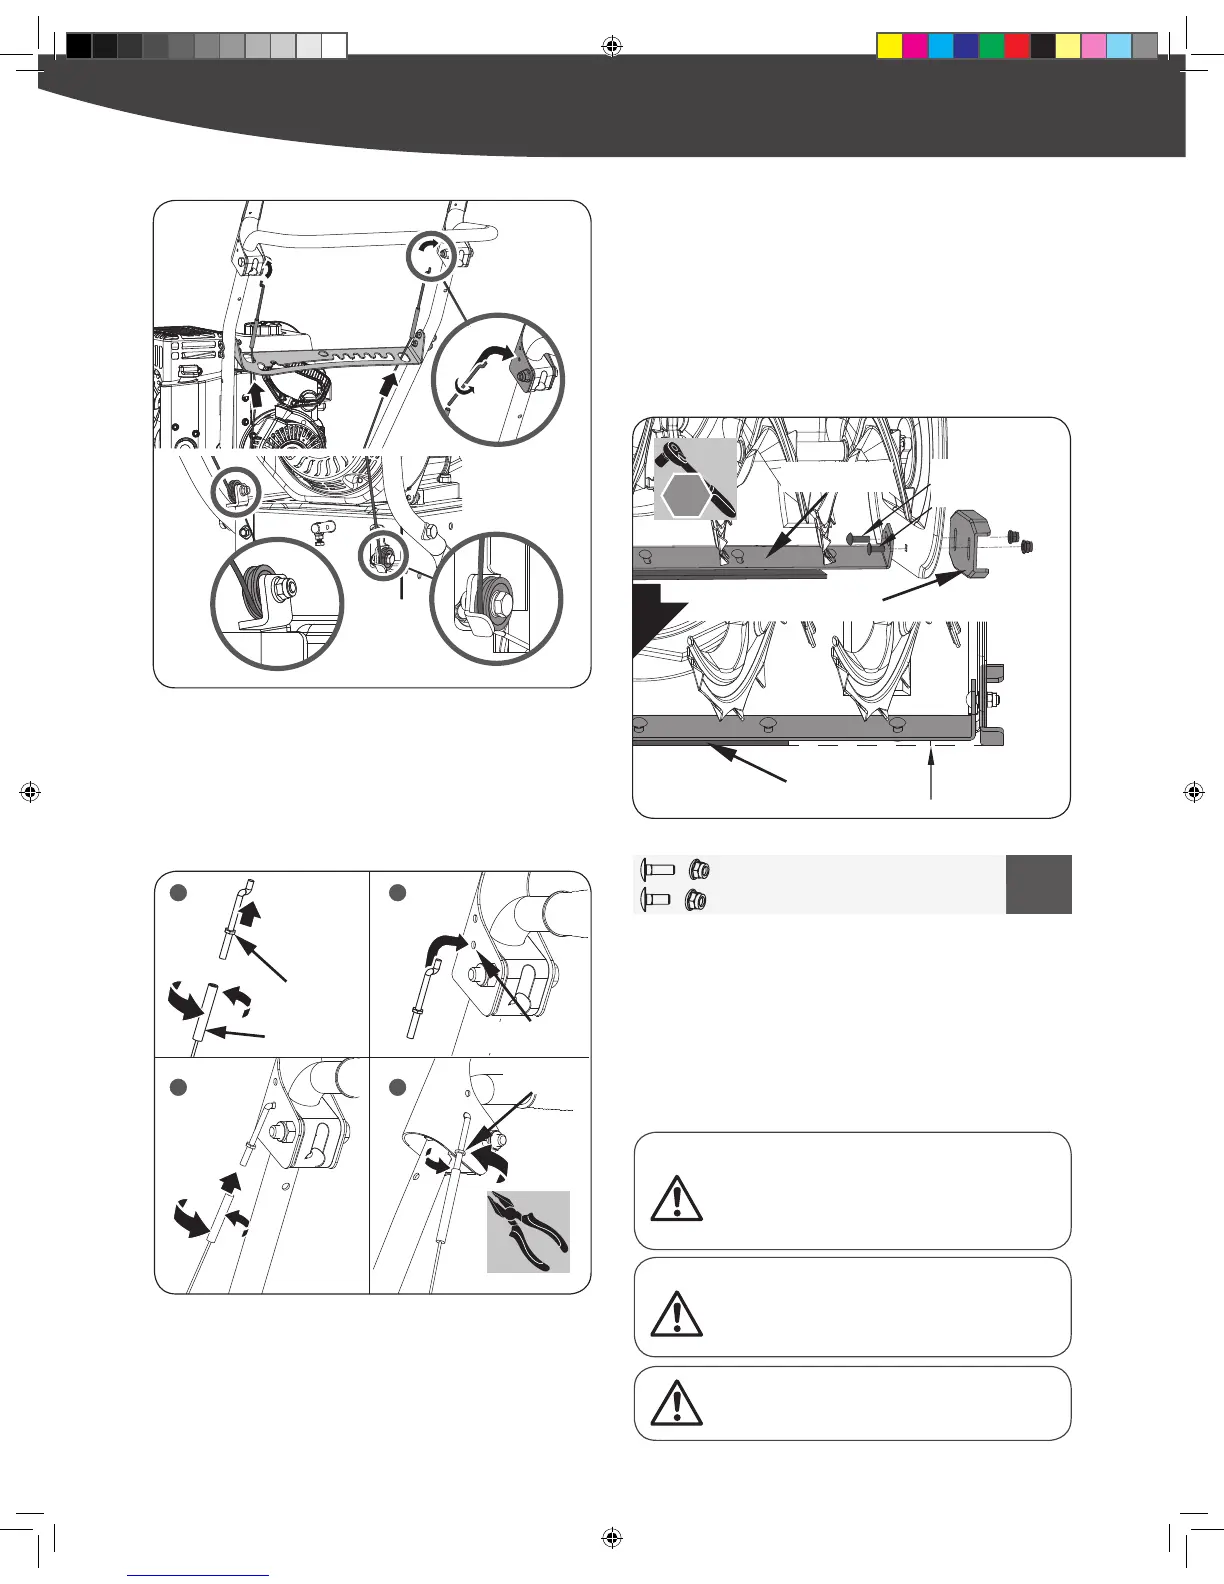
1.
4.
2.
2.
Lift the machine so that the scrapper blade is 1/8” (3mm)
above the ground, ensuring it is level. A piece of cardboard
half the thickness of the snow blower packaging placed
under the scrapper blade is recommended.
Attach the skid shoes to the sides of auger housing with the
bolts and nuts. The shorter M8X20 bolts should be in the front
holes while the longer M8X25 bolts in the rear holes. Move
the skid shoes down as far as possible. Be sure both skid shoes
are adjusted evenly. Tighten securely. (See
Figure 8
)
Place the machine is on a level and solid surface.
Remove the 1/8” (3mm) spacer you used from under the
scrapper blade.
Disconnect the Z-fittings from the turnbuckles and hook
them into the lower holes in the clutch levers. Thread the
turnbuckles without turning the cables onto Z-ttings until
there is no slack in the cables. Do not overtighten the cables.
Hold the ats on the turnbuckles with pliers and tighten the
jam nuts against the turnbuckles. (See
Figure 7b
steps 1 – 4)
Figure 8
M8x25 X 2
6
M8x20 X 2
TIRES
The tires are over-inflated at factory for shipping purposes.
Check the pressure in the tires prior to usage. Reduce or increase
air pressure to ensure equal tire pressure to the manufacturer’s
recommended pressure. The recommended air pressure can be
found on the tire sidewall.
Figure 7a
Figure 7b
Under any circumstance do not exceed manufacturer’s
recommended pressure. Excessive pressure when
seating beads may cause tire/rim assembly to burst
with force sufficient to cause serious injury. Refer to
side wall of tire for recommended pressure.
Equal tire pressure should be maintained at all times. If
the tire pressure is not equal in both tires, the machine
may not travel in a straight path and the scraper blade
may wear unevenly.
Keep tires free of gasoline and oil, which can harm
rubber.
 Loading...