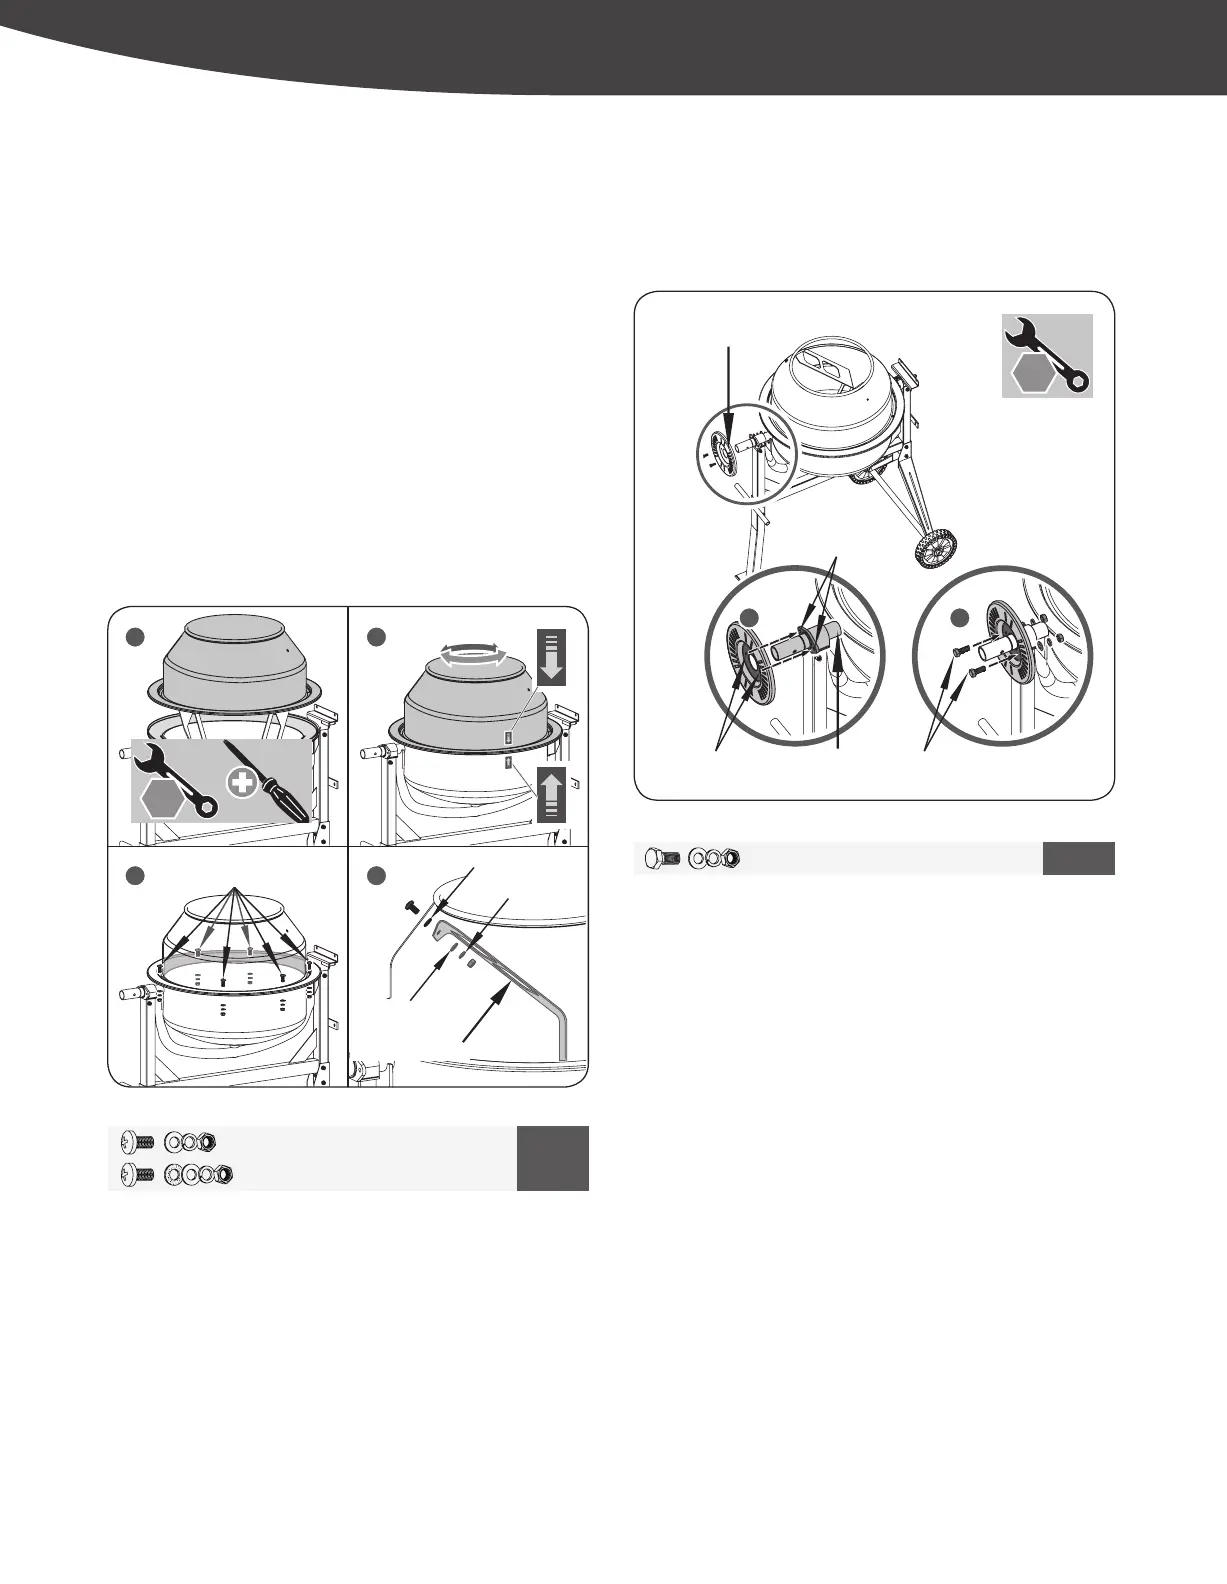
1. Place the upper drum onto the bottom drum by aligning both
the mounting holes, and the labeled arrows. (See Figure 4,
Illustration 1 & 2)
2. Insert a M8×20 cross headed screw into each mounting holes
in the rim. Secure each screw from below with a at washer,
lock washer and nut. Make sure the tightening process is
carried out progressively. (See Figure 4, Illustration 3)
3. Secure the mixing blades to the upper drum by inserting two
M8×20 cross headed screws, from the outside through the
holes in the drum.
4. A leather washer should be positioned inside between the
drum and blade. Secure the mixing blade on the inside using a
at washer, spring washer and nut. (See Figure 4, Illustration 4)
5. Finally, ensure top and bottom mixing blade mountings are
tight.
1. Slide the locking plate over the large diameter shaft (at the
“leg side” of the frame) with the rim facing inwards as shown.
Insert two M8×25 bolts into the mounting holes, and secure
each with a nut, lock washer and at washer. (See Figure 5a)
Figure 4
Figure 5a
UPPER DRUM TIPPING BAR
M8×20 (×6)
Lock Washer
Leather Washer
Flat Washer
21
43
Mixing Blade
Shaft
Locking Plate
Mounting Hole (×2)
Mounting Hole (×2)
1
M8×25 (×2)
2
M8 × 20 × 6
6
M8 × 20 × 2
M8 × 25 × 2
7
13
mm
× 2
13
mm
9
|
Assembly
74013US25M101.indd 9 2017/3/14 11:28:44