DANGER:
Do not allow any part of the power cord on the mower or
extension cord to become pinched or trapped when
assembling or raising the handles. A pinched live power cord
can cause the handles to become electrically energized.
Contact with electrically live conductive parts will result in
death by electrocution, electric shock, and/or serious personal
injury.
ASSEMBLY
To lower the handle assembly:
• Loosen the upper handle lock knobs (B).
NOTE: Loosen the knobs (B) on the upper handle by turning
them counterclockwise.
• Lower the upper handle (C). Avoid pinching or trapping any
power cords.
INSTALLING THE MULCHING PLUG
(For Mulching Operation)
See figure 3
NOTE: When using the mulching plug, do not install the grass
catcher.
• Remove switch key and battery packs.
• Lift and hold the rear discharge door (A).
• Grasp the mulching plug (B) by its handle and insert it at a
slight angle, as shown.
• Push the mulching plug securely into place.
• Lower the rear discharge door.
• Reinstall switch key and battery packs when you are
ready to mow.
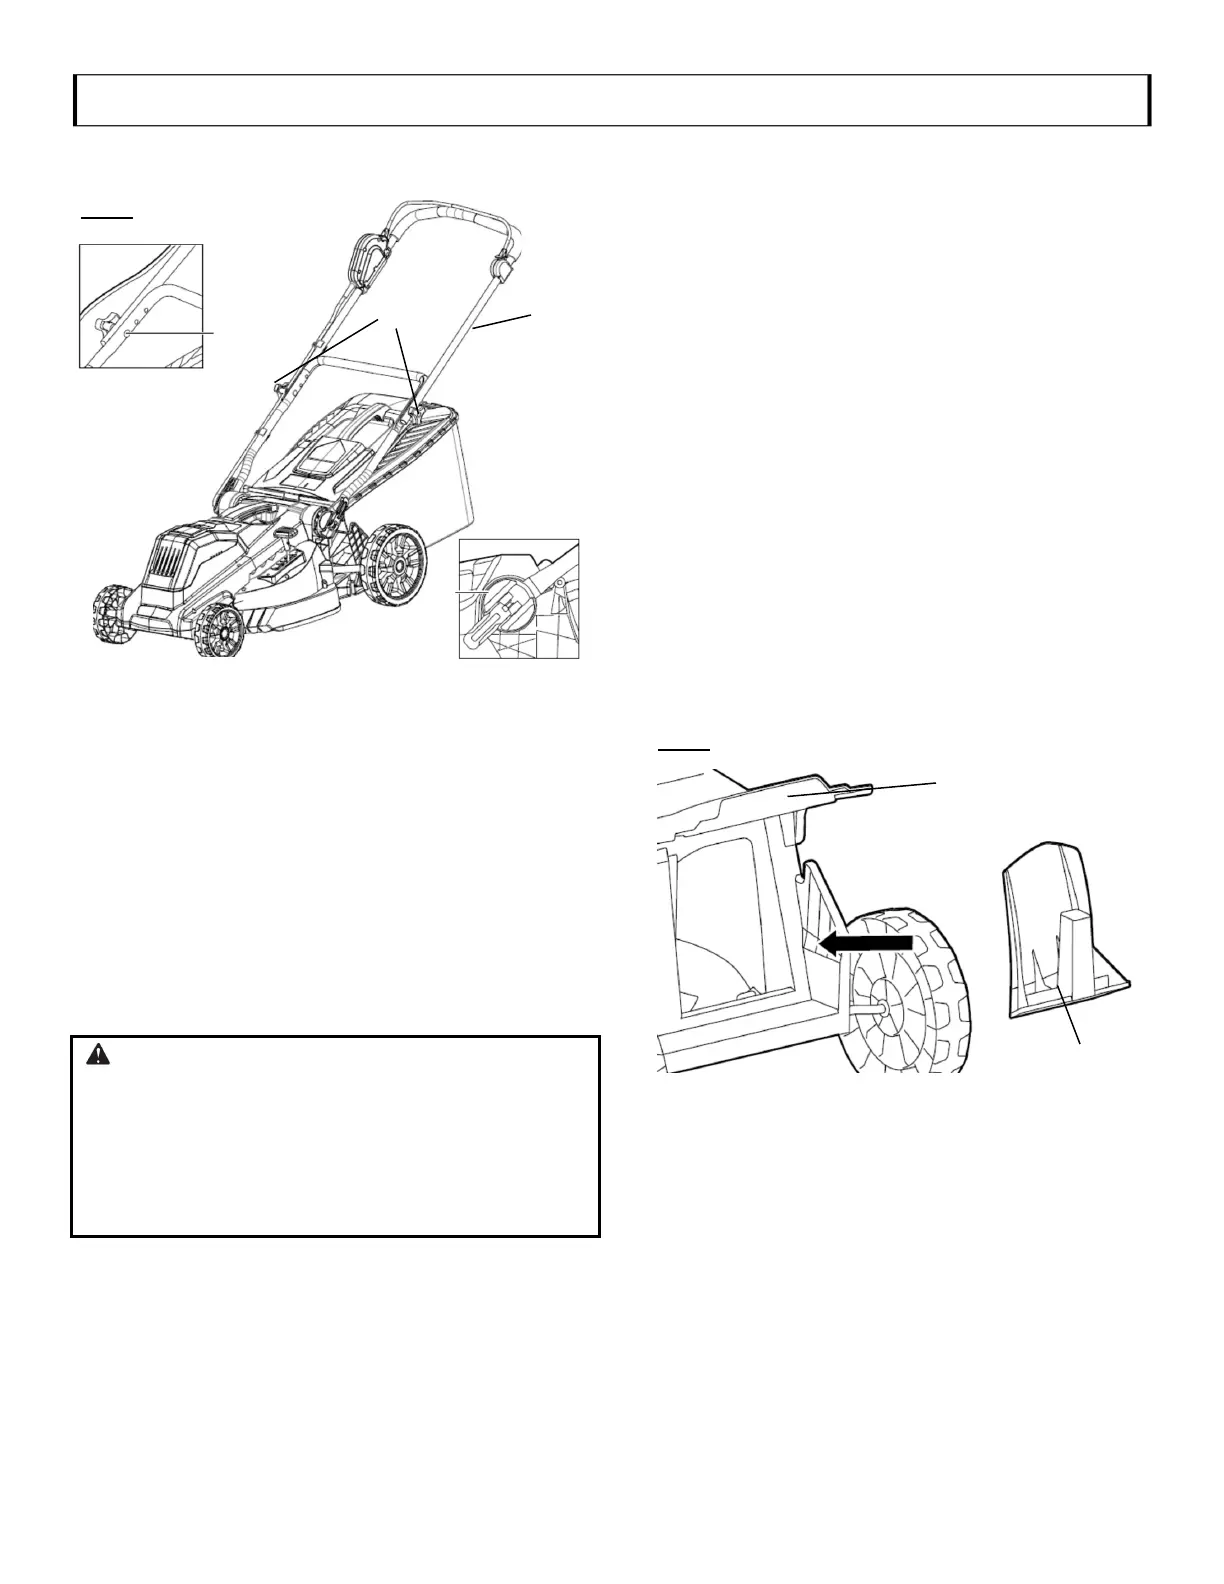
INSTALLING AND ADJUSTING HANDLE ASSEMBLY
See Figures 2
To install lower handle and upper handle assembly:
• Tighten the lower handle with the cam locks (A) on both
sides.
• Tighten the upper handle and lower handle with the supplied
nuts and screws on both sides. There are 3 positions or
adjusting the height.
• Install the two cable clips into the upper and lower handle,
then fix the line by cable clips.
NOTE: The lower handle has three hole settings for height
adjustment. Make sure you use the same height setting for each
side. Make sure the handles snap into place securely.
9
Model 622019-1
Fig. 2
3 Positions
A
B
C
Fig. 3
A
B
 Loading...