EasyManua.ls Logo

Yashica TL Electro - User Manual

Yashica TL Electro
9 pages
Print Icon
To Next Page IconTo Next Page
Loading...
Yashica TL Electro
This camera manual library is for reference and historical purposes, all rights reserved.
This page is copyright by mike@butkus.org, M. Butkus, NJ.
This page may not be sold or distributed without the expressed permission of the producer
I have no connection with Chinon Co., Japan
On-line camera manual library
This is the full text and images from the manual.
To print, try printing only 3 or 4 pages at a time.
Back to main on-line manual page
If you find this manual useful, how about a donation of $3 to: M. Butkus, 29 Lake Ave., High Bridge, NJ
08829-1701 and send your e-mail address so I can thank you. Most other places would charge you $7.50 for a
electronic copy or $18.00 for a hard to read Xerox copy. This will allow me to continue to buy new manuals
and pay their shipping costs.
It'll make you feel better, won't it?
If you use Pay Pal, use the link below. Use the above address for a check, M.O. or cash.
(posted 3-02)
www.orphancameras.com
Question and Answer IconNeed help?

Do you have a question about the Yashica TL Electro and is the answer not in the manual?

Summary

Installing Batteries

Battery Installation Procedure

Instructions for installing mercury batteries, including warnings and checking for proper installation via the green signal lamp.

Film Loading

Film Loading Procedure

Steps for loading film, including opening the back cover, inserting the cassette, and engaging the film leader.

ASA Speed Setting

Setting ASA Film Speed

How to set the ASA speed rating of the film loaded in the camera using the ASA Indicator Window.

Shutter Speed Setting

Setting Shutter Speed

Instructions on how to set the shutter speed using the Shutter Speed Control Dial.

Exposure Setting

Correct Exposure Adjustment

Guides on setting aperture for correct exposure using the green symbol in the viewfinder.

Preselecting Aperture

Method to preselect aperture for subdued lighting conditions by setting aperture and then shutter speed.

Shutter Speed Range Notice

Information on obtaining infinite shutter speeds and handling in-between settings for correct exposure.

Lens Compatibility Notice

Note on using manual extension bellows and tubes with standard lenses lacking an Auto Manual Lever.

Focusing

Focusing Technique

How to achieve precise focus by turning the Focusing Ring and observing the microprism spot.

Sensitivity Range

Sensitivity Range and Shutter Speed

Explains the automatic exposure system's sensitivity based on ASA speed and lists usable shutter speed ranges.

Film Unloading

Film Unloading Procedure

Steps to safely unload film, including stopping winding when resistance is felt and pressing the rewind release button.

Flash Photography

Using Flash Equipment

Guidance on using flash equipment, connecting units, and setting synchronization speeds for different flash types.

Speeds for Flash Sync

Details on electronic flash, M.F. class bulbs, and F.P. class bulbs synchronization speeds.

B Setting

Instructions for using the 'B' setting for long exposures, recommending a tripod and cable release.

Self-Timer

Self-Timer Operation

Instructions for winding the film advance lever, pushing the self-timer lever, and activating the self-timer.

Backlit Subjects

Shooting Backlit Subjects

Tips for taking exposure readings when shooting backlit subjects, suggesting doubling exposure.

Infrared Film Photography

Infrared Film Photography

Guidance on infrared film photography, focusing on using the red index for distance compensation.

Film Plane Indicator

Using Film Plane Indicator

Using the film plane indicator for critical focusing in close-ups and adjusting the Distance Scale.

Depth of Field

Depth of Field Explanation

Explains depth of field and how it is affected by aperture setting and focus distance.

Lens Interchanging

Changing Lenses

Instructions for changing Yashinon lenses, noting the screw-thread mount and parallax-free viewing.

Overview

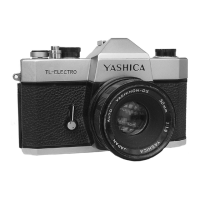
The Yashica TL Electro is a single-lens reflex (SLR) camera designed for both amateur and experienced photographers, featuring through-the-lens (TTL) exposure metering and a screw-thread lens mount. This manual provides comprehensive instructions for its operation, from basic film loading to advanced flash photography and lens interchangeability.

Function Description

The Yashica TL Electro is a 35mm SLR camera that utilizes a TTL exposure metering system to ensure accurate exposure settings. Its primary function is to capture still photographs on 35mm film. The camera integrates an electronic shutter speed control, allowing for precise exposure adjustments. The TTL metering system is designed to read the light directly through the lens, providing accurate exposure information based on the lens and aperture in use. The camera features a manual film advance lever, a shutter release button, and a film rewind knob for film handling. A self-timer is included for delayed shutter release, useful for self-portraits or group shots where the photographer wants to be in the picture. The camera also supports flash photography with various synchronization options.

Important Technical Specifications

  • Film Type: 35mm film.
  • Batteries: Originally designed for two 1.35V mercury batteries (Mallory PX-640 or equivalent). The manual notes that these are no longer available in the U.S. and suggests 1.5V replacements, but warns of potential LED burnout due to the increased voltage (3V total instead of 2.7V). It recommends 1.4V zinc-air batteries or a battery holder to drop alkaline batteries to 1.35V.
  • ASA Speed Setting: Adjustable via a milled ring around the Shutter Speed Control Dial, allowing the user to match the film's ASA rating.
  • Shutter Speed: Adjustable via the Shutter Speed Control Dial. The camera offers an infinite range of shutter speeds between 1/60 and 1/1000 sec in automatic mode. Specific settings for flash synchronization are also available, including "60-X" for electronic flash (synchronizes at all speeds under 1/60 sec and B), 1/30 sec or slower for M.F class bulbs, and all speeds other than 1/60 sec for F.P class bulbs. The "B" setting allows the shutter to remain open as long as the shutter release button is depressed.
  • Lens Mount: Screw-thread mount, compatible with Yashinon lenses.
  • Focusing: Manual focusing through the viewfinder with a microprism focusing spot at the center of the finder field.
  • Self-Timer: Provides a delayed action of 8 to 9 seconds.
  • Exposure Metering: TTL automatic exposure system with a sensitivity range that varies according to the ASA speed rating of the film. The viewfinder displays a green (O) symbol for correct exposure, an upper half (n) for over-exposure, and a lower half (v) for under-exposure.

Usage Features

  • Film Loading: The back cover opens by pulling up the Film Rewind Knob. The film cassette is loaded, and the film leader is inserted into the take-up spool. The film advance lever is wound, and the sprocket teeth engage the film perforations. The back cover is then closed, and the film is advanced until the exposure counter shows "1". The Film Rewind Knob turning during advancement indicates proper film take-up.
  • ASA Speed Setting: Lift and turn the milled ring around the Shutter Speed Control Dial to align the film's ASA rating with the ASA Indicator Window.
  • Shutter Speed Setting: Turn the Shutter Speed Control Dial to align the desired speed setting with the index line.
  • Exposure Setting: Press the Activator Switch and turn the Aperture Ring until the entire green (O) symbol appears in the viewfinder for correct exposure. If only the upper half (n) is visible, it indicates over-exposure, requiring a faster shutter speed or an ND filter. If only the lower half (v) is visible, it indicates under-exposure, requiring a slower shutter speed or flash photography. For preselection of aperture, set the desired aperture, press the Activator Switch, and then turn the Shutter Speed Control Dial until the green symbol appears.
  • Focusing: Turn the Focusing Ring while looking through the viewfinder. Precise focus is achieved when the subject appears clear without multiple glitter in the microprism focusing spot.
  • Film Unloading: Stop winding the film advance lever when resistance is felt. Press the Film Rewind Release Button on the camera base, fold out the rewinding crank-handle, and turn it in the direction of the arrow until it turns freely. Pull the Film Rewind Knob all the way up to open the back cover and remove the exposed film.
  • Flash Photography: For cordless flash units, mount them on the direct contact shoe. For conventional strobe or AC flash units, plug the cord into the Synchro-Terminal. Synchronization is automatically determined by the Shutter Speed Control Dial setting. Correct aperture is calculated by dividing the flash guide number by the flash-to-subject distance.
  • Self-Timer: Wind the Film Advance Lever, push the Self-Timer Lever all the way down, and depress the Shutter Release Button to activate the 8-9 second delay.
  • Backlit Subjects: For backlit subjects, either approach the subject for an exposure reading or give about double the normal exposure.
  • Infrared Film Photography: Focus normally, then align the subject distance with the red infrared index on the Distance Scale for compensation.
  • Depth of Field: The extent of acceptable sharpness is greater at smaller aperture settings, when focused on distant subjects, and more extensive in the background than the foreground.
  • Lens Interchanging: To change lenses, turn the lens barrel counter-clockwise. It is recommended to interchange lenses in the shade.

Maintenance Features

  • Battery Care: Always use the correct type of batteries. Do not dismantle mercury batteries, throw them into fire, or keep them where children can access them. It is recommended to carry spare batteries for long trips.
  • General Care: The manual implies general care practices such as avoiding force when advancing film to prevent tearing or dislodging it from the cassette. When changing lenses, doing so in the shade can help protect the camera's interior and sensor from direct light exposure.

Yashica TL Electro Specifications

General IconGeneral
BrandYashica
ModelTL Electro
CategoryDigital Camera
LanguageEnglish

Related product manuals