Installation_Guide | 1 - Installation Guide | 34
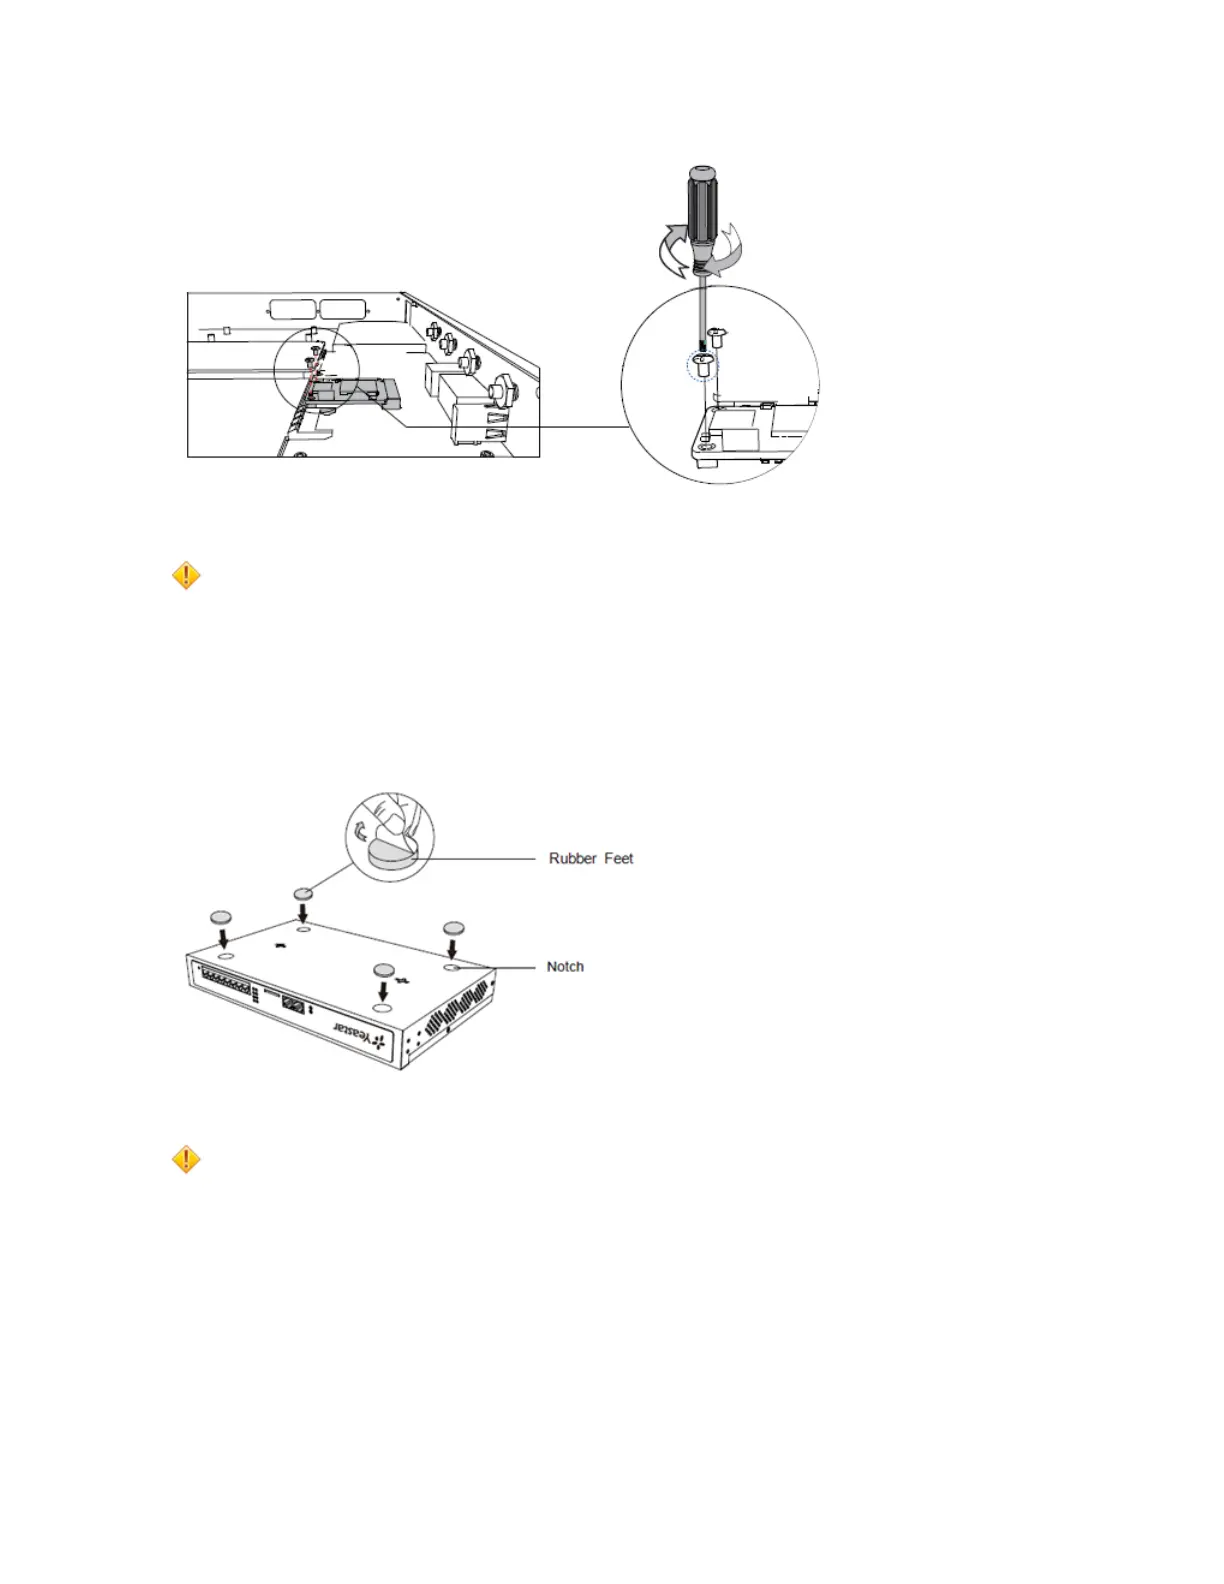
Desktop Installation
Caution:
• Set 5~10cm gaps around the device for air circulation.
• Avoid any heavy thing placed on the device.
1. Place the PBX on a steady platform.
2. Remove the adhesive backing paper from the rubber feet.
3. Turn over the device and attach the supplied rubber feet to the recessed areas on the bottom at each corner
of the device.
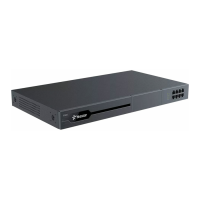
Rack Installation
Caution:
• Be careful not to drop any components. Dropping components may damage them or cause an injury.
• Only use the 19-inch rack mounting kits (attached bracket and fittings) included with the PBX.
1. Fix the brackets to the left and right sides of the PBX with 4 screws.
 Loading...