Do you have a question about the YitaHome LHHY-V 1 and is the answer not in the manual?
Ensure stability using ground nails, ropes, and expansion screws to prevent collapse.
Avoid use in high winds, heavy snow, or inclement weather; respect wind/snow limits.
Thoroughly inspect all bolts, nuts, and buckles for tightness before use.
Warranty excludes damages from improper installation, misuse, or lack of precautions.
Two or more people, ladder, and electric drill may be needed for assembly.
Do not assemble in heavy winds; unit is temporary, not for sustained weather.
Avoid open flames, do not fully tighten screws initially for better alignment.
Professional installation is highly recommended for optimal results.
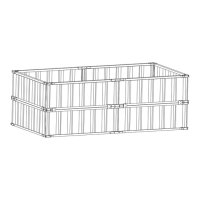
Connect legs (A) to base plates (J) using screws (1).
Join beams (B, B1) to connector (P) using hardware (U, 1).
Assemble legs (A) with top beams (B, B1) using screws (1, 2).
Install upper supports (H, H1) onto the frame using screws (1).
Attach corner brackets (K, K1) to the frame using screws (3, 4).
Connect roof support rods (D) to the central hub (L) using screws (1).
Attach roof struts (D) to the frame using screws (1).
Connect panel components (E, W3) using screws (3).
Assemble roof structure with panels (E, D, F) and hub (L) using screws (1).
Install the top cap (M) onto the central hub (L) using screw (7).
Attach upper frame connectors (G5, N, E, D) using screws (1).
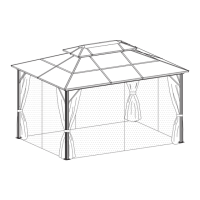
Install roof panels (R1, R2) onto the frame (D, E).
Remove protective films from R1/R2 panels before installation.
Secure corner supports (G3, N1) to the frame (D, E) using screws (1).
Install roof panels (F1, F2, Q1, Q2) onto the frame (E, D).
Remove protective films from Q1/Q2 panels before installation.
Install roof panels (Q3, Q4) onto the frame (D, E).
Remove protective films from Q3/Q4 panels before installation.
Attach side beams (G1, G2) and connectors (N) to the frame using screws (1).
Hang curtains on parts B and B1, noting hole counts.
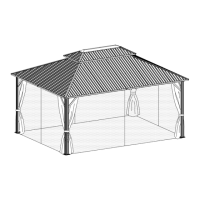
Install sidewall curtains (T) using connector (U).
Hang side netting on parts B and B1, noting hole counts.
Secure front netting (T1) and curtains (T) to part A using connector (U).
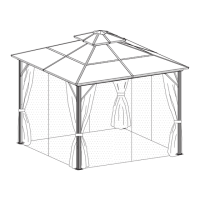
Anchor gazebo with screws/nails for wind resistance on cement or grassy surfaces.
The installation is now complete.
Contact YITAHOME for installation questions via phone or email.
Alternative contact method for Amazon orders through your account.
| Brand | YitaHome |
|---|---|
| Model | LHHY-V 1 |
| Category | Outdoor Furnishing |
| Language | English |