This document provides assembly instructions and important warnings for the YITAHOME YSS-V2 10x10 FT Hardtop Gazebo. It is designed as a temporary, portable outdoor shelter.
Function Description
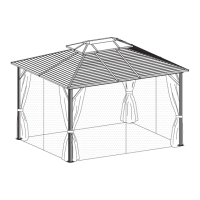
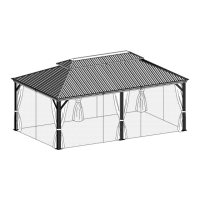
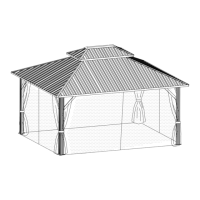
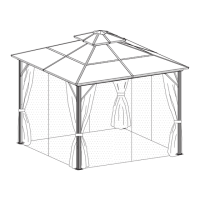
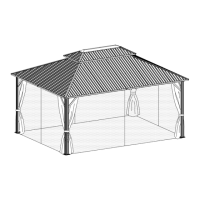
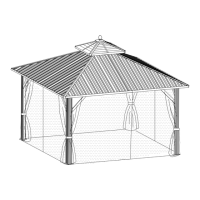
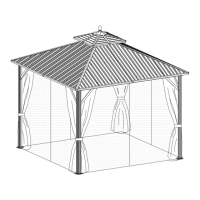
The YITAHOME 10x10 FT Hardtop Gazebo serves as a temporary outdoor shelter, offering protection from sunlight and rain. Its hardtop design provides a more robust overhead cover compared to fabric gazebos. The integrated screens are designed to block flying insects, enhancing comfort for users. This gazebo is suitable for various outdoor activities, providing a shaded and somewhat enclosed space for relaxation or entertainment.
Usage Features
Assembly Requirements:
- Personnel: Two or more people are required for assembly to ensure safety and ease of construction.
- Tools: A ladder and an electric drill may be necessary to facilitate the assembly process.
- Screw Tightening: To better align screws in practical situations, it is advised not to fully tighten screws initially. They should only be fully secured once all components are properly aligned.
- Professional Installation: Professional installation is highly recommended to ensure correct and secure assembly.
Stability and Safety:
- Ground Anchoring: It is crucial to use ground nails, ropes, and expansion screws for stability, regardless of the ground type. This is to prevent devastating injuries to people inside or nearby and property damage caused by a collapsing gazebo.
- Weather Conditions: The gazebo is not designed to withstand strong gusts of wind, heavy snow accumulation, or other inclement weather. It should not be used in high winds or heavy snow.
- Wind Speed Precautions: If wind speed exceeds 25 Mph, precautions must be taken, which may include disassembling the gazebo or securing it more robustly.
- Snow Accumulation: Snow should be cleared when it accumulates more than 2 inches to prevent structural damage or collapse.
- Temporary Structure: This unit is not a permanent structure and is not designed to be left up for extended periods of time, especially in adverse weather conditions.
- Fire Safety: Do not use candles, matches, or any open flames near the tent to prevent fire hazards.
Structural Components and Assembly Steps:
The assembly process involves multiple steps, each focusing on different parts of the gazebo structure.
- Step 1: Base Columns: Begin by attaching the base plates (J) to the main support columns (A) using screws (3). There are four such columns, forming the primary vertical supports.
- Step 2: Horizontal Beams (Lower): Connect the lower horizontal beams (B and B1) using part P. It is essential to ensure that the three holes on part P face upwards as shown in the diagram to ensure correct orientation. These beams form the lower perimeter of the gazebo frame.
- Step 3: Lower Frame Assembly: Connect the assembled B and B1 beams to the main columns (A) using screws (7). This step establishes the rectangular base frame of the gazebo.
- Step 4: Upper Horizontal Beams: Install the upper horizontal beams (H1 and H2) to the main columns (A) and the lower frame (B1) using screws (3). These beams contribute to the upper structure and roof support.
- Step 5: Roof Connectors: Attach the roof connectors (K and K1) to the upper frame using screws (3 and 4). These connectors are crucial for supporting the hardtop roof panels. The instructions also detail how to attach the curtain hangers (U) and the central hook (V) to the roof structure, indicating their placement for later steps.
- Step 6: Roof Support Arms (Lower): Install the lower roof support arms (E) to the central roof connector (L) and the upper frame using screws (1). These arms extend outwards from the center to support the roof panels.
- Step 7: Roof Support Arms (Upper): Attach the upper roof support arms (E1) to the lower roof support arms (E) and the central roof connector using screws (1). This creates a robust framework for the hardtop.
- Step 8: Central Canopy and Hook: Install the central canopy (M) and the decorative top piece (Za) to the peak of the roof structure using screws (2). The central hook (5) is also installed in this step, providing a hanging point for lights or decorations.
- Step 9: Roof Panel Supports (Outer): Attach the outer roof panel supports (G5) to the upper frame using screws (1). These supports provide additional structure for the roof panels.
- Step 10: Roof Panels (S1 and S2): Begin installing the hardtop roof panels (S1 and S2). The diagrams illustrate the placement of these panels, which form the main surface of the roof.
- Step 11: Roof Panels (D1 and D2): Continue installing the hardtop roof panels (D1 and D2) along with their corresponding covers (N3 and N4) using screws (1). These panels complete the main roof structure.
- Step 12: Roof Panels (F1 and F2): Install the final hardtop roof panels (F1 and F2) using screws (1). This step completes the hardtop roof assembly.
- Step 13: Edge Trims: Attach the edge trims (Z) to the roof panels by lightly tapping them with a screwdriver. These trims provide a finished look and help secure the panels.
- Step 14: Final Roof Panel Placement: This step shows the complete arrangement of the hardtop roof panels (Q1, Q2, Q3, Q4) and their interlocking design.
- Step 15: Roof Panel Reinforcement: This step illustrates the underside of the roof, showing how the panels (Q1, Q2, Q3, Q4) are supported by the frame (B, B1, E1, F1, F2) and secured with screws (Y).
- Step 16: Securing Roof Panels: Secure the roof panels using screws (Y, 2, 6). Notes emphasize fixing screws on the central beam first to prevent the iron sheet from falling, not fully securing screws until all are in position, and requiring two persons for installing Part Y, with one person securing it from inside and the other inserting screws from outside.
- Step 17: Upper Roof Structure: Install the upper roof structure components (G1, G2, N, N1) using screws (1). This forms the smaller, elevated section of the hardtop roof.
- Step 18: Curtain Installation (Sidewall): Attach the sidewall curtains (T) to the frame. The instructions specify that some curtain parts have 6 holes for hanging on Part B1, while others have 6 holes for hanging on Part B. This indicates different curtain types or sections for specific frame parts.
- Step 19: Curtain Placement: Pay attention to the correct installation position of the sidewall curtains (T). The diagram shows how the curtains are hung and tied back.
- Step 20: Netting Installation (Sidewall): Attach the sidewall netting (T1) to the frame. Similar to the curtains, some netting parts have 6 holes for hanging on Part B1, and others for Part B.
- Step 21: Netting Placement: Pay attention to the correct installation position of the sidewall netting (T1). The instructions detail how to secure parts T1 and T (curtains) together using screws (1 to 2), and how to secure the back curtain (T) and front curtain (T1) using screws (1 to 3). The hook attached to the netting should be hung on Part A.
- Step 22: Ground Anchoring: This critical step involves securing the gazebo to the ground using expansion screws (8) for cement surfaces or ground nails (9) for grassy surfaces. Failure to complete this step may result in the gazebo toppling in strong winds.
- Step 23: Installation Completed: This indicates the final assembled state of the gazebo.
Maintenance Features
Pre-Use Inspection:
- Thorough Inspection: Before each use, thoroughly inspect the gazebo to ensure all bolts, nuts, and buckles are completely tightened and securely fastened. This is crucial for maintaining structural integrity and safety.
Weather-Related Maintenance:
- Snow Removal: Clear snow when it accumulates more than 2 inches to prevent damage to the roof structure.
- High Winds/Inclement Weather: Do not use the gazebo in high winds or inclement weather. It is not designed to withstand strong gusts or heavy snow. If such conditions are expected, it may be necessary to disassemble the gazebo to prevent damage.
Warranty Limitations:
- Improper Installation/Misuse: The warranty does not cover damages, losses, or injuries resulting from improper installation, misuse, or failure to use the stability accessories (ground nails, ropes, expansion screws).
- Lack of Maintenance: Failure to perform necessary maintenance, such as not clearing snow or not taking precautionary measures in adverse weather, will also void the warranty.
General Care:
- Temporary Use: As a temporary structure, it is not recommended to leave the unit up for extended periods, especially in harsh weather, to prolong its lifespan.
- Cleaning: Regular cleaning of the hardtop and screens will help maintain the appearance and functionality of the gazebo. Specific cleaning instructions are not provided in this document but are generally recommended for outdoor structures.