R A D I O B U S M O D E
An unlimited number of receivers may be connected together to form a radio bus. This makes it possible to:
•
send controls to groups of receivers on the radio bus (see “Radio Memo”)
•
send a control from a transmitter to a receiver which is out of direct range
•
centralise operation of all lights or all window shutters
All receivers (MTR2000ER - MTV500ER - MVR500ER) are compatible with the radio bus.
The window shutter controls may also be sent via lighting modules and vice versa.
See the “Radio Memo” or go to www.yokis.com for more information on the radio bus.
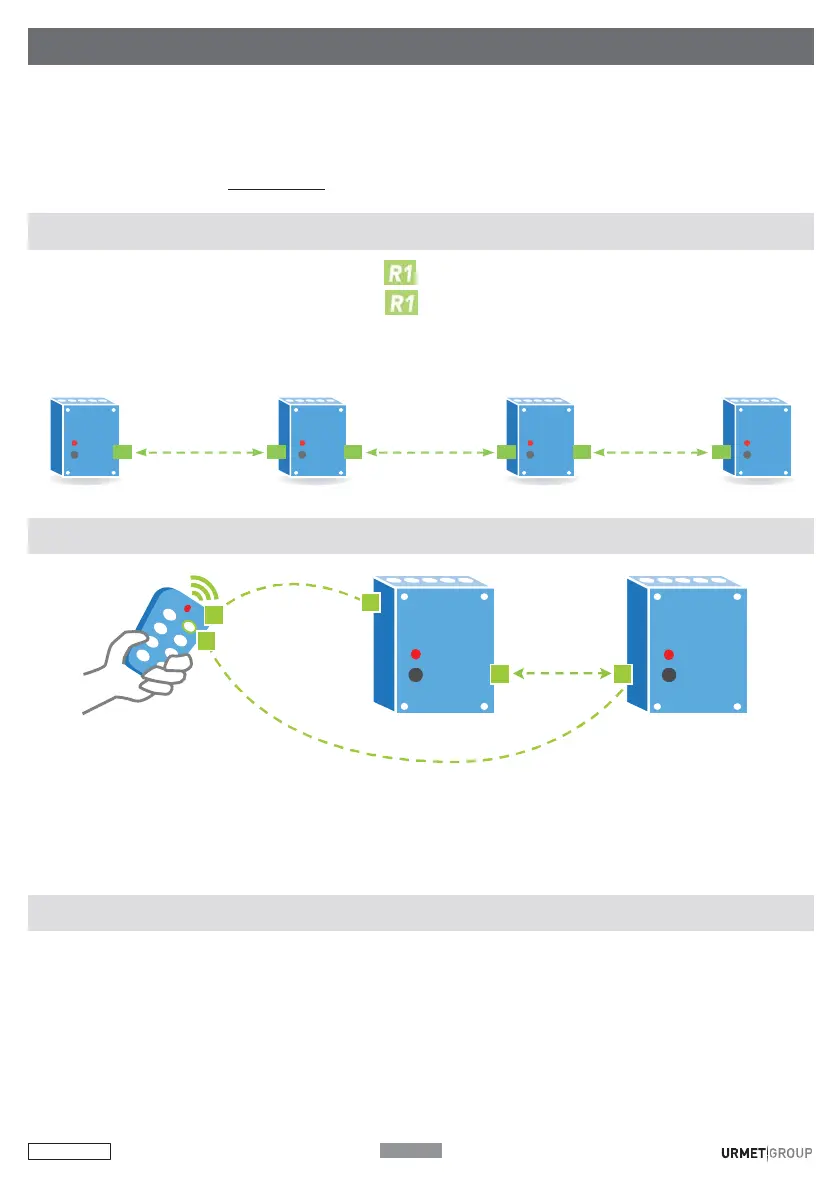
HOW TO CREATE A RADIO BUS BETWEEN RECEIVERS
Press “Connect” on receiver 1. Its LED will start flashing
.
While the LED is flashing, press “Connect” on receiver 2
.
To confirm the connection, the LED of receiver 2 will flash once and the LED of receiver 1 will stop flashing. The relays of the
two receivers will switch once when the connection has been established.
Unlimited number
Possible with of receivers on
all Yokis receivers the radio bus
Le d
Le d
Le d
Led
Co nn e ct
R1
R1
Con ne ct
R1
R1
Con ne ct
R1
R1
Con ne ct
HOW TO INCREASE THE RANGE USING AN INTERMEDIATE RECEIVER
Led
Led
Connect
Connect
1
. Define a radio bus between receivers as described above.
2
. Connect the transmitter to the receiver to be controlled by pressing the chosen pushbutton on the transmitter (E) 5 times.
Press the pushbutton in the “Connect” hole of the receiver (R) while the transmitter LED is flashing.
3
. At this point, create an access point on the receiver nearest to the transmitter by pressing the transmitter (E) pushbutton
7 times (the same one programmed in the previous step). The transmitter LED will start flashing rapidly. Then press the
pushbutton in the “Connect” hole of the first receiver (R) once (1
press)
. The transmitter and receiver LED will stop flash-
ing.
RADIO BUS CENTRALISATION
The following five steps are needed for centralisation:
1
. Create the radio bus between receivers
Follow the procedure described above.
2
. Connect the pushbutton of the transmitter to the nearest receiver
(it is advisable to connect the transmitter to the nearest receiver to avoid problems of range)
1
. Press the chosen pushbutton on the transmitter 5
times.
2
. Press the pushbutton in the ‘Connect’ hole of the receiver with the point of a pencil while the transmitter LED is flash-
ing.
3
. The receiver will switch the relay briefly and the transmitter LED will go out.
P9
R1
E7
R1 R1
E5
 Loading...