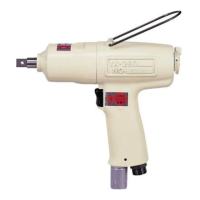
This document describes the YETC-230ER-L, an impulse wrench manufactured by YOKOTA. It provides essential information for installation, operation, maintenance, and safety.
Function Description
The YETC-230ER-L is an impulse wrench designed for tightening processes on threaded fasteners. It operates as part of an air system, requiring a compressed air supply that is clean, dry, and regulated. The air system setup includes a branch pipe, main pipe, compressor, shut-off valve, filter, regulator, oiler, coupler, and air hose. The tool's operation relies on the proper functioning of these components to ensure optimal performance and longevity.
Important Technical Specifications
- Brand: YOKOTA
- Safety Standard: EN ISO 11148-6
- Power Supply (V): AC 100~240V, 50/60Hz
- Dimensions:
- H: 105 mm
- W: 230 mm
- D: 290 mm
- Air Pressure: The air pressure at the tool's inlet during running should be a maximum of 6.3 bar. Exceeding this pressure can lead to unnecessary wear and damage. If the pressure falls below 5.5 bar, power loss will occur, and excessively low pressure can also cause additional wear/damage.
- Compressed Air Quality: The compressed air must be clean and dry. This is best achieved through the use of an air filter, and a complete FRL (filter, regulator, lubricator) unit is recommended.
- Oiler Adjustment: If an oiler is used, it should be adjusted to dispense approximately 3 to 6 droplets per minute.
- Air Hose Length: The air hose between the oiler and the tool should not exceed 6 to 8 meters.
- Hose Diameter: It is crucial that the quick coupler and hose have a sufficient diameter. The hose should be as thick as possible, as a hose that is too small can restrict airflow and impact performance.
Usage Features
Before Taking into Use:
- Read and understand the manual thoroughly before installation, operation, repair, maintenance, or changing accessories.
- Only qualified and trained operators should install, adjust, or use the tool.
- Before first use, fill the air inlet with a few droplets of resin and acid-free oil (e.g., Red Rooster air tool oil, Order no. Atlub) and let the tool run freely for a few seconds.
- Before connecting the hose, ensure both the hose and quick coupler are clean by letting air run freely through them.
- If the tool will not be used for an extended period, it must be oiled by filling the air inlet with resin and acid-free oil and running the tool for a few seconds.
Safety Precautions:
- Do not modify the tool, as this can endanger the operator.
- Ensure the manual is always accessible.
- Prevent projectiles from being generated during operation.
- Securely fix the workpiece.
- Ensure no dangerous circumstances for others in the work area.
- Always wear safety glasses appropriate for the operation's risk.
- Wear suitable gloves to prevent entanglement with rotating accessories.
- Keep fingers away from the inserted tool or accessory.
- Never hold the drive shaft, socket, bit, or inserted/mounted tool/accessory with hands while rotating.
- For impact and impulse wrenches, use only impact sockets.
- Use ear protection as required.
- Take reasonable countermeasures to minimize noise levels.
- Disconnect the air supply before changing tools, accessories, repairs, or when the tool is not in use.
- Always check for damaged mounted tools or accessories.
- Keep rotating parts away from any body part.
- Wear a hairnet if you have long hair and suitable clothing to prevent entanglement.
- Do not use quick-change couplings directly on the air inlet; assemble at least 50 cm of air hose with a shock-resistant hose joint.
- If universal twist couplings (claw couplings) are used, ensure lock pins are mounted.
- Never carry the tool by the air hose.
- Use a safety helmet for overhead work.
- Be aware that the workpiece, inserted/mounted tool/accessory may become hot during operation, causing burning injuries.
- Only use air hoses designed for the tool and resistant to the used air pressure.
- Always use "safety quick change couplers."
- Ensure no persons are in the working or danger zone.
- The minimum age for operating this tool is 18 years.
- Keep away from whipping hoses, and immediately shut down the air supply if a hose is damaged or comes loose.
- Keep the workplace clean and organized to prevent stumbling hazards.
- This tool is not insulated for use in potentially hazardous areas or contact with electric power.
- Wear appropriate clothing for comfort.
- Divert cold exhaust air away from hands and body.
- Never direct exhaust air towards yourself or others.
Accessories:
- Only use accessories and consumables designed for this tool.
- Select accessories that provide the lowest possible noise level and vibration, and replace them if noise or vibration increases.
- Avoid worn or ill-fitting impact sockets or extensions, as they increase noise and vibration.
- For impulse wrenches, "sleeve drive" sockets are recommended to minimize noise and vibration.
- Ensure the inserted/mounted tool/accessory is properly held by the retainer and that the retainer is in good condition. Never use the tool without a retainer, as this can cause high-speed projectiles.
- Use accessories according to manufacturer specifications.
Using the Tool:
- Familiarize yourself with the workplace and surrounding area before use.
- Always obey safety regulations for the work area.
- Wear suitable gloves to protect against hazards such as crushing, impacts, heat, vibration, cuts, and abrasions.
- The operator must be able to handle the tool's size, weight, and power.
- Be prepared for normal/abnormal movements/forces generated by the tool.
- Maintain body balance and secure footing.
- Release the lever/trigger if the air supply is interrupted.
- If experiencing discomfort (pain, throbbing, aching, tingling, numbness, burning sensation, or stiffness) in hands, arms, shoulders, neck, or other body parts, stop using the tool, inform your employer, and consult a qualified health professional.
Maintenance Features
- Regularly check the tool for loose bolts/screws or parts.
- If power loss occurs, have the tool repaired.
- Only trained and qualified engineers are permitted to adjust or repair the tool.
- If the tool has a silencer, ensure it is working properly and replace it if damaged.
- Dispose of the tool according to local regulations, recycling as much as possible. Do not discard it in the normal waste bin.
Intended Use
- The user or employer must assess the specific use of the tool.
- Never use the tool for purposes other than its design and as explained in this manual.
- Damages resulting from not following the manual, incorrect use, or incorrect repairs are not covered by the warranty.
- The tool is designed for tightening processes on threaded fasteners. Any other use requires a risk assessment by the employer/user.
Warranty
- Tools (Yokota, Toku, Red Rooster): 12 months from the date of purchase.
- Spare Parts (repaired by us): 3 months.
- Warranty covers material or construction defects clearly attributable to the manufacturer.
- Replacement parts or repair by an official Yokota/Red Rooster service workshop is free of charge if the tool is under warranty.
- Freight or postage costs are the buyer's responsibility.
- Damage due to normal wear, overloading, or incorrect use is excluded from warranty.
- Replacement of tools due to warranty claims is not part of the warranty arrangements.
- Claims for loss of production and/or other damages are excluded.
- Warranty repairs are only considered if the tool is in its original state and accompanied by a copy of the purchase invoice.
- Warranty claims must be made through the dealer who supplied the tool.