EasyManua.ls Logo

YOODA 35EVY Series - User Manual

Default Icon
7 pages
Print Icon
To Next Page IconTo Next Page
Loading...
Non-compliance with the specification might cause risk for life or health and can determine proper work of the blind.
We strongly recommend to comply with the specification.
Installation of the tubular motor should be performed by specialists with 1kV or higher SEP-certified electrician's licence (SEP - Association of Polish
Electrical Engineers) or equal license.
35EVY and 45EVY SERIES TUBULAR MOTOR
www.sukcesgroup.pl
Illustrations from the top:
1. Tubular motor 35 EVY with obstacle detection
2. Tubular motor 45 EVY with obstacle detection
EVY motors are motors with radio receiver. They have
a mechanism for detection of obstacles, so that the motor
stops if sensing resistance in its path. Detection of obstacles
works in both directions, with the use of security locks as well
as with springy hangers. Electronic limit position switches set
by using the remote control provide ease of programming.
Motors provide the ability to set the third position. For EVY
motors, it is possible to connect an impulse switch that
controls the motor in "step by step" mode. EVY series tubular
motors are compatible with all YOODA brand devices.
1. Radio receiver memory:
up to 20 transmitters
2. Max time of continous work:
4 min.
3. Power supply:
230 V / 50 Hz
4. Operating temperature:
from -5°C to 50°C
5. Protection degree:
IP 44
Maximal time of continuous work is 4 minutes. After that time thermal protection will be activated preventing motor form
overheating. After that motor will be disabled for about 20 minutes until it cools down.
1
1. General information
power supply cable
control system
programming
button
capacitor motor brake gear
antenna
Question and Answer IconNeed help?

Do you have a question about the YOODA 35EVY Series and is the answer not in the manual?

Summary

General Information about YOODA Tubular Motors

Radio Receiver Memory Capacity

The motor's radio receiver can store up to 20 transmitters.

Maximum Continuous Work Time

The motor is designed for a maximum continuous operation of 4 minutes.

Power Supply Requirements

The motor operates on a 230 V / 50 Hz power supply.

Operating Temperature Range

The motor functions within a temperature range of -5°C to 50°C.

Motor Protection Degree

The motor has a protection degree of IP 44.

Safety Measures and Installation Precautions

General Safety and Handling Guidelines

Covers precautions for liquids, wiring, electrical system checks, maintenance, tool usage, and child safety.

Motor Installation Procedure in Tube

Step-by-step guide for cutting, deburring, adapting, measuring, inserting, and securing the motor within the tube.

Electrical Connection and Range Specifications

Wiring and Mounting Guidelines

Details on connecting power supply wires, antenna, and microswitch, including color coding.

Radio Range Factors and Specifications

Explanation of radio range variability and specific outdoor/indoor distances and operating frequency.

Programming and Configuration

Programming the First Transmitter

Procedure for pairing the initial remote control with the motor.

Changing Motor Direction (Method 1)

Reversing motor direction, which also erases previously programmed transmitters.

Changing Motor Direction (Method 2)

Reversing motor direction without affecting stored transmitters.

Automatic Limit Position Programming

Instructions for automatically setting the upper and lower travel limits.

Advanced Limit Position Settings

Manual Limit Position Programming

Detailed steps for manually setting the upper and lower limit positions using the control buttons.

Automatic Limit Position Regulation

Information on the automatic adjustment of limit positions every 30 days and its activation.

Additional Programming Functions

Programming the Third (Favorite) Limit Position

Setting a specific intermediate position as a favorite.

Removing the Third Limit Position

Procedure to delete the pre-set favorite limit position.

Removing All Limit Positions

Procedure to erase all programmed upper, lower, and third limit positions.

Programming Another Transmitter

Adding additional remote controls to the motor's memory.

Deleting All Transmitters

Erasing all previously programmed remote controls from the motor's memory.

Motor Operation Modes

Activating Impulse Mode

Enabling a mode where direction buttons cause short movements.

Setting Motor Reaction on Power-Up

Configuring how the motor behaves immediately after power is supplied.

Reaction to Obstacle Detection

Setting the motor's response when an obstacle is detected (stop or reverse).

Obstacle Detection Sensitivity Modes

Adjusting the sensitivity for obstacle detection across different ranges.

Programming Key-Ring Remotes (No P2 Button)

Method for programming remotes that lack a dedicated P2 button.

Overview

YOODA 35EVY and 45EVY Series Tubular Motor

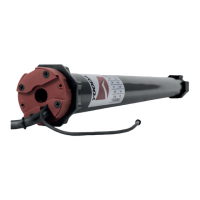
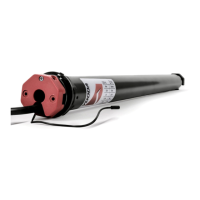
This document describes the YOODA 35EVY and 45EVY series tubular motors, which are designed for roller shutters and similar applications. These motors feature an integrated radio receiver and obstacle detection capabilities, making them suitable for automated window coverings.

Function Description

The EVY series motors are equipped with a radio receiver, allowing for wireless control via remote transmitters. A key feature is the obstacle detection mechanism, which automatically stops the motor if it encounters resistance in its path. This safety function operates in both upward and downward directions, utilizing security locks and springy hangers to prevent damage.

Electronic limit position switches are easily set using a remote control, simplifying the programming process. The motors also offer the ability to set a third, intermediate position (favorite position). For enhanced control, an impulse switch can be connected to operate the motor in a "step by step" mode. All EVY series tubular motors are compatible with the full range of YOODA brand devices.

The motors support automatic programming of limit positions, especially when used with elements that inhibit the bottom slat. This feature is available for 35EVY and 45EVY 10 Nm and 20 Nm motors. When activated, the limit positions are automatically adjusted every 30 days after the motor is started up or down. This function is factory disabled and requires activation. During an update of limit positions, pressing the STOP button removes the current settings.

The device also supports an "impulse mode," where pressing a direction button results in a short motor movement. The motor's reaction after power-on can be configured, offering three distinct behaviors: a sound and up/down movement, only up/down movement, or no movement. Similarly, the reaction to an obstacle detected can be set to either stop the roller shutter or move it in the opposite direction.

Three obstacle detection sensitivity modes are available:

  • Mode 1: Reduced sensitivity, detection within 20 cm from the upper limit positions.
  • Mode 2: Moderate sensitivity, detection within 4 cm from the upper limit positions.
  • Mode 3: Full sensitivity, detection along the entire height of the roller shutter.

Important Technical Specifications

  • Radio Receiver Memory: Up to 20 transmitters can be programmed.
  • Maximum Continuous Work Time: 4 minutes. After this period, thermal protection activates to prevent overheating, disabling the motor for approximately 20 minutes until it cools down.
  • Power Supply: 230 V / 50 Hz.
  • Operating Temperature: -5°C to 50°C.
  • Protection Degree: IP 44.
  • Operating Frequency: 433.92 MHz.
  • Radio Receiver Range:
    • Outdoor: 200 m (L1)
    • Indoor: 35 m (L2)
    • Note: Range is variable and can be affected by building construction, interference from other radio transmitters, and other environmental conditions.

Usage Features

Programming First Transmitter:

  1. Turn on power or press the programming button on the motor head. The motor will make a sound.
  2. Press the programming button P2 on the remote. The motor will make a sound.
  3. Press P2 again. The motor will make a sound.
  4. Press the UP button. The motor will make a sound and perform a short up/down movement. If a transmitter is already programmed, the motor will emit three sounds and make a short up/down movement; otherwise, it will only emit three sounds.
    • A pause longer than 4 seconds during programming will exit programming mode without saving changes.
    • Programming the first transmitter clears all previously programmed transmitters.

Changing Motor Direction:

  • Method 1 (Removes programmed transmitters): Follow a similar sequence to programming the first transmitter, but press the DOWN button instead of UP at the final step.
  • Method 2 (Retains limit positions): Press and hold the programming button on the motor head for 5 seconds. The roller shutter will perform a short up/down movement.

Programming Limit Positions (Manual):

  1. Press P2 during motor movement to stop it.
  2. Use UP/DOWN buttons to precisely adjust the position.
  3. Press P2 again to resume continuous movement.
  4. To confirm the upper limit, press the STOP button 5 times at 1-second intervals when the roller shutter reaches the desired upper limit. The motor will make a sound and perform a short up/down movement.
  5. To confirm the lower limit, press the STOP button 5 times at 1-second intervals when the roller shutter reaches the desired lower limit. The motor will make a sound and perform a short up/down movement.

Programming Third Limit Position (Favorite):

  1. After setting upper and lower limits, move the blind to the desired favorite position.
  2. Hold the STOP button for 3 seconds. The motor will make a sound and perform a short up/down movement, confirming the third limit position is set.

Removing Third Limit Position:

  1. Press the STOP button 5 times at 1-second intervals. The motor will make three sounds, and the third limit position will be removed.

Removing Limit Positions:

  1. Press P2, motor sounds.
  2. Press DOWN, motor sounds.
  3. Press P2, motor sounds.
  4. Press P2 again, motor sounds and performs short up/down movement. Limit positions are removed.

Programming Another Transmitter:

  1. Press P2 on an already programmed remote (Remote A). The motor will make a sound.
  2. Press P2 on Remote A again. The motor will make a sound.
  3. Press P2 on the new remote (Remote B). The motor will make a sound and perform a short up/down movement. The new remote is programmed.
    • Up to 20 transmitters can be controlled.
    • A pause longer than 4 seconds during programming will exit programming mode without saving changes.

Deleting All Transmitters:

  1. Press P2 on an already programmed remote (Remote A). The motor will make a sound.
  2. Press STOP. The motor will make a sound.
  3. Press P2. The motor will make a sound and perform a short up/down movement. All transmitters and limited positions are removed.
    • A pause longer than 4 seconds during programming will exit programming mode without saving changes.

Programming Key-Ring Remotes (without P2 button):

  1. Simultaneously push STOP and UP buttons on the key-ring remote instead of P2.
  2. Follow the programming steps as described for other transmitters.

Maintenance Features

  • Thermal Protection: The motor has a maximum continuous operation time of 4 minutes. After this, thermal protection activates to prevent overheating, disabling the motor for about 20 minutes until it cools down.
  • Regular Electrical System Control: The electrical system should be regularly checked for any signs of wear or damage to the motor.
  • Power Disconnection: Electrical supply must be disconnected before performing any maintenance, cleaning, or repair work.

Important Safety Information

  • Non-compliance with the specifications can lead to risks for life or health and may impair the proper functioning of the blind.
  • Installation of the tubular motor must be performed by specialists with a 1kV or higher SEP-certified electrician's license (SEP - Association of Polish Electrical Engineers) or an equivalent license.
  • The installer must comply with local standards and regulations and provide users with information on the device's conditions and maintenance. Failure to follow these instructions may result in risks to life and health, improper roller shutter function, and loss of warranty rights.
  • Minimize contact of the motor with any liquids.
  • The motor's torque parameter must be adequate for the weight of the roller shutter curtain.
  • Wiring must be installed to prevent water from entering the tubular motor and to avoid damage from the moving roller shutter curtain.
  • No tools should be used when placing the motor in the tube.
  • Special attention must be paid not to damage the motor during adapter mounting.
  • The motor and its control system should be kept out of reach of children.
  • Motors should be mounted in locations protected from unfavorable weather conditions.
  • All cables connecting the power receiver to the electrical source must be protected from overload and short-circuits with automatic disconnecting devices.
  • The device should be powered by a separate source and protected only with a fast-blow fuse (never a slow-blow fuse). Using an inadequate fuse can void warranty rights.
  • When connecting to a power source, cables with adequate cross-section must be used. The long-lasting output load capacity table should guide cable selection.

YOODA 35EVY Series Specifications

General IconGeneral
BrandYOODA
Model35EVY Series
CategoryEngine
LanguageEnglish

Related product manuals