Do you have a question about the YOSUDA L-001A and is the answer not in the manual?
Consult your physician before starting any exercise program, especially if you have medical conditions.
Carefully read the manual before installation and use. Ensure all users are informed of warnings.
Stop exercising immediately if you feel pain or discomfort. Consult a doctor before continuing.
This instrument is only applicable to adults. Keep babies and children away from it.
Place on a hard, horizontal floor with protective layer, ensuring at least 0.5m free space around.
Verify all screws, nuts, and hardware are firmly installed before exercise.
Equipment must be used safely under regular inspection of wear/destructive parts.
Place on a stable, flat floor. Stop use if damaged components or abnormal sound are found.
Wear proper sport suits; avoid loose clothing that can get caught in moving parts.
Operate carefully when lifting or moving to avoid back injury. Use correct methods or ask for assistance.
Movable parts require regular maintenance. Check for looseness or damage and repair/replace immediately.
Pay special attention to wearable parts for safe operation.
Be aware of potential injuries from flywheel system. Press brake lever to stop crank movement.
Ensure the adjustment knob is always in a locked condition for safety.
Rotate resistance clockwise and fine-tune knob to lock crank and flywheel when not in use.
Diagram showing the placement of safety warning labels on the exercise bike.
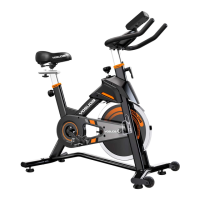
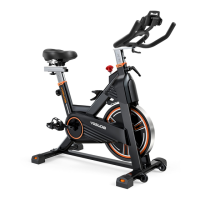
Details product name, model, weight limits, manufacturer, and compliance standards.
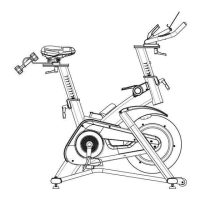
Details of the main frame, front, and rear stabilizers.
Components related to the seat, seat slider, and seat post.
Information on left and right pedals and cranks.
Details on the handlebar, handlebar post, and monitor.
Components including the flywheel, belt cover, and belt tray.
List and identification of tools provided for assembly, such as Allen wrenches.
Identification of various screws, bolts, nuts, and washers used in assembly.
Attaching the front and rear stabilizers to the main frame using bolts, washers, and screws.
Mounting the left and right pedals onto the respective cranks, ensuring correct orientation.
Inserting and securing the adjustable seat post into the main frame for height adjustment.
Attaching the seat slider to the seat post and then mounting the seat onto the slider.
Inserting and securing the handlebar post into the main frame for height adjustment.
Securing the handlebar to the post and attaching the IPAD holder.
Mounting the monitor support and connecting the monitor with its sensing cable.
Ensure all bolts are firmly locked after completing installation for safe use.
Note that an extra brake pad is included in the package.
Wipe down equipment after each use, check for vibrations, and tighten pedals.
Inspect moving parts, fittings, clean/lubricate pins, tighten seat, treat brake pads, check bottom bracket.
Check all hardware, inspect brake tension rod for wear, clean/lubricate seat post and handlebar post.
Importance of warm-up, aerobic, and leisurely movement for a successful exercise schedule.
Instructions for head stretching exercises for neck mobility.
Guidance on shoulder lift movements for flexibility and relaxation.
Stretching exercises for arms and shoulders, including holding wrist and overhead stretches.
Exercises to stretch quadriceps and inner thigh muscles.
Stretches for foot muscles and lower leg flexibility.
| Brand | YOSUDA |
|---|---|
| Model | L-001A |
| Category | Exercise Bike |
| Language | English |