Do you have a question about the YSI EXO and is the answer not in the manual?
Connect the sonde to a computer using a USB cable and adapter for data transfer and power.
Establish a wireless connection from the sonde to a computer using Bluetooth technology.
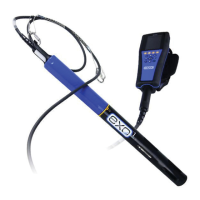
Connect the sonde to the EXO Handheld device using a field cable for data access.
Guide to pairing the sonde with a Windows PC via Bluetooth, including pairing code and steps.
The EXO Sonde Quick Start Guide provides essential information for setting up and using an EXO sonde for environmental monitoring. This document is designed to help users quickly get their EXO sonde operational, covering initial setup, communication, and basic troubleshooting. For more in-depth details on part numbers, accessories, maintenance, sensor calibration, and connecting to a data logger, users are directed to the comprehensive EXO User Manual.
The EXO sonde is a sophisticated device designed for environmental monitoring, capable of measuring various parameters in water. It operates by integrating multiple probes (sensors) that collect data, which can then be transmitted to a computer or a dedicated handheld device for analysis and logging. The sonde is built to be robust and reliable for field use, providing accurate data for environmental studies.
Upon receiving the EXO sonde, users should carefully inspect the shipping container for any signs of damage. If damage is found, the shipping carrier should be contacted immediately. All equipment should be removed from the box, and packing materials should be checked thoroughly, as some parts may be loose.
The package typically includes the sonde itself, various probes (sensors), batteries, a battery cover wrench, a sensor tool with a magnet (used to activate Bluetooth), and KOR™ software on a USB flash drive.
Users will need to provide an EXO Handheld device or a PC running KOR™ software. Additionally, a USB cable and adapter, a field cable, or a Bluetooth dongle may be required, all of which are sold separately.
To prepare the sonde for operation, users must install the probes into the connectors on the sonde bulkhead. This involves removing buffer bottles and hydration caps from the sensors (if applicable), and then removing the calibration cup and guard from the sonde. Port plugs should be removed, and sensors inserted into the ports, finger-tightening the locking rings until snug. All ports are universal, meaning any sensor can be plugged into any port, with the exception of the wiper. The wiper must be installed in the correct port to function properly: Central Port 7 for EXO2/EXO2s, and Port 5 for EXO3.
Batteries must also be installed. The EXO1 and EXO3 sondes use two D-cell alkaline batteries, while the EXO2 sonde uses four D-cell alkaline batteries. For the EXO2s, and optionally for EXO1, EXO2, and EXO3, external power sources can be used. Rechargeable NiMH D-cell batteries (not provided) with a minimum rating of 10,000 milliamp hours can also be used, though deployment life cannot be estimated with them due to variations in capacity and discharge curves.
To install batteries, the battery cover or cap must be removed. For EXO1, the blue battery cover is twisted counter-clockwise and lifted off, using the included wrench if necessary. For EXO2/EXO3, the battery cap is unscrewed and removed, also using the wrench if needed. Batteries are inserted with the negative (-) terminals facing down toward the probes. The battery cover or cap is then replaced and tightened until snug, taking care not to overtighten.
Finally, the KOR™ software needs to be loaded onto a PC, and the sonde connected to either an EXO Handheld device or a PC.
The sonde can communicate with a computer via a USB cable or wirelessly via Bluetooth®.
First, the KOR™ software must be installed on the computer, following prompts for new hardware and drivers. The USB Signal Output Adapter is then plugged into the top of the sonde. The small end of the USB cable connects to the top of the adapter, and the large end connects to a standard USB port on the computer. This setup provides a hardwired communication link and power to the sonde.
For wireless communication, the computer must have an internal Bluetooth radio or use a Bluetooth dongle. Bluetooth is activated by holding the included sensor tool with a magnet at the magnetic activation area on the sonde. Once activated, a blue light will illuminate. The KOR™ software will automatically pair the instrument to the PC.
The male 6-pin connector on the field cable is pressed into the top of the sonde. The female 6-pin connector on the cable is pressed into the bottom of the handheld. The retaining collars on each end are then screwed down.
The sonde features two LED indicator lights when power is supplied, providing status updates:
Upon startup, the KOR™ software will search for and discover the activated sonde, requesting to connect. Once connected via Bluetooth, the blue light on the sonde will blink.
Users are encouraged to register their product online at YSI.com/warranty to activate their warranty and stay informed about software updates. It is also recommended to keep the serial number and date of purchase on file for future reference.
The guide emphasizes the importance of proper installation of probes and batteries, and correct communication setup to ensure the sonde functions optimally. While specific maintenance guidelines are referred to the full user manual, the quick start guide ensures that the initial setup is performed correctly, laying the groundwork for effective environmental monitoring.
| Manufacturer | YSI |
|---|---|
| Model | EXO |
| Depth Range | Up to 250 meters |
| Communication | USB |
| Operating Temperature | -5°C to 50°C |
| Parameters Measured | Depth |