LED Indicator Light Button Operation
Red LED = module off One second press = on/off
Green LED = module on
Five second press = pattern
change
Green LED blinking then pause =
indicates pattern number
2
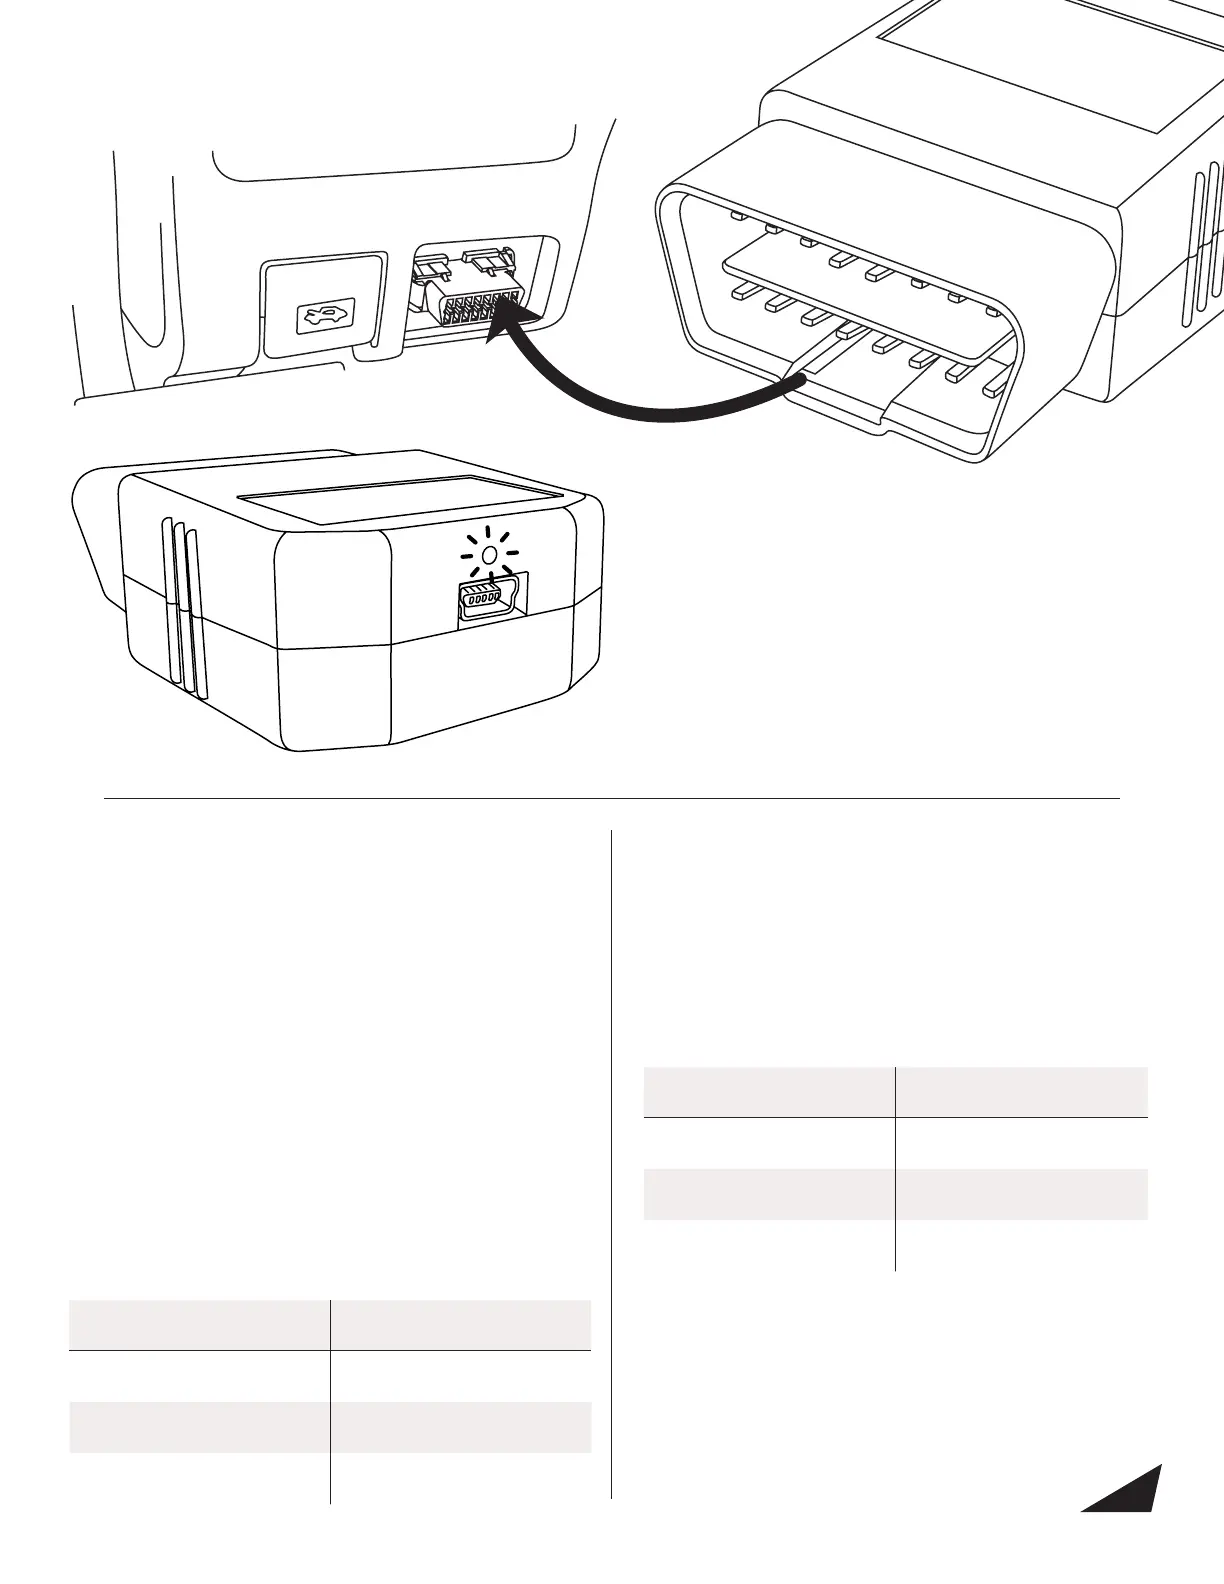
1. Connect the module into the vehicle’s OBD-II port. The
OBD-II port is located under the dashboard on the
driver’s side.
2. Start your vehicle.
3. The module will begin to boot and the LED will ash for
ve seconds.
4. When the module is ready to use the green LED will
ash for 5 seconds and then turn off.
5. If you need to disconnect the module and plug it back
in, you will need to follow the boot sequence again.
OBD-II MODULE INSTALLATION
Using your module with the Switch:
1. Connect the 2x2 plug on the switch into the port on the
side of your Z-Flash module.
2. Clean the surface where you want to stick the switch with
alcohol and wait for it to dry completely.
3. Remove the paper backing and stick the switch.
Careful! You only have one attempt to get the switch to
stick. Remember to apply light pressure ensuring the
entire switch mounting pad is making contact with the
mounting area.
4. Press and hold the button on the switch for one second
to activate the module. The light will change from red to
green to indicate the Z-Flash is activated.
5. To change the pattern, press and hold the button for 5
seconds. Below is a full chart on how to use the switch.
Using your module with the Hardwire:
1. Connect the 2x2 plug on the switch into the port on the
side of your Z-Flash module.
2. Set your ash pattern for each mode using the Z-Flash
software available at TheZFlash.com.
3. Follow the chart below to connect modes 1, 2, and/or 3
to +12V.
Wire Color Mode
Blue Mode 1
Yellow Mode 2
Blue and Yellow Mode 3
 Loading...