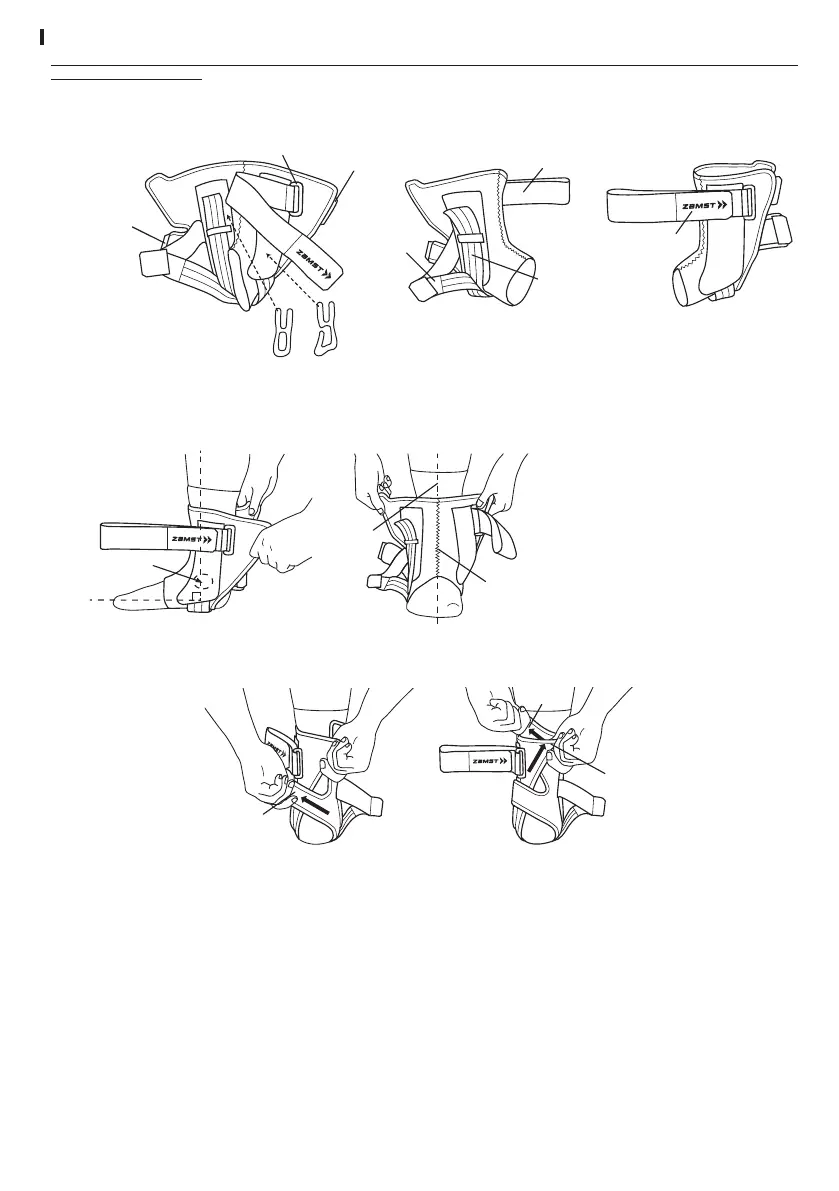
How to apply
• Before attaching this product, carefully read the “Precautions for use - Be sure to read this” section. Then follow the steps provided to ensure the
product is correctly attached.
• The steps below use the right foot for reference. Follow the same steps for the left foot.
1.
Unfasten all the hook-and-loop fasteners of the product. Conrm the top/bottom, inside/outside, and front/back of the product.
Hook-and-loop
fastener B
Personal-t-stays
Hook-and-loop
fastener A
Loop
Strap bearing the logo
Strap bearing the logo
Dual inversion
control strap
Stirrup strap
<Outside of the product> <Inside of the product>
Fold back the upper strap with the ZAMST logo and temporarily fasten it to the main body to make the product easy to apply.
2. Position your ankle at right angle, open the rear entry of the product and slide your foot into the opening from the back.
Center of
your foot
Position of inner
ankle bone
Center of
the product
Slide your foot, toes rst, into the product,
so that the center of your foot is aligned to
the product’s center line.
3. Fasten hook-and-loop fasteners A and B.
① ②
Tab
Hook-and-loop
fastener A
Hook-and-loop
fastener B
① Place your feet on the oor with your
foot at right angles to your lower leg.
Fasten hook-and-loop fastener A,
pulling it diagonally upward.
② Hold hook-and-loop fastener B and
the tab. Wrap the support around
your ankle by pulling hook-and-loop
fastener B diagonally upward and
fastening it. Tightly wrap your ankle
without creating wrinkles or sags.