This document is an instruction book for a Zanussi ZDT 6252 dishwasher.
Function Description
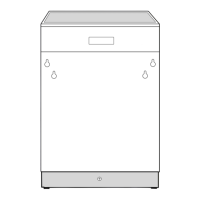
The Zanussi ZDT 6252 is a dishwasher designed for domestic use, offering various washing programmes to suit different types and degrees of soil on crockery, cutlery, pots, and pans. It features a water softener to remove minerals and salts from the water supply, ensuring optimal washing results. The appliance is equipped with an "SID" (Super Intensity Dispenser) detergent dispenser, located in the upper basket, specifically for prewash detergent when a prewash is required. Audible signals are incorporated to indicate accepted instructions, programme start, and programme end. A safety device ensures the machine stops if the door is opened during operation.
Important Technical Specifications
- Dimensions:
- Width: 59.6 cm
- Height: 81.8 - 87.8 cm
- Max depth: 55.5 cm
- Max depth with open door: 111.4 cm
- Electrical connection:
- Voltage: 220/240 V - 50 Hz
- Motor rating during wash: 200 W
- Power of heating element: 2100 W
- Overall power: 2300 W
- Water supply pressure:
- Minimum: 50 kPa (0.5 bar)
- Maximum: 800 kPa (8 bar)
- Capacity: 12 place settings
Usage Features
Control Panel: The controls are located on the top of the door, requiring the door to be open for programme selection. It includes an On/Off push button, an On/Off indicator light, programme selection push buttons, and an End of cycle indicator light.
Washing Programmes:
- RINSE AND HOLD: For partial loads to be completed later, preventing food scraps from sticking. Involves a cold rinse.
- INTENSIVE 70°C: For heavy soil (crockery, cutlery, pots, pans). Includes hot prewash, main wash up to 70°C, two cold rinses, one hot rinse, and drying.
- NORMAL 65°C: For normal soil (crockery, cutlery). Includes cold prewash, main wash up to 65°C, one cold rinse, one hot rinse, and drying.
- BIO 50°C: For normal soil (crockery, cutlery). Includes cold prewash, main wash up to 50°C, one cold rinse, one hot rinse, and drying. This is the testing programme for EN 50242.
- QUICK 50°C: A special programme for quick washing of a full load of lightly soiled dishes, glasses, and crockery (except pots). Includes main wash up to 50°C, one cold rinse, and one hot rinse.
Audible Signals:
- Short "instruction accepted" signal: Confirms when any push button (except On/Off) is pressed.
- Long "programme run" signal: A continuous signal heard when the door is closed, indicating the programme has started.
- Intermittent "end of programme" signal: Informs when the wash programme has ended. These signals can be deactivated or reactivated by simultaneously pressing and holding programme push buttons 3 and 4 for about 3 seconds before starting a programme.
Loading the Appliance:
- Remove food scraps before loading to prevent filter clogging.
- Avoid loading very small items that can fall through baskets.
- Lower basket: Designed for saucepans, lids, plates, salad bowls, cutlery. Arrange serving dishes and large lids around the edge to ensure free rotation of the upper spray arm.
- Upper basket: Designed for dessert plates, saucers, dinner plates (up to 24 cm), salad bowls, cups, and glasses. Arrange items for water to reach all surfaces. Light items (plastic bowls) should be loaded securely. Plates can be loaded from the rear, tilted forwards.
- Cutlery basket: Place cutlery with handles facing downwards (or upwards if handles obstruct the lower spray arm). Mix spoons with other cutlery to prevent sticking. Silver cutlery should be separated from steel cutlery. The basket is in two parts for loading flexibility. Long bladed knives and sharp items should be positioned horizontally in the upper basket.
Adjusting Upper Basket Height: The upper basket can be moved to a higher position to accommodate very large plates (over 27 cm and up to 31 cm) in the lower basket. This involves moving front runner stops, sliding the basket out, and refitting it in the higher position. In the higher position, the top basket only takes plates up to 20 cm, and cup racks cannot be used.
Water Softener: Adjustable according to local water hardness (Clarke, French degrees, PPM). Factory set at level 4. Levels range from 0 (no salt needed) to 5. Adjustment is done by pressing ON/OFF, then simultaneously pressing and holding programme push buttons 3 and 5 for 5 seconds, then selecting the desired level using the programme push buttons.
Filling with Salt: Use only dishwasher-specific salt. Fill just before starting a programme to prevent corrosion. Unscrew the cap, pour 1 litre of water (first time only), then fill with salt using a funnel. Replace the cap tightly. A green float in the salt cap or a salt indicator light on the control panel indicates when salt is needed.
Rinse Aid: Automatically added during the last rinse for spot and streak-free drying. The dispenser holds about 110 ml. Fill by turning the lid anticlockwise. The indicator (B) becomes clear when refill is needed. Adjust the dose using a 6-position selector (C) based on drying results (increase for drops/lime spots, reduce for sticky whitish streaks).
Use of Detergent: Use only dishwasher-specific detergents. Recommended Finish detergents include Double Action Tablets, Powder, and Liquid Gel.
- Powder detergents: Open dispenser lid, add recommended quantity (from "Washing programmes" chart), close lid. For prewash, add a small amount over the lid.
- Tablet detergents: Place 1 tablet in the dispenser. For prewash, place a further tablet on the lid.
- If using the SID dispenser for prewash, add the extra detergent into the SID dispenser, not on the lid.
- Compact detergents with enzymes are effective at 50°C, allowing for energy saving.
Operating Sequence:
- Check filters: Ensure they are clean and correctly positioned.
- Press On/Off: On/Off indicator light comes on.
- Check rinse aid and salt: Ensure adequate levels.
- Load dishes: Remove food scraps, arrange dishes in baskets, ensuring spray arms rotate freely.
- Measure out detergent: Add required amount, close dispenser lid.
- Set programme: With the door open, press the desired programme push button; its indicator light will flash.
- Start programme: Close the door. An audible signal confirms start, and the programme indicator light stays on.
- End of programme: Dishwasher stops automatically, an audible signal sounds, and the "end of cycle" indicator light flashes. The On/Off indicator light remains on until manually switched off.
- Switch off: Open door, press On/Off. Wait a few minutes before unloading for better drying. Empty lower basket first.
- Cancel programme: Open door, press the current programme's push button for over 1 second until its light goes out. The dishwasher resets.
Maintenance Features
Internal Cleaning:
- Regularly clean door seals, detergent, and rinse aid dispensers with a damp cloth.
- Use Finish Dishwasher Cleaner every 3 months or run a 65°C wash without dishes to clean inaccessible parts, eliminate odours, and prevent limescale buildup.
- Do not use the dishwasher without filters. Incorrect filter positioning will lead to poor washing results.
Cleaning the Central Filter (After each wash):
- Remove food scraps from the drain filter (A) by pulling it out by the handle.
- Rinse under running water.
- Refit by pushing it back until it engages.
Cleaning the Large Filter (Every week):
- Remove the spray arm by pulling it upwards.
- Turn the column (C) anticlockwise by 90° and slide out the filter.
- Clean both sides of the large filter (B) under running water using a brush.
- Refit in reverse order, ensuring the drain filter handle points towards the front.
External Cleaning:
- Clean external surfaces and control panel with a damp soft cloth and neutral detergents.
- Avoid abrasive products, scouring pads, or solvents.
Prolonged Periods of Non-Operation:
- Unplug the appliance and turn off the water.
- Fill the rinse aid dispenser.
- Leave the door ajar to prevent unpleasant smells.
- Keep the inside of the machine clean.
Frost Precautions:
- Avoid placing the machine below 0°C. If unavoidable, empty the machine, close the door, disconnect the water inlet pipe, and empty it.
Moving the Machine:
- Unplug it.
- Turn off the water tap.
- Remove water inlet and discharge hoses.
- Pull the machine out with hoses.
- Avoid over-tilting during transportation.