This document is a user manual for the Zanussi ZFT10210WV freezer. It provides essential information for safe installation, operation, maintenance, and troubleshooting of the appliance.
Function Description
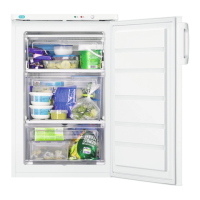
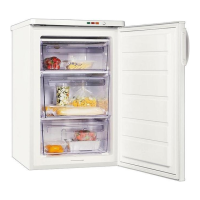
The Zanussi ZFT10210WV is a freezer designed for household and similar applications. Its primary function is to freeze fresh food and store frozen and deep-frozen food for extended periods. The appliance features a QuickFreeze function to rapidly freeze larger quantities of fresh food. It also includes a temperature regulation system to maintain optimal internal conditions and an alarm system to alert users to high temperatures or open doors.
Important Technical Specifications
- Model: ZFT10210WV
- Dimensions:
- Height: 850 mm
- Width: 595 mm
- Depth: 635 mm
- Rising Time: 13 hours (in case of power failure)
- Voltage: 230-240 Volts
- Frequency: 50 Hz
- Refrigerant: Isobutane (R600a), a natural gas with high environmental compatibility. This gas is flammable.
- Climate Class: The appliance is designed to operate within specific ambient temperature ranges:
- SN: +10°C to +32°C
- N: +16°C to +32°C
- ST: +16°C to +38°C
- T: +16°C to +43°C
- Electrical Connection: The appliance must be earthed and is supplied with a 13 amp fuse (BS 1362 ASTA approved).
- Maximum Freezing Capacity: The maximum quantity of food that can be frozen in 24 hours is specified on the rating plate.
Usage Features
Control Panel:
The control panel includes:
- Green On/Off Power Indicator Light: Indicates if the appliance is switched on.
- Temperature Regulator and On/Off Switch: Used to adjust the internal temperature and turn the appliance on/off.
- Yellow QuickFreeze Indicator Light: Illuminates when the QuickFreeze function is active.
- Acoustic Signal Stop and QuickFreeze Switch: Used to silence alarms and activate/deactivate the QuickFreeze function.
- Red Alarm Indicator Light: Blinks to indicate an improper temperature or high temperature alarm.
Switching On/Off:
- Switching On: After installation, allow the appliance to stand upright for 4 hours. Insert the plug, then turn the Temperature Regulator clockwise to a medium position. The Green On/Off Indicator Light will illuminate, and the Red Alarm Indicator Light will blink until the internal temperature reaches the safe conservation level for frozen food.
- Switching Off: Turn the Temperature Regulator to the "O" position. The Green On/Off Indicator Light will switch off. To disconnect from power, remove the mains plug.
Temperature Regulation:
The internal temperature is controlled by the Temperature Regulator. Lower settings provide minimum coldness, while higher settings provide maximum coldness. A medium setting is generally recommended. The optimal setting depends on room temperature, door opening frequency, quantity of food, and appliance location.
QuickFreeze Function:
This function is used for rapid freezing of fresh food (more than 3-4 kg).
- Activate by pressing the QuickFreeze button for 2-3 seconds, 6-24 hours before placing food in the freezer. The Yellow QuickFreeze Indicator Light will illuminate, and the compressor will run continuously.
- Place food in the freezing compartment(s).
- After 24 hours (or once food is completely frozen), deactivate by pressing the QuickFreeze button for 2-3 seconds. The Yellow QuickFreeze Indicator Light will go out.
- Move frozen food to storing compartments to make room for more freezing.
High Temperature Alarm:
If the internal temperature rises above -12°C (e.g., due to a power failure), the Red Alarm Indicator Light will flash, and an acoustic alarm will sound. Press the Acoustic Signal Stop to silence the alarm. The Red Alarm Indicator Light will continue to flash until the safe temperature is restored.
Freezing Fresh Food:
- Activate the QuickFreeze function.
- Place fresh food in the bottom compartment.
- Do not add other food to be frozen during the 24-hour freezing process.
- Once freezing is complete, return to the required temperature setting.
Storage of Frozen Food:
- Ensure commercially frozen foodstuffs were adequately stored by the retailer.
- Transfer frozen foodstuffs from the store to the freezer as quickly as possible.
- Do not open the door frequently or leave it open longer than necessary.
- Once defrosted, food deteriorates rapidly and cannot be refrozen.
- Do not exceed the storage period indicated by the food manufacturer.
- In case of accidental defrosting due to power failure, if the power has been off longer than the "rising time" specified in the technical characteristics, defrosted food must be consumed quickly or cooked immediately and then re-frozen (after cooling).
Thawing:
Frozen food can be thawed in the refrigerator compartment or at room temperature. Small pieces can be cooked directly from frozen, but cooking time will be longer.
Energy Saving Hints:
- Do not open the door frequently or leave it open longer than necessary.
Freezing Hints:
- Freeze only top-quality, fresh, and thoroughly cleaned foodstuffs.
- Prepare food in small portions for rapid freezing and to thaw only required quantities.
- Wrap food in aluminum foil or polythene, ensuring airtight packages.
- Prevent fresh, unfrozen food from touching already frozen food to avoid temperature rise.
- Lean foods store better and longer than fatty ones. Salt reduces storage life.
- Water ices, if consumed immediately after removal, can cause freeze burn.
- Label packs with freezing dates to track storage time.
Maintenance Features
Care and Cleaning:
- Before maintenance, deactivate the appliance and disconnect the mains plug.
- Clean the interior and accessories with lukewarm water and neutral soap.
- Regularly check and wipe door seals clean.
- Rinse and dry thoroughly.
- If accessible, clean the condenser and compressor at the back with a brush to improve performance and save electricity.
- Do not use detergents, abrasive powders, chlorine, or oil-based cleaners as they can damage the finish.
- Do not pull, move, or damage pipes/cables inside the cabinet.
- Take care not to damage the cooling system.
No-Frost Technology:
The evaporator is assisted by electric heating during defrosting to facilitate ice removal. Defrost water drips into a tray above the compressor and evaporates. The evaporator becomes warm during defrosting (approx. 30 minutes) but does not affect internal temperature. Keep foods well-packed to avoid moisture loss from air circulation. Do not obstruct vent holes. It is recommended to place all foods in baskets in the freezer compartment.
Periods of Non-Operation:
For long periods of non-use:
- Disconnect from electricity supply.
- Remove all food.
- Clean the appliance and accessories.
- Leave the door(s) open to prevent unpleasant smells.
Installation:
- Positioning: Install in a dry, well-ventilated indoor area where ambient temperature matches the appliance's climate class. Avoid heat sources and direct sunlight. Ensure free air circulation around the back. If positioned under an overhanging wall unit, maintain a minimum distance of 100 mm.
- Levelling: Ensure the appliance stands level using the two adjustable feet at the front bottom.
- Rear Spacers: Fit the two supplied spacers into the holes at the back, ensuring the arrow (A) is positioned correctly, then turn them counter-clockwise 45° to lock in place.
- Door Reversibility:
- Tilt the appliance carefully so the compressor doesn't touch the floor.
- Unscrew both adjustable feet.
- Unscrew the screws of the door bottom hinge.
- Remove the door by pulling it slightly downwards.
- Unscrew the top door hinge pin, then screw it back on the other side.
- Fit the door on the upper door hinge pin.
- Remove the lower hinge. Put it over the pin in the direction of the arrow.
- Unscrew and install the screw on the opposite side.
- Install the lower hinge on the opposite side, leaving the door position unchanged.
- Screw in the one screw in the place set free on the other side, as well as the adjustable feet (2 pieces).
- Remove and install the handle on the opposite side.
- Note: This operation is best done with another person.
- Electrical Connection:
- Must be earthed.
- Ensure appliance parameters match mains power supply.
- Use a correctly installed shockproof socket.
- Do not use multi-plug adapters or extension cables.
- Do not damage electrical components.
- Mains cable must stay below the mains plug level.
- Connect the mains plug only at the end of installation, ensuring access.
- Pull the mains plug, not the cable, to disconnect.
- Wiring code: Green and yellow (Earth), Brown (Live), Blue (Neutral).
- A 13 amp ASTA approved (BS 1362) fuse must be used if changing the plug fuse.
- Dispose of cut-off plugs safely to avoid shock hazard.
Service:
- Contact an Authorized Service Centre for repairs.
- Use original spare parts only.
- Only qualified personnel should perform maintenance and recharging of the cooling unit (contains hydrocarbons).
Disposal:
- Disconnect from mains supply.
- Cut off and discard the mains cable.
- Remove the door to prevent children/pets from being trapped.
- The refrigerant circuit and insulation materials are ozone-friendly. Insulation foam contains flammable gas.
- Contact municipal authority for correct disposal information.
- Do not damage the cooling unit near the heat exchanger.
- Recycle packaging in relevant containers.
- Do not dispose of appliances marked with the crossed-out wheeled bin symbol with household waste; return to a local recycling facility or municipal office.