This document is a user manual for a Zanussi refrigerator, models ZRDN39FW and ZRDN39FX. It provides comprehensive information on safety, installation, operation, maintenance, and troubleshooting to ensure proper and safe use of the appliance.
Function Description
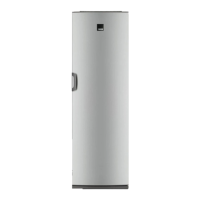
The Zanussi refrigerator is designed for household and similar applications, including farmhouses, staff kitchen areas in shops, offices, and other working environments, as well as hotels, motels, bed and breakfast, and other residential environments. Its primary function is to preserve fresh food by maintaining a cool internal temperature. The appliance is equipped with a DynamiCAIR system that allows for rapid cooling of foods and helps maintain a more uniform temperature within the compartment. It is important to note that this refrigerating appliance is not suitable for freezing foodstuffs.
Usage Features
Temperature Regulation: The refrigerator's temperature is regulated automatically, but users can adjust it manually. The temperature setting depends on factors such as room temperature, frequency of door opening, quantity of food stored, and appliance location. A medium setting is generally recommended. To lower the internal temperature, turn the temperature regulator clockwise; to raise it, turn it counterclockwise.
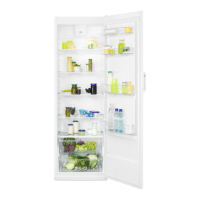
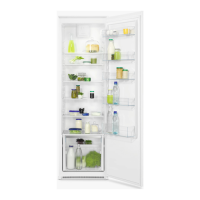
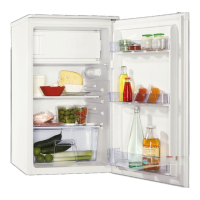
Door Shelves: The door shelves are adjustable, allowing users to reposition them to accommodate food packages of various sizes. To adjust, gradually pull the shelf up until it comes free, then reposition as required.
Movable Shelves: The refrigerator walls are fitted with runners, enabling flexible positioning of the shelves to suit storage needs.
Vegetable Drawers: Special drawers are located at the bottom of the appliance for storing fruits and vegetables, helping to keep them fresh. It is advised not to move the glass shelf above the vegetable drawer to ensure correct air circulation.
DynamiCAIR Function: The DynamiCAIR system helps achieve rapid cooling and uniform temperature distribution. It should be activated when cooling a large amount of food or when the room temperature exceeds 35°C. To switch on the fan, press button (A); a green light (B) will appear. Remember to turn off the fan by pressing button (A) again before switching off the appliance, which will make the green light (B) disappear.
Food Storage Recommendations:
- Meat: Wrap in suitable packaging and place on the glass shelf above the vegetable drawer, storing for at most 1-2 days.
- Fruits and Vegetables: Clean thoroughly and place in the special vegetable drawer. Avoid refrigerating exotic fruits like bananas, mangos, papayas, as well as tomatoes, potatoes, onions, and garlic.
- Butter and Cheese: Store in an airtight container or wrap in aluminum foil or a polythene bag to minimize air exposure.
- Bottles: Close bottles with a cap and place them on the door bottle shelf or bottle rack.
- General: Cover food with packaging to preserve freshness and aroma. Use closed containers for liquids and food to prevent flavor transfer. Separate cooked and raw food to avoid cross-contamination. Do not insert hot food; allow it to cool to room temperature first. Place new stock behind old stock to prevent food waste.
Maintenance Features
Cleaning the Interior: Before initial use, and for periodic cleaning, wash the interior and all accessories with lukewarm water and a neutral soap, then dry thoroughly. Avoid using detergents, abrasive powders, chlorine, or oil-based cleaners, as these can damage the finish. Accessories and parts are not suitable for dishwasher cleaning.
Door Seals: Regularly check and clean the door seals to ensure they are free from debris and maintain an effective seal.
Defrosting: The refrigerator compartment features automatic defrosting. Defrost water drains into a special container at the back of the appliance, where it evaporates. It is crucial to periodically clean the defrost water drain hole in the middle of the refrigerator compartment channel to prevent water overflow and dripping onto food.
Period of Non-Operation: If the appliance will not be used for a long period, disconnect it from the electricity supply, remove all food, clean the appliance and all accessories, and leave the door open to prevent unpleasant smells and mold development.
Replacing the Lamp: The appliance is equipped with a long-life LED interior light. To replace it:
- Disconnect the plug from the mains socket.
- Pull the left side of the lamp cover to unlock and remove it.
- Replace the bulb with one of the same power and shape, specifically designed for household appliances (E14 base LED bulbs, maximum power shown on the lamp unit). It is strongly recommended to use original spare parts.
- Install the lamp cover.
- Connect the plug to the mains socket.
- Open the door to ensure the light switches on.
Closing the Door: To ensure proper door closure, clean the door gaskets. If necessary, adjust the door or replace defective door gaskets by contacting an Authorised Service Centre.
Troubleshooting: The manual includes a comprehensive troubleshooting guide to address common issues such as the appliance not operating, being noisy, compressor running continually, incorrect temperature, door misalignment, lamp not working, excessive frost/ice, and water flow issues. For persistent problems, users are advised to contact the nearest Authorized Service Centre.