Power Wiring Guidelines
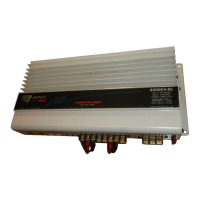
Amplifier Power Endplate
1. Connect the 12V “POS” terminal (FUSED +12VDC) to the
battery with 10 gauge (or heavier) wire.
2. Fuse the wire within 18” of the battery with a 30 amp fuse
or circuit breaker. Although the amplifier is already fused,
a short between the amplifier and the battery could cause
a fire. See the section titled “Warnings”.
3. Connect the “NEG” terminal to the vehicle chassis with the
shortest possible 10 gauge wire. Do not make this
connection directly to the battery. Do not use seat or seat
belt bolts for grounding. Do not share this connection with
other equipment. A “single point” ground for high current
connections will degrade the system’s performance.
Inadequate power supply connections will result in
REDUCED POWER OUTPUT.
4. Connect the “TURN ON” terminal to the radio’s “amp turn
on” or in some cases “power antenna” lead. This
connection requires very little current and may be
connected with a light gauge wire such as #22. Applying
12 volts to this terminal turns the amplifier on.
5
 Loading...


