Install the hardware and make all cable connection
a. Wall mounting and Ceiling mounting
1. Use the 3 supplied screws to fix the base plate to a flat surface.
2. Loosen the lock ring to adjust the desired angle of the camera.
3. Tighten the lock ring.
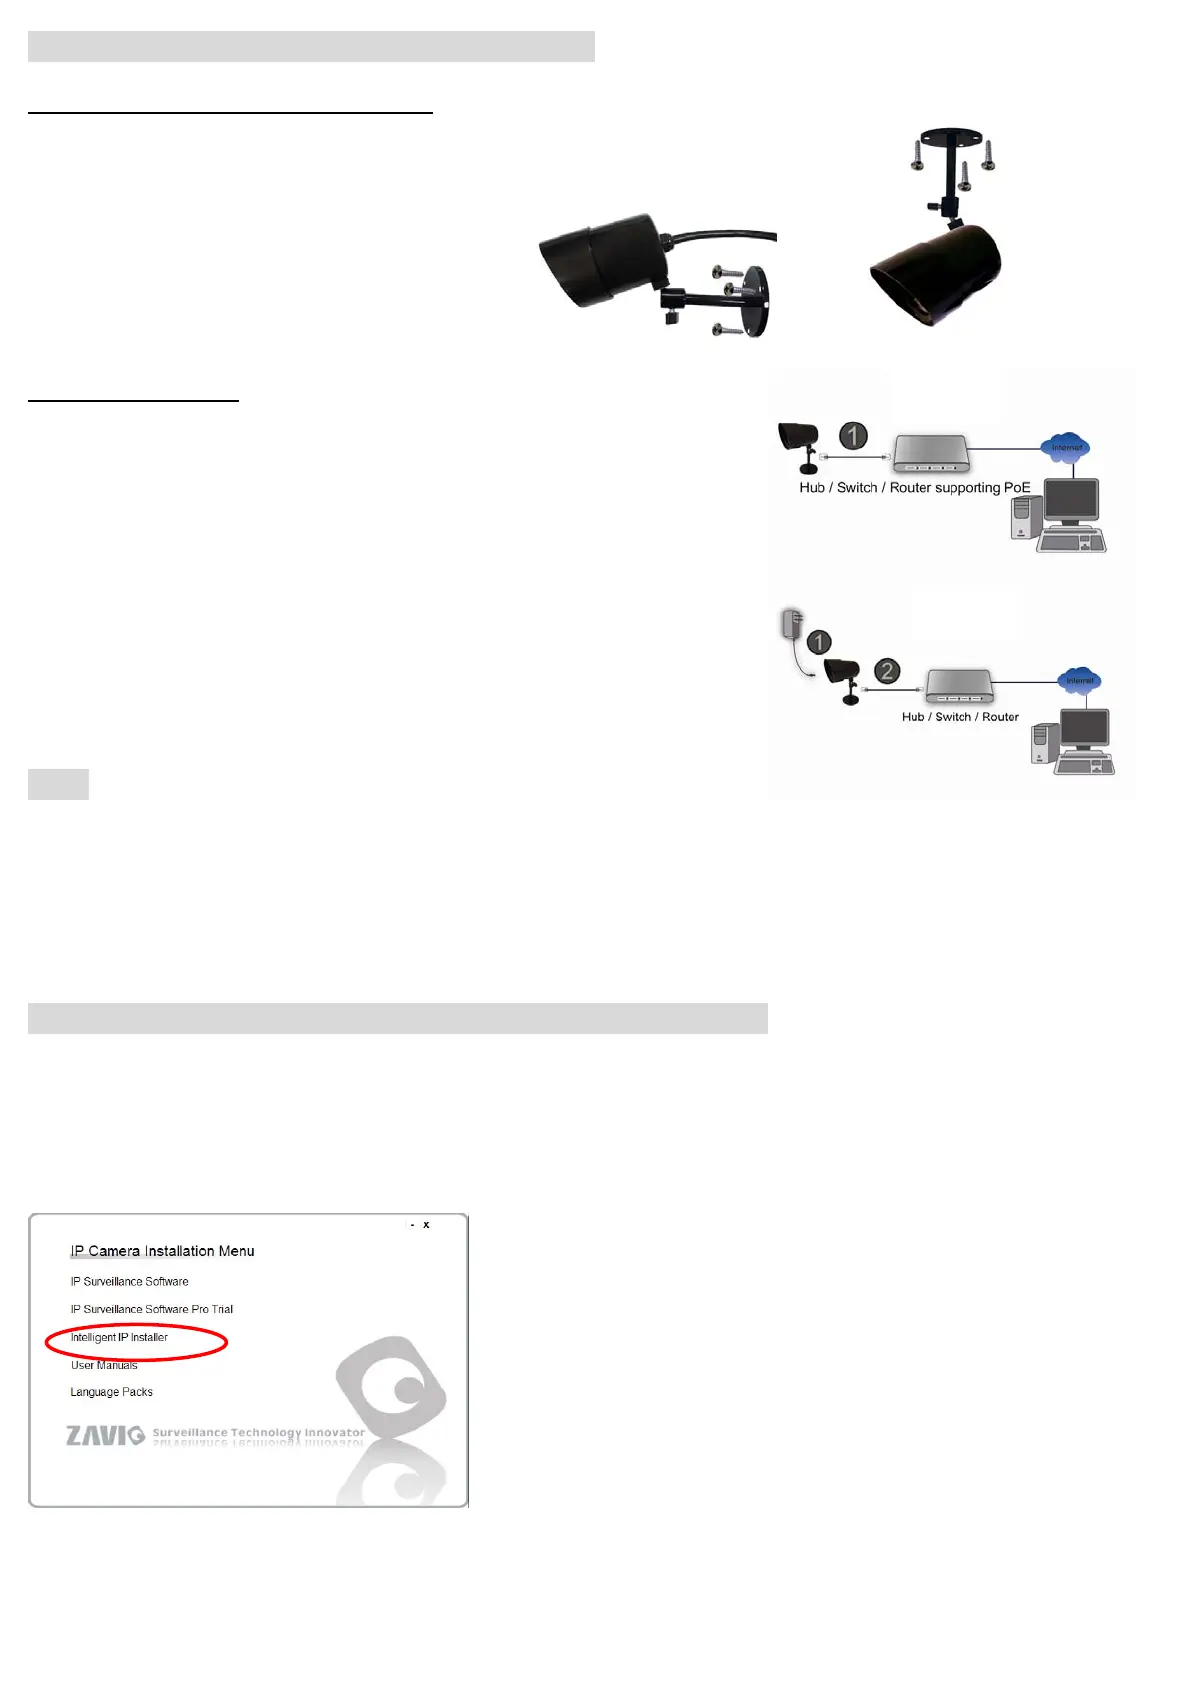
b. Connect all cables
b1. Power over Ethernet (PoE)
1. Using a standard RJ-45 network cable, connect the IP Camera
to a PoE-enabled Hub / Switch / Router
b2. Without Power over Ethernet (PoE) connection
1. Connect the power adaptor to the IP Camera.
2. Using a standard RJ-45 network cable, connect the IP Camera
to a normal Hub / Switch / Router.
Note:
1. If not necessary, please don’t open the housing to avoid moisture invading inside.
2. In case of needing to open the housing, please restore in 5 minutes.
3. If fog appears on the lens, please open the cover of IP CAM and expose it in the dry environment between 50~70℃
around 2 hours to dry the wetted inside.
Microsoft OS:Use the software CD to install Intelligent IP Installer
Power on your PC and insert the CD-ROM. The setup page will show up automatically. Please follow those steps
below to install the firmware.
Select “Intelligent IP Installer” and follow the installation process to complete the installation.
b2
b1
2

 Loading...