6 7
B. Transmitter, Receiver and Servo Settings
Checking Operation of the Servo
After installation of the servo and receiver into your model is complete,
turn on the transmitter (fully extend the antenna) now turn on the receiver.
Check to see if all servos are working properly.
If not, check the connections and/or make sure that the main battery pack is charged.
If the servos check out is fine, connect the linkage to the servo horns.
Check that the servos are moving in the correct direction.
If not, change the servo direction with the reversing shunt switches located on the bottom of the radio.
The 3rd channel of the Zebra 3 is not reversible.
If everything is checked out, turn off the receiver first, and then turn off the transmitter.
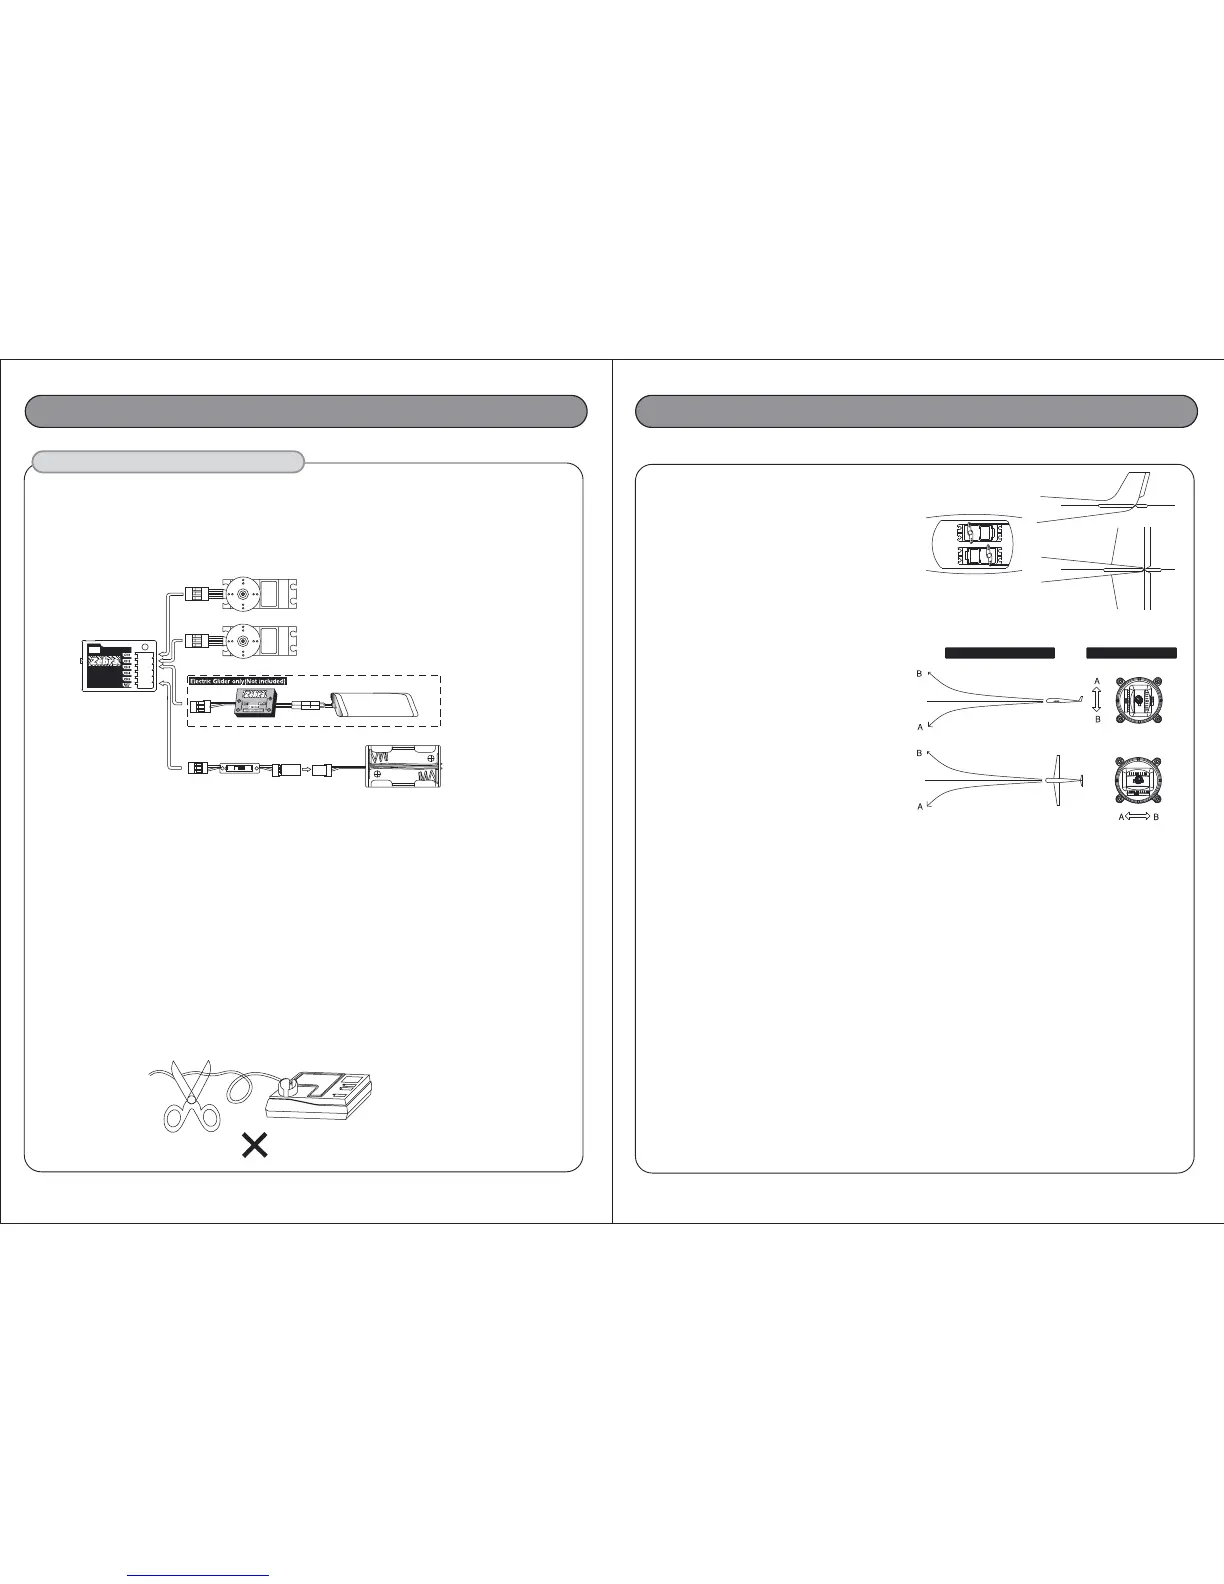
Warning!!! : Do not shorten the length of the receiver antenna by cutting off any excess wire.
This will severely affect the operating range and could result in injury to yourself and others.
D. Range checking
- Always perform a range check before each operation.
- Perform range check by walking away from the aircraft with the transmitter antenna collapsed.
- You should have complete control from a distance of 60 - 90ft ( 20 - 30m ).
- If the controls are erratic before the minimum distance is reached, do not fly until the problem is resolved.
Elevator and Aileron Servo Trim Settings
- Trim Setting before Flight
The servo trim enables minor adjustment of the servo
neutral position so that the plane will fly straight when
the stick is in the center position. Before adjusting the
servo trim, please make sure that when both the stick
and the servo trim is in its center position (1) the servo
arm is perpendicular to the push rods, and (2) the elevator
and aileron of the plane is flush with the tail wing.
- Trim Setting during Flight
You may perform some minor trim adjustment
during flight if the plane nose up or down
(Elevator Trim) or sideways (Aileron Trim) when
the stick is in the center position.
However please keep in mind that trim adjustment
is only for minor adjustment and major adjustment
should still be done through push rod (linkage)
adjustment at the model.
Note: There is no trim adjustment on the
3rd channel of the Zebra 3
Zebra 3 FM Instruction ManualZebra 3 FM Instruction Manual
3. OPERATION
A. Installation of Receiver and Servos
After connecting the receiver and servos as below illustration, turn on the power of the transmitter first then turn
on the receiver. (Always turn your transmitter first and off last to prevent lost of control.)
Now, move the controls to see if the servos are moving properly. If not, check your wiring or crystals if the
servos do not move at all.
RX Battery box
S/W HARNESS
Elevator Servo
Channel #2
Aileron or Rudder Servo
Channel #1
-When your plane does this - Move trim like below
Channel #3
7.2V-8.4V Batt.
ZR-106SF
Extra Long Range
FM
C. Simulator system (Aero version only)
- Zebra 3FM system is compatible with SIC (simulator interface cord- Part # 58318, not included)
designed to work with the popular and free FMS flight simulator. (http://www.hitecrcd.com/product_fs.htm)
 Loading...