MC93XX Quick Start Guide
13
Charging the Device
Use one of the following accessories to charge the battery.
Charging the Main Battery
To charge the main battery:
1. Connect the charging accessory to the appropriate power source.
2. Insert the device into a cradle or attach a cable.
The device starts to charge automatically. The Charge LED Indicator indicates the charge status. See the table
below for charging indications.
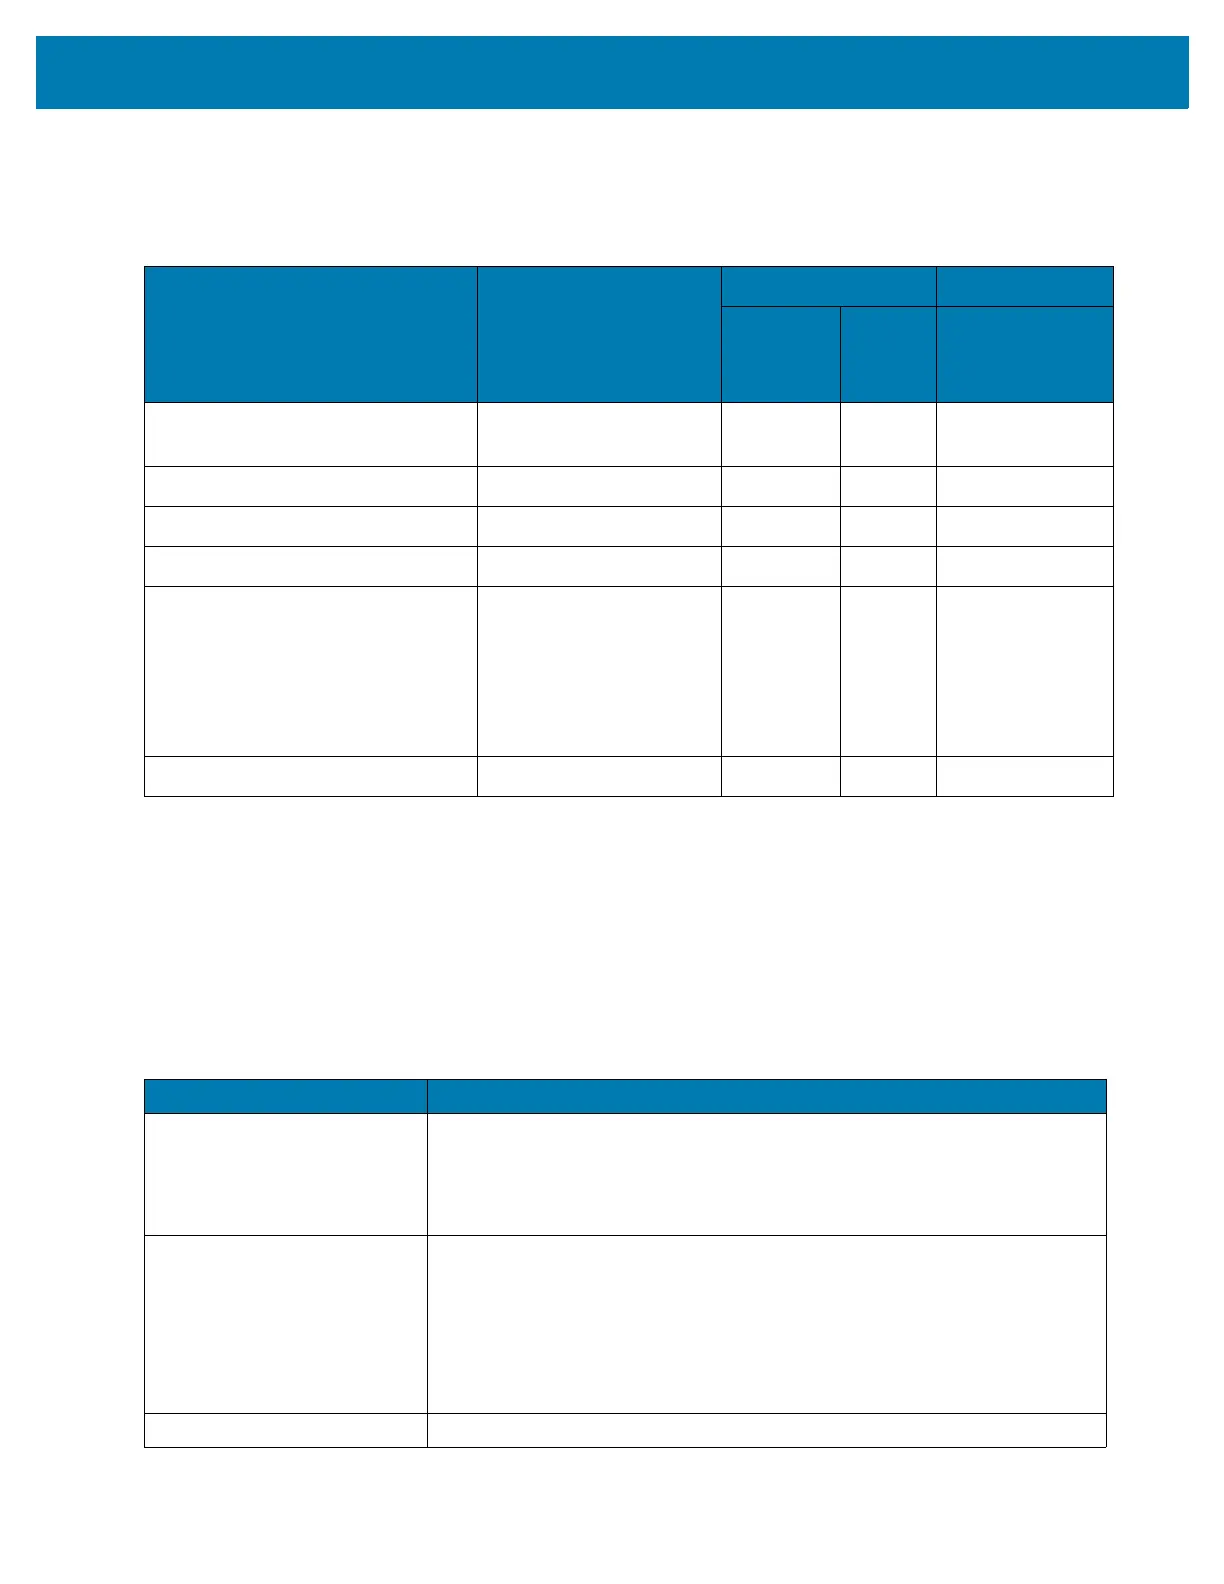
Table 3 Charging and Communication
Description Part Number
Charging Communication
Battery
(In
Device)
Spare
Battery
USB
1-Slot USB Charge Cradle with
Spare Battery Charger
CRD-MC93-2SUCHG-01 Yes Yes Yes
4-Slot Charge Only ShareCradle CRD-MC93-4SCHG-01 Yes No No
4-Slot Spare Battery Charger SAC-MC93-4SCHG-01 No Yes No
16-Slot Spare Battery Charger SAC-MC93-16SCHG-01 No Yes No
USB Charge/Com Snap-on Cup
NOTE: A separate USB cable and pow-
er supply is required to support fast
charging. USB (Type-C) Cable is re-
quired to allow communication from the
snap-on to the PC/laptop.
CBL-MC93-USBCHG-01 Yes No Yes
Charge Only Adapter ADP-MC93-CRDCUP-01 Yes NA No
Table 4 LED Charge Indicators
Status Indications
Off • The battery is not charging.
• The device is not inserted correctly in the cradle or connected to a
power source.
• Cradle is not powered.
Slow Blinking Amber
Every 3 seconds
• Battery is charging, but the battery is fully depleted and does not yet
have sufficient charge to power the device.
• After battery removal, indicates that the device is in hot swap mode with
connectivity persistence.
NOTE: The SuperCap requires a minimum of 15 minutes to fully charge in order to
provide adequate connectivity and memory session persistence.
Solid Amber • Battery is charging.
 Loading...
