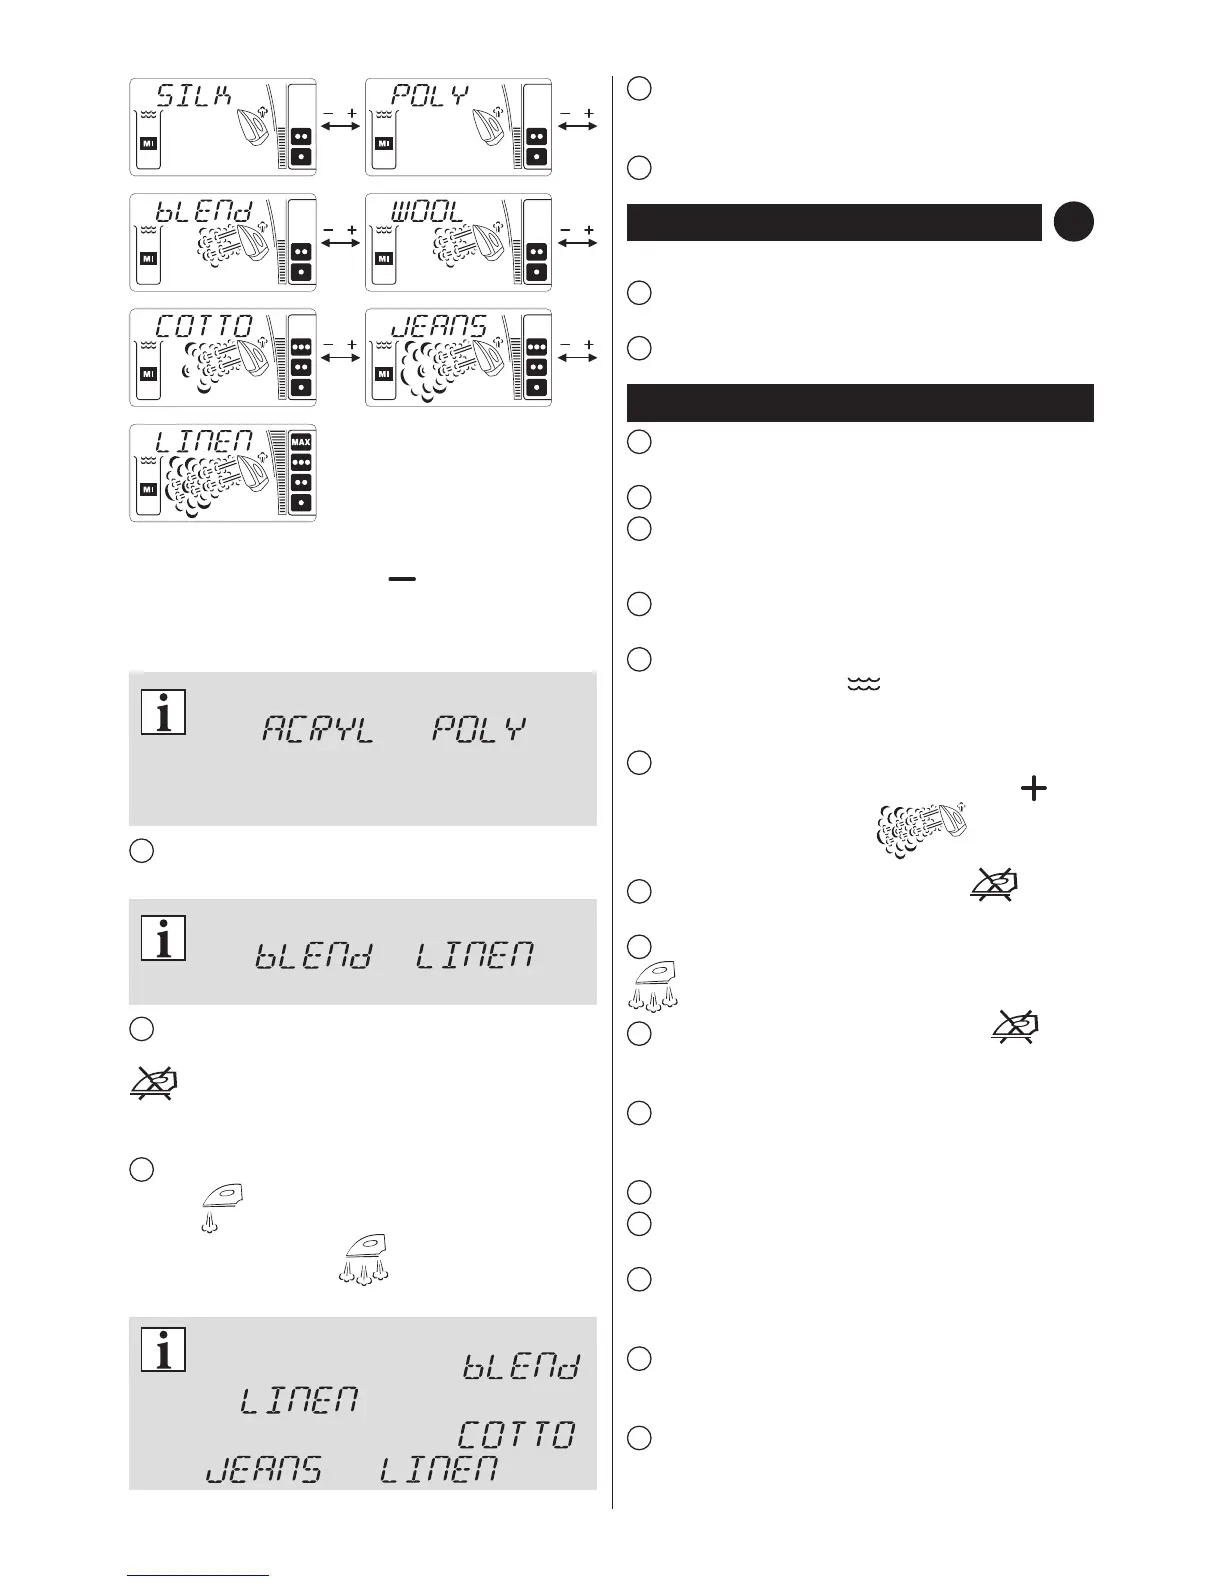
To reduce the temperature press the fabric and steam
emission selection button „ ” (every pressing is
accompanied by a sound signal). On LCD display you will
see the options displayed in opposite order than in the case
of increasing the temperature.
When one of the options from 1 to 4 is selected
(from „ ” to „ ”), you
can iron in dry mode only and no steam is
generated. If you operate the iron with these
settings, you will see red pilot light.
3
The pilot light switches off automatically as soon as the
selected temperature of iron baseplate is reached.
When one of the options from 5 to 9 is selected
(from „ ” to „ ”), you
can use the steam while ironing.
4
When the steam boiler is being heated, on the LCD
display you will see the steam boiler heating indicator
blinking. As soon as the appropriate temperature is
reached, the steam boiler heating indicator stops blinking
and shall be no longer displayed on LCD display.
5
Set the steam emission button to the appropriate
position ( – steam is emitted from the openings placed
in the front part of the iron; – steam is emitted from all
openings of the iron).
Regular steam mode can be used for
settings starting from „ ”
to „ ”. Use the professional
steam mode for settings „ ”,
„ ” and „ ”.
6
If the baseplate of the iron and steam boiler are ready to
use, the red pilot light disappears and the green pilot light
switches on.
7
The appliance is ready to use.
Mounting the cord wraps
●
Unwind and straighten the power cord.
1
Insert the cord wraps into one of the two openings
located at the top part of the steam station.
2
Wind the power cord around the cord wraps.
Preparing the steam generator to operation
1
Unwind and straighten the connection cable and the
power cord.
2
Fill the water reservoir (see: Filling the water).
3
Start the appliance (see: Starting the appliance).
FIRST IRONING
1
Proceed as described in section “Preparing the steam
generator to operation”.
2
Select water hardness level by pressing the water
hardness selection button . Proof the water hardness
level by using the water hardness tester (see: Proong the
water hardness tester).
3
Select the maximal steam emission level by pressing the
fabric and steam emission selection button „ ” until
you see MAX setting displayed ( ).
4
The steam boiler heating indicator starts to
blink signalling that the steam boiler has started to heat.
5
Shift right the steam emission regulator to the position
.
6
The steam boiler heating indicator stops
blinking (no longer displayed on LCD display) as soon as
selected temperature of the steam boiler is reached.
7
When the iron baseplate and the steam boiler are ready
to use, the red pilot light will be switched off and the green
pilot light will be switched on.
8
The appliance is ready to use.
9
Keep the steam emission button pressed for ca. 1 min
in order to clean the steam emission system.
10
Press the steam emission button in order to steam
iron. In order to initiate steam emission it may be necessary
to press the steam emission button several times.
11
While the steam emission button is being pressed, you
will see steam emission level indicator blinking on the LCD
display.
12
It is recommended to iron a less precious item at the very
beginning, e.g. an old towel.
C


 To Next Page