Do you have a question about the Zimmer Biomet Arcos Modular Femoral Revision System and is the answer not in the manual?
| Manufacturer | Zimmer Biomet |
|---|---|
| Modularity | Modular |
| Material | Titanium alloy |
| Indications | revision hip arthroplasty |
| Surface Finish | Porous coating for bone ingrowth |
| Sizes Available | Multiple sizes to accommodate patient anatomy |
| Sterility | Sterile |
Determines patient position and surgical approach for adequate anatomy visualization.
Remove the stem from the cement mantle and ensure all cement is removed.
Remove a cementless stem, possibly requiring osteotomy or sectioning.
Prepare the femur for a PPS coated distal stem by sequentially reaming two cortical diameters.
Prepare the proximal femur for the tapered region using a transition reamer.
Sequentially broach the proximal femur until the final broach size matches the last proximal reamer.
Determine deficiency, align resection guide, mark, and remove with a saw.
Perform trial reduction using modular neck and head trials to determine offset, length, and stability.
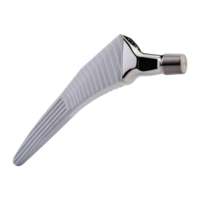
Assemble distal stem and proximal body implants to match trial orientation.
Insert the implant into the femur until the desired depth is achieved.
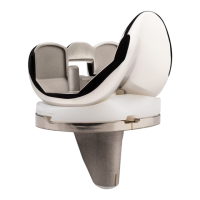
Thread locking screw into proximal body to secure distal and proximal implants.
Perform final trial reduction and impact modular head onto the stem.
Prepare the femur for an STS distal stem by reaming in 1 mm increments.
Trial the distal stem, matching the final reamer diameter and desired length.
Assemble final STS reamer into proximal reamer and ream proximal femur.
Assemble proximal broach body and distal stem trial, then broach proximal femur.
Align resection guide to broach, mark, and complete calcar resection with a saw.
Perform trial reduction using modular neck and head trials for offset, length, and stability.
Assemble distal stem and proximal body implants to match the orientation of the assembled trial.
Insert the final implant into the femur until the desired depth is achieved.
Thread the locking screw into the proximal body to lock the distal and proximal body implants.
Perform final trial reduction and impact the modular head onto the stem.
Thread the trochanteric bolt guide into the insertion hole on the proximal body.
Select bolt length and drill bit, compress auxiliary implant to bone fragment.
Thread bolt through guide into proximal body until a click is felt and heard.
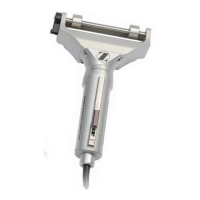
Utilize the in-femur assembly tool for final insertion of the implant.
Attach strike plate, tighten until click, impact proximal body to desired depth.
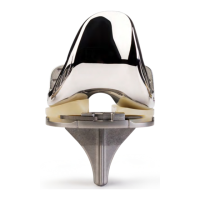
Attach torque wrench, tighten to 300 in-lbs to fully engage taper junction.
Loosen strike plate, unthread distal fastener, disengage proximal/distal inserter.
Remove proximal fastener using taper assembly driver.
Thread locking screw into proximal body using hex driver and T-handle.
Attach proximal fastener to proximal body, lock to inserter.
Insert distal fastener, tighten strike plate, set version, and apply torque.
Remove inserter by turning torque wrench counter-clockwise.
Remove locking screw, thread taper disassembly tool, turn torque wrench clockwise.