EasyManua.ls Logo

Zimmer Biomet NexGen MIS LPS-Flex User Manual

Default Icon
72 pages
To Next Page IconTo Next Page
Page #1 background imageLoading...
Page #1 background image
NexGen
®
MIS LPS-Flex
Mobile Implant System
Surgical Technique

Table of Contents

Question and Answer IconNeed help?

Do you have a question about the Zimmer Biomet NexGen MIS LPS-Flex and is the answer not in the manual?

Zimmer Biomet NexGen MIS LPS-Flex Specifications

General IconGeneral
ManufacturerZimmer Biomet
ModelNexGen MIS LPS-Flex
MaterialCobalt Chromium, Titanium, Polyethylene
FlexionHigh Flexion
DesignMinimally Invasive Surgery (MIS) Design
Intended UseTotal Knee Arthroplasty

Summary

Introduction to NexGen MIS LPS-Flex

NexGen MIS LPS-Flex Mobile Bearing Knee

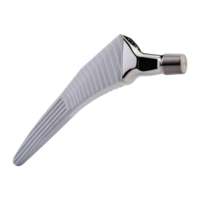
Description of the implant system designed for greater range of motion.

Patient Selection Criteria

Guidelines for choosing appropriate patients for MIS total knee arthroplasty.

Preoperative Planning

Surgical Approaches

Minimally Invasive Access Techniques

Details on Medial Parapatellar, Midvastus, Subvastus, and Quad-Sparing approaches.

Soft Tissue Balancing

Ligament adjustment for joint stability using release techniques.

Varus and Valgus Release

Techniques for correcting varus and valgus deformities.

Step One: Resect Proximal Tibia

Assemble and Position Tibial Cut Guide

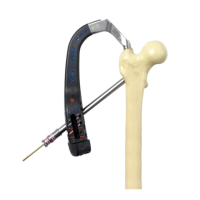
Guide setup and placement for precise tibia resection.

Step Two: Establish Femoral Alignment

Step Three: Cut the Distal Femur

Step Four: Check Extension Gap

Step Five: Size Femur and Establish External Rotation

Referencing Techniques for Femur Sizing

Anterior and posterior methods for accurate femur sizing and rotation.

Step Six: Finish the Femur

Femoral Finishing Cuts

Executing precise distal femoral cuts using guides.

Step Seven: Femoral Notching Guides

MIS Notch/Chamfer Trochlear Guide

Guide for trochlear groove and chamfer cuts.

MIS QS Notch Guide

Alternative guide for intercondylar notch preparation.

Step Eight: Check Flexion Gap

Balance Flexion/Extension Gaps

Achieving symmetrical joint space in flexion and extension.

Step Nine: Prepare the Tibia

Assemble and Position Tibial Broach Plate

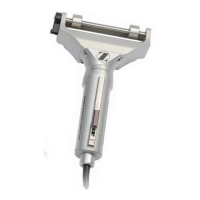
Guide setup for tibial broaching and component preparation.

Step Ten: Perform Trial Reduction

Insert and Remove Femoral Provisional

Trial component placement and removal for assessment.

Step Eleven: Finish the Tibia

Tibial Preparation and Broaching

Finalizing tibia for implant seating.

Step Twelve: Prepare the Patella

Patellar Resection and Finishing

Cutting and preparing the patella using various guides.

Optional Patella Protectors

Protective device for the patella during bone cuts.

Step Thirteen: Perform a Final Trial Reduction

Step Fourteen: Implant Components

Tibial and Femoral Component Implantation

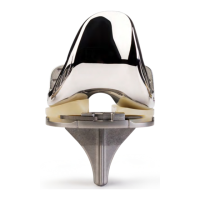
Securing the tibial base plate and femoral components.

Articular Surface and Patellar Implantation

Attaching the mobile bearing surface and patellar component.

Closure

Rehabilitation Protocol

Related product manuals