Do you have a question about the Zircon StudSensor HD70 OneStep and is the answer not in the manual?
The tool recalibrates itself during scanning when needed, often transparently. An arrow icon indicates a missed stud.
Slide the tool slowly across the surface. Edge indication illuminates first, then center indication with multiple bars.
For deeper studs, only two bars may show on the Signal Strength indicator, with the SpotLite beam and some Target bars illuminating.
Grasp firmly, hold straight, keep flat against wall, avoid touching surface or other body parts.
Humidity, moisture, or recent paint may affect sensor accuracy. Allow walls to dry.
Studs are typically 16 or 24 in. apart and 1.5 in. wide. Other widths may not be studs.
Quickly release and re-press the Power button to enter DeepScan mode for thicker walls.
The AC WireWarning indicator appears when live AC voltage is detected, flashing if scanning over a live wire.
Always turn off power before penetrating surfaces. Do not assume wires are absent or safe.
| Stud Width Indication | Yes |
|---|---|
| Calibration | Automatic |
| Display Type | LCD |
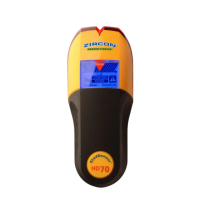
| Modes | Stud Scan, Deep Scan, AC Scan |
| Power Source | Battery |
| Auto Shut-off | Yes |
| Low Battery Indicator | Yes |
| Operating Temperature | 32°F to 104°F (0°C to 40°C) |
| Detection Depth (Wood) | 3/4 in. (19 mm) |
| Detection Depth (Metal) | Up to 38 mm (1 1/2 in.) |
| Detection Depth (AC Wiring) | 2 in. (51 mm) |
| Batteries | 1 x 9V |
| Warranty | 1 year |
| Detection Depth | Up to 38 mm (1 1/2 in.) |