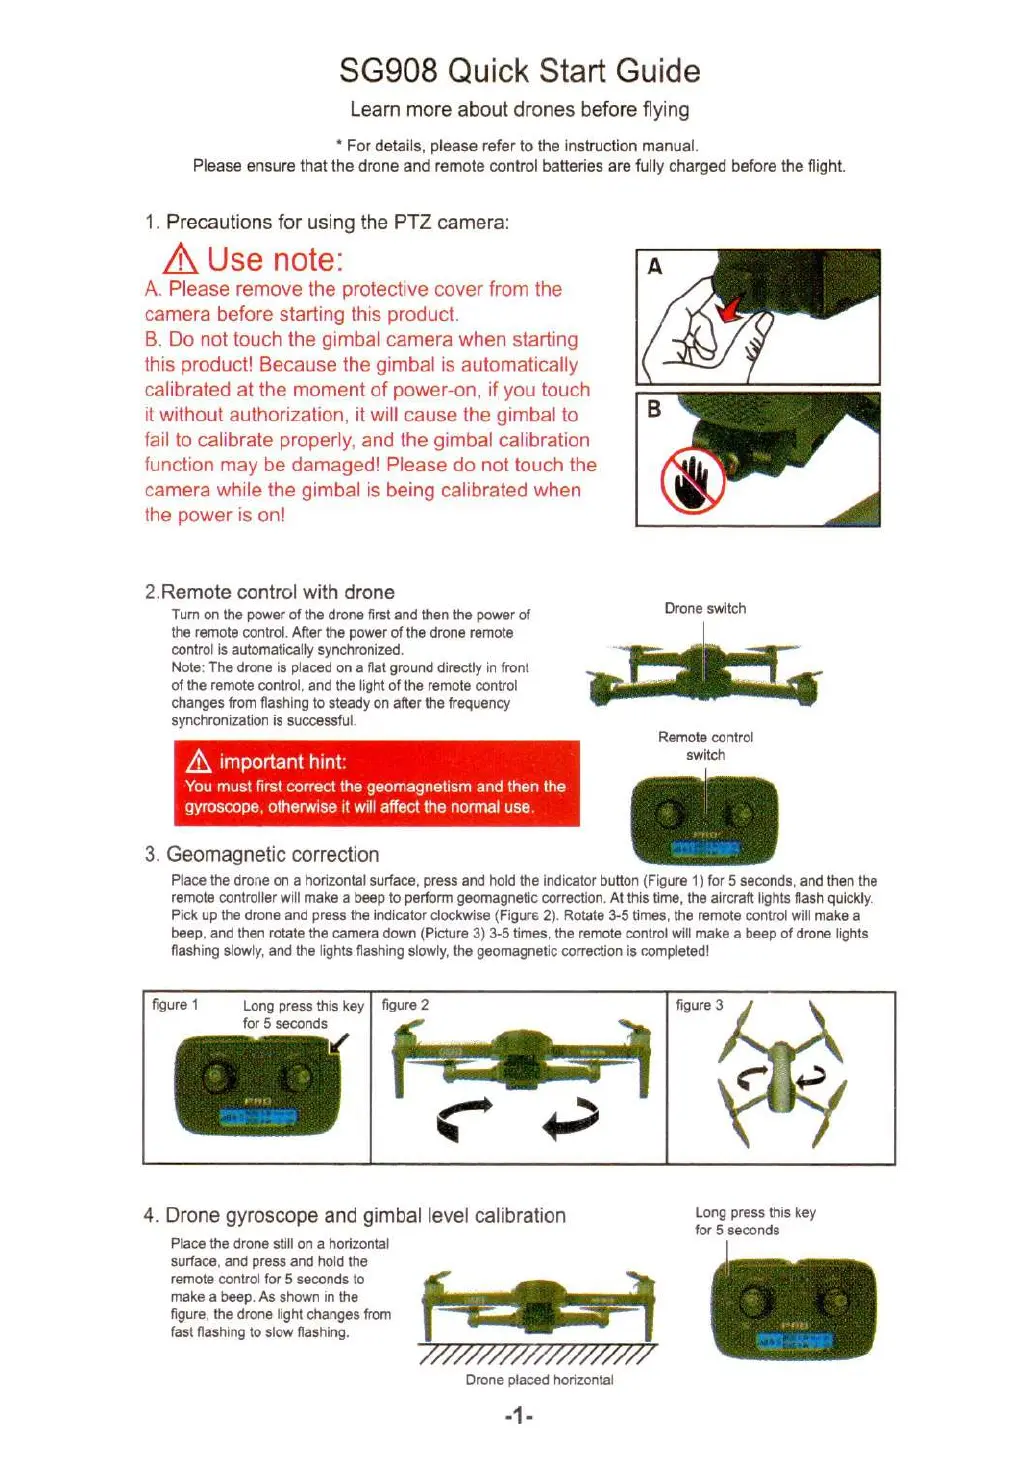
Drone switch
figure 1
Long press this key
for 5 seconds
figure 2
Remote control
switch
Drone placed horizontal
SG908 Quick Start Guide
Learn more about drones before flying
* For details, please refer to the instruction manual.
Please ensure that the drone and remote control batteries are fully charged before the flight.
1. Precautions for using the PTZ camera:
Use note:
A.
Please remove the protective cover from the
camera before starting this product.
B.
Do not touch the gimbal camera when starting
this product! Because the gimbal is automatically
calibrated at the moment of power-on, if you touch
it without authorization, it will cause the gimbal to
fail to calibrate properly, and the gimbal calibration
function may be damaged! Please do not touch the
camera while the gimbal is being calibrated when
the power is on!
2.Remote control with drone
Turn on the power of the drone first and then the power of
the remote control. After the power of the drone remote
control is automatically synchronized.
Note: The drone is placed on a flat ground directly in front
of the remote control, and the light of the remote control
changes from flashing to steady on after the frequency
synchronization is successful.
important hint:
You must first correct the geomagnetism and then the
gyroscope, otherwise it will affect the normal use.
3. Geomagnetic correction
Place the drone on a horizontal surface, press and hold the indicator button (Figure 1) for 5 seconds, and then the
remote controller will make a beep to perform geomagnetic correction. At this time, the aircraft lights flash quickly,
Pick up the drone and press the indicator clockwise (Figure 2). Rotate 3-5 times, the remote control will make a
beep, and then rotate the camera down (Picture 3)3-5 times, the remote control will make a beep of drone lights
flashing slowly, and the lights flashing slowly, the geomagnetic correction is completed!
Long press this key
for 5 seconds
4. Drone gyroscope and gimbal level calibration
Place the drone still on a horizontal
surface, and press and hold the
remote control for 5 seconds to
make a beep. As shown in the
figure, the drone light changes from
fast flashing to slow flashing.
 Loading...