Do you have a question about the ZOJE ZJ5820 and is the answer not in the manual?
Explains safety indications, DANGER and CAUTION labels, and symbols used in the manual.
Covers high voltage hazards, environmental requirements like temperature and humidity.
Details safe installation practices, including handling weight, electrical connections, and PPE.
Instructions on safe operation, including protective eyewear and avoiding moving parts.
Guidelines for safe cleaning and maintenance, emphasizing protective gear and avoiding ingestion.
Explains the meaning of specific warning symbols and labels found on the sewing machine.
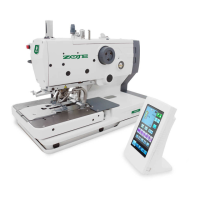
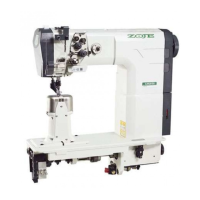
Diagram and list identifying key components of the sewing machine.
Identifies specific safety devices integrated into the sewing machine.
Presents detailed specifications for sewing speed, shape, width, length, and air pressure.
Illustrates various eyelet buttonhole sewing shapes including straight and taper.
Illustrates various straight buttonhole sewing shapes including straight and taper.
Shows the pattern for circular stitch sewing.
Instructions for securely installing the sewing machine head into the table.
Details the safe procedure for tilting the machine head and returning it to its original position.
Step-by-step guide for installing the belt cover and the feed bar cover U.
Instructions on how to properly install the cotton stand for thread management.
Guide for installing the air unit and valve unit, including connection details.
Instructions for connecting and installing the 2-pedal foot switch for operation.
Steps for installing the treadle unit and its connecting rod for operation.
Guide for installing the hand start switch, including setup and adjustment procedures.
Safety warnings and recommended oil for lubricating the sewing machine.
Instructions for adding lubricating oil to the arm oil tank and bed oil tank.
Steps for lubricating the needle bar, looper, spreader, and looper base.
Procedure for correctly installing the needle, including alignment and securing.
Detailed instructions and diagrams for threading the upper thread correctly.
Instructions for threading the lower thread, showing methods for different specifications.
Guide for threading the gimp correctly, including specific instructions for different specifications.
Instructions for threading all threads when the cotton stand is on the right side.
Identifies and describes the main areas and ports of the operation panel.
Steps for turning on the machine, checking the display, and starting operation with the pedal.
Explains the interface for inputting sewing data and describes button functions.
Details the functions and remarks for various buttons used in pattern programming.
Guide on how to preset and alter pattern data, including selecting and confirming parameters.
Lists and explains the 6 parameters frequently accessed via hot keys.
Table listing pattern parameters at S level with their codes, content, range, and default values.
Details parameters for linear and round bar-tacking, including stitch numbers and speeds.
Lists parameters for knife shape, width adjustment, and various bar-tacking settings.
Explains Test Feed Mode and how to confirm patterns before actual sewing.
Details pedal actions for starting, pausing, and returning to position during test mode.
Procedures for returning the machine to the cloth setting position and ending the test mode.
Describes the Non-Cut mode where no knife action occurs during sewing.
Explains the Cut-before-Sewing mode where cutting occurs before sewing.
Details the Cut-after-Sewing mode where cutting occurs after sewing.
Instructions on how to shift the cloth-feeding board position for easier cloth setting.
Steps to enter the threading mode for easier upper thread setup.
Detailed steps for threading the upper thread after entering threading mode.
Guide to performing automatic sewing, including trial sewing and pattern selection.
Instructions for operating the machine in manual mode for stitch-by-stitch adjustment.
Procedure for stopping manual sewing using the emergency stop switch.
How to pause the sewing machine during operation due to thread breakage or other issues.
Steps to release a paused state and return the machine to the setting position.
Procedure to resume sewing after a pause, including handling thread breakage.
Guide on using the cyclical sewing function to combine multiple patterns.
Detailed steps for setting up a cyclical pattern program by combining single patterns.
Instructions on setting the pattern content for each step (S1, S2, S3, S4) in a cyclical program.
Overview of the Setting Mode Level 1 interface for accessing functions.
Overview of the Setting Mode Level 2 interface for detailed settings.
Lists and describes the functions available in Setting Mode Level 2.
Procedure to access and view the software version of the operation panel and controller.
How to adjust the LCD backlight lightness using the interface.
How to access and clear the error history and information logs.
Details communication modes: Panel Software Update via U Disk and Parameter Transfer.
Steps to update the operation panel software using a U disk.
Information displayed after a successful software update, requiring a machine restart.
Procedure to input parameters from a U disk to the operation panel.
Procedure to output parameters from the operation panel to a U disk.
Confirmation prompt for outputting parameters to the U disk.
How to access the interface for setting U level parameters.
Explains 'Data Input Type' and 'Selection Type' for setting parameters.
Steps to enter and manage password for parameter encryption.
Instructions on how to select and change specific parameters after entering the password.
How to check changed parameters, including password entry and restoring defaults.
Detailed list of parameters at U Level, including functions, range, and default settings.
Lists parameters related to clamping, test mode, and needle stop positions.
Details parameters for auto mode, forbidding functions, and safety switches.
Lists parameters for knife shape, width adjustment, and various bar-tacking settings.
Details parameters for thread loosening, trimming, and thread breakage sensors.
Lists parameters for thread taking-up, tension adjustment, and frame-moving.
How to access the interface for parameter initialization and select initialization levels.
Procedure for backing up and restoring U level parameters.
Routine cleaning procedures for the sewing machine head and components.
Detailed steps for cleaning the machine head, needle, and eye guard.
Instructions for cleaning the eye guard and lubricating the machine head.
Procedure for draining water from the bed base, especially after cleaning.
Guide for adjusting the height of the spreaders and loopers for proper sewing.
Instructions on how to adjust the zigzag width or stitch width of the sewing machine.
Steps for preparing a customized needle and adjusting its position for zigzag sewing.
Detailed steps for adjusting the zigzag base line position using needle guard and feed base.
Guide for adjusting the timing between the needle and loopers for optimal sewing.
Procedure for adjusting the looper stroke for different materials and threads.
Instructions on adjusting the needle bar height for proper sewing operation.
How to adjust the clearance between the loopers and the needle.
Instructions for adjusting the needle guard position.
Guide for adjusting the installation positions of the spreaders.
Procedure for adjusting the timing of the spreaders.
How to adjust the height of the throat plate for proper sewing.
Instructions for changing the cutting length, including replacing the hammer.
Procedure for filing the cutting surface of the hammer to ensure clean cuts.
Detailed steps for filing the hammer's cutting surface for optimal performance.
How to adjust the contact between the knife and hammer for proper cutting action.
Instructions for safely replacing the knife on the sewing machine.
Detailed steps for removing the old knife and installing a new one.
How to make fine adjustments to the knife position for optimal cutting.
Adjusting the knife position in the forward and back directions.
Relationship between needle drop position and eyelet pattern for proper cutting.
How to adjust the lift amounts for the work clamps.
Adjusting the forward and back positions of the work clamps.
Adjusting the sideways positions of the work clamps.
How to adjust the positions of the work clamp plates for proper sewing.
How to adjust the cloth opening amounts for both left and right work clamp plates.
How to adjust the upper thread feeding amount for consistent sewing.
Instructions for adjusting the lower thread feeding amount.
Steps for replacing the upper movable knife.
How to adjust the upper movable knife for proper thread trimming.
Adjusting the position of the thread trimmer lever bracket.
Instructions for replacing the movable and fixed knives for lower thread and gimp.
Steps for replacing the movable knife.
Steps for replacing the fixed knife.
How to adjust the cutting pressure for clean thread trimming.
How to adjust the meshing amount of components.
Instructions for adjusting the thread nipper assembly and opener.
Checks for proper thread nipper operation, including opening and closing.
How to adjust the thread handler for proper thread guiding.
Detailed method for adjusting the thread handler.
List of error codes and messages with their corresponding content.
Troubleshooting guide for common malfunctions, including reasons and solutions.
List of system and special malfunctions with methods for settlement.
Codes and settlement methods for system-level malfunctions.
Troubleshooting for special malfunctions like pause key issues or tilted machine heads.
Settlement methods for errors related to motor connections and sensors.
Troubleshooting for motor running errors, communication issues, and stepping motor problems.
Schematic diagram of the eyelet buttonhole machine system components and connections.
| Max Sewing Speed | 5000 stitches per minute |
|---|---|
| Max Stitch Length | 5 mm |
| Lubrication | Automatic |
| Motor Power | 550W |
| Presser Foot Lift | 13 mm |
| Stitch Type | Lockstitch |
| Needle Size | 9 to 18 |