7
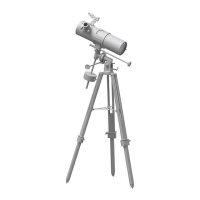
5. How to install and use
the finder scope. The
included LED finder scope is a
powerful aid to point the
telescope to a ground or sky
objects. Install the finder
scope as shown in figure 23.
Make sure to tighten the two
supplied finder scope nuts as
shown . Make sure the finder
scope is pointing to the same
direction as the telescope’s
aperture.
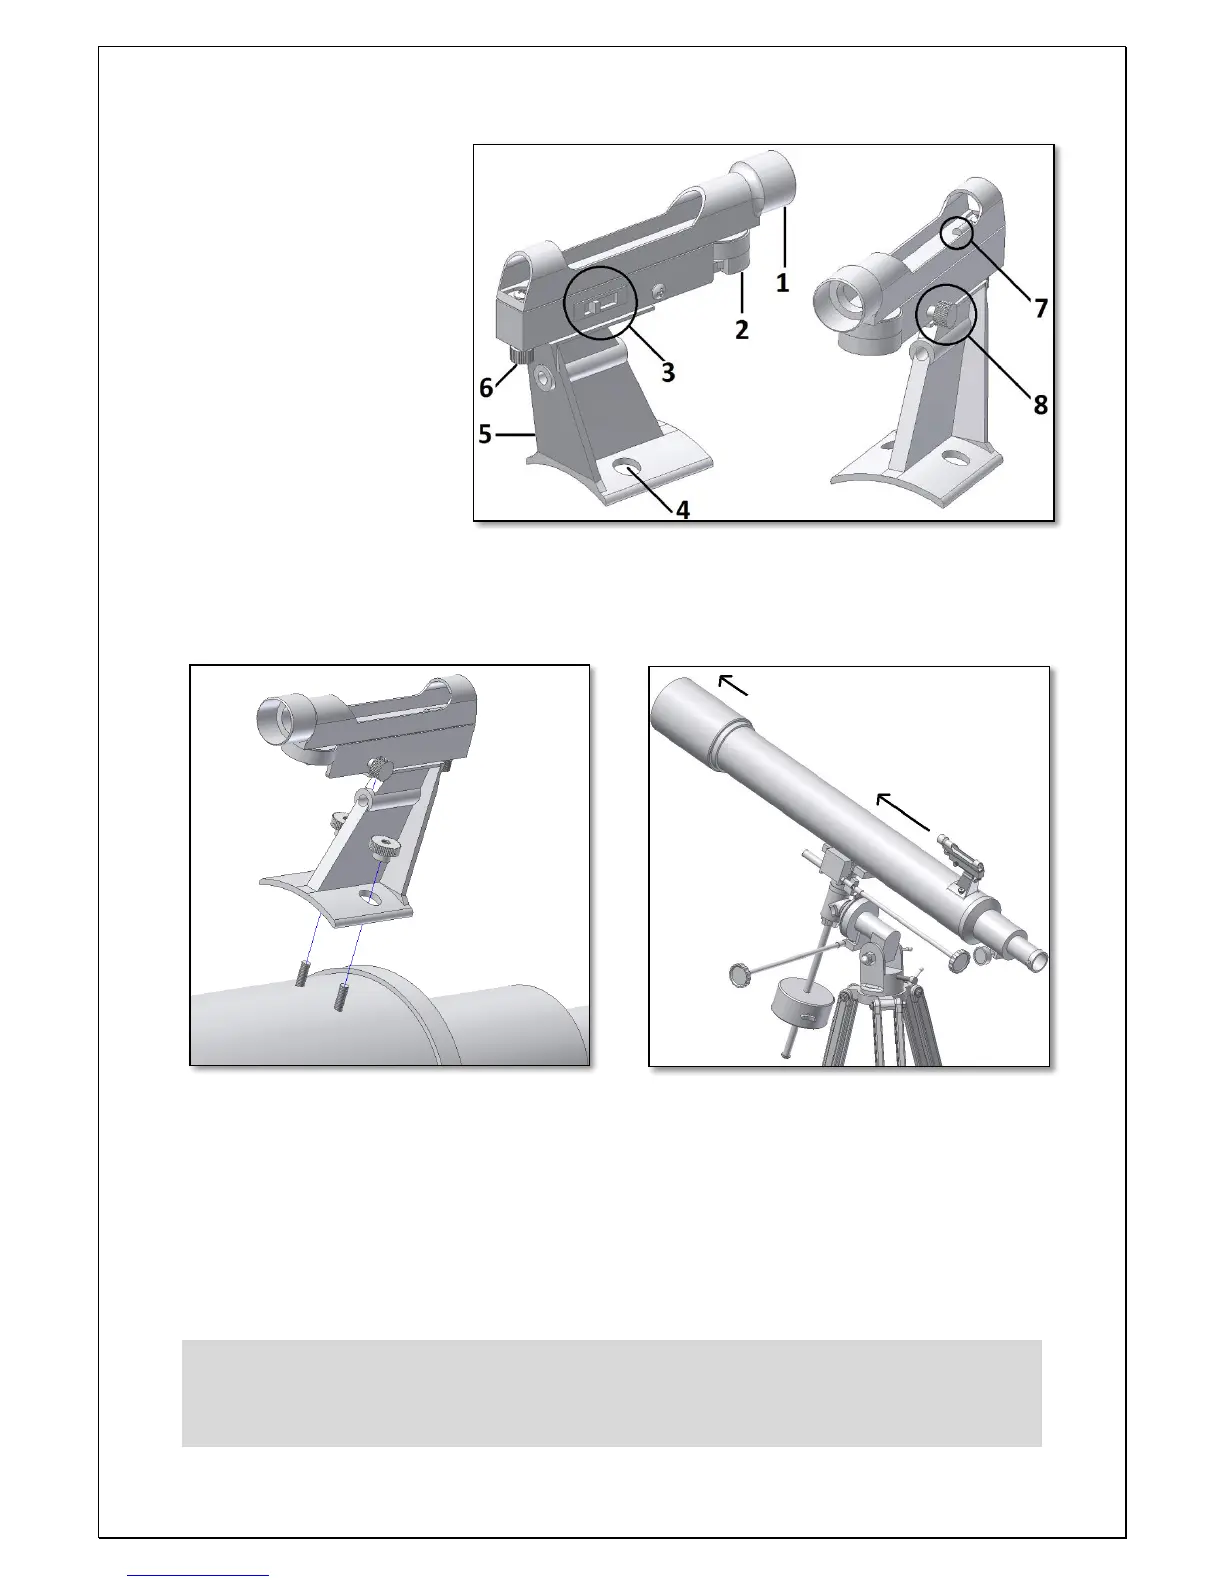
1. Knowing your
finderscope.
1- Aperture; 5- Finder bracket;
2- Battery compartment; 6- Finder’s altitude adjust. thumbscrew;
3- LED swtich; 7- LED beam exit;
4- Finderscope to telescope connection; 8- Finder’s azimuth adjustment.thumbscrew;
The finder scope is used as an aiming device. It
projects a tiny red dot on the transparent screen – figure 25. The finder should be aligned with the
telescope. When pointing the led finder the area around the red point should match the one seen
through the telescope’s eyepiece. Use the side switch to turn the led on/off or to increase its
brightness. There are 3 positions: 0, 1, 2. Position 0 is off – the led is off. When not in use please
switch it always to the off position to increase battery’s life. Position 1, led is on at its dimmest
brightness. Position 2, led is on at its brightest position. Depending on the sky quality choose
position 1 or 2 (more light pollution 1 is better than 2)