EZ1
TM
DRAINAGE SERIES
EZ1
TM
FLOOR DRAIN INSTALLATION INSTRUCTIONS
Zurn Industries, LLC | Specification Drainage Operation
1801 Pittsburgh Avenue, Erie, PA U.S.A. 16502 · Ph. 855-663-9876, Fax 814-454-7929
In Canada | Zurn Industries Limited
3544 Nashua Drive, Mississauga, Ontario L4V 1L2 · Ph. 905-405-8272, Fax 905-405-1292
www.zur n.com
Rev. C
Date: 02/27/2018
C.N. No. 139680
Form No. FD97
Page 3 of 6
®
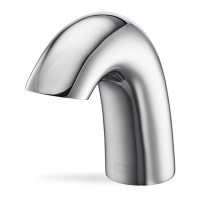
7. Hit the top of the rough-in cover with a pair of adjustable
pliers to loosen bond with the concrete. Continue hitting
the rough-in cover until a visible crack forms around the
entire circumference of the rough-in cover. Rough-in cover
should appear loose (separtates up from concrete). See
Fig. 7
Note: Be careful to not hit the finished concrete floor
as it will chip/damage the finish. Only hit the plastic
rough-in cover. Do not use excessive force.
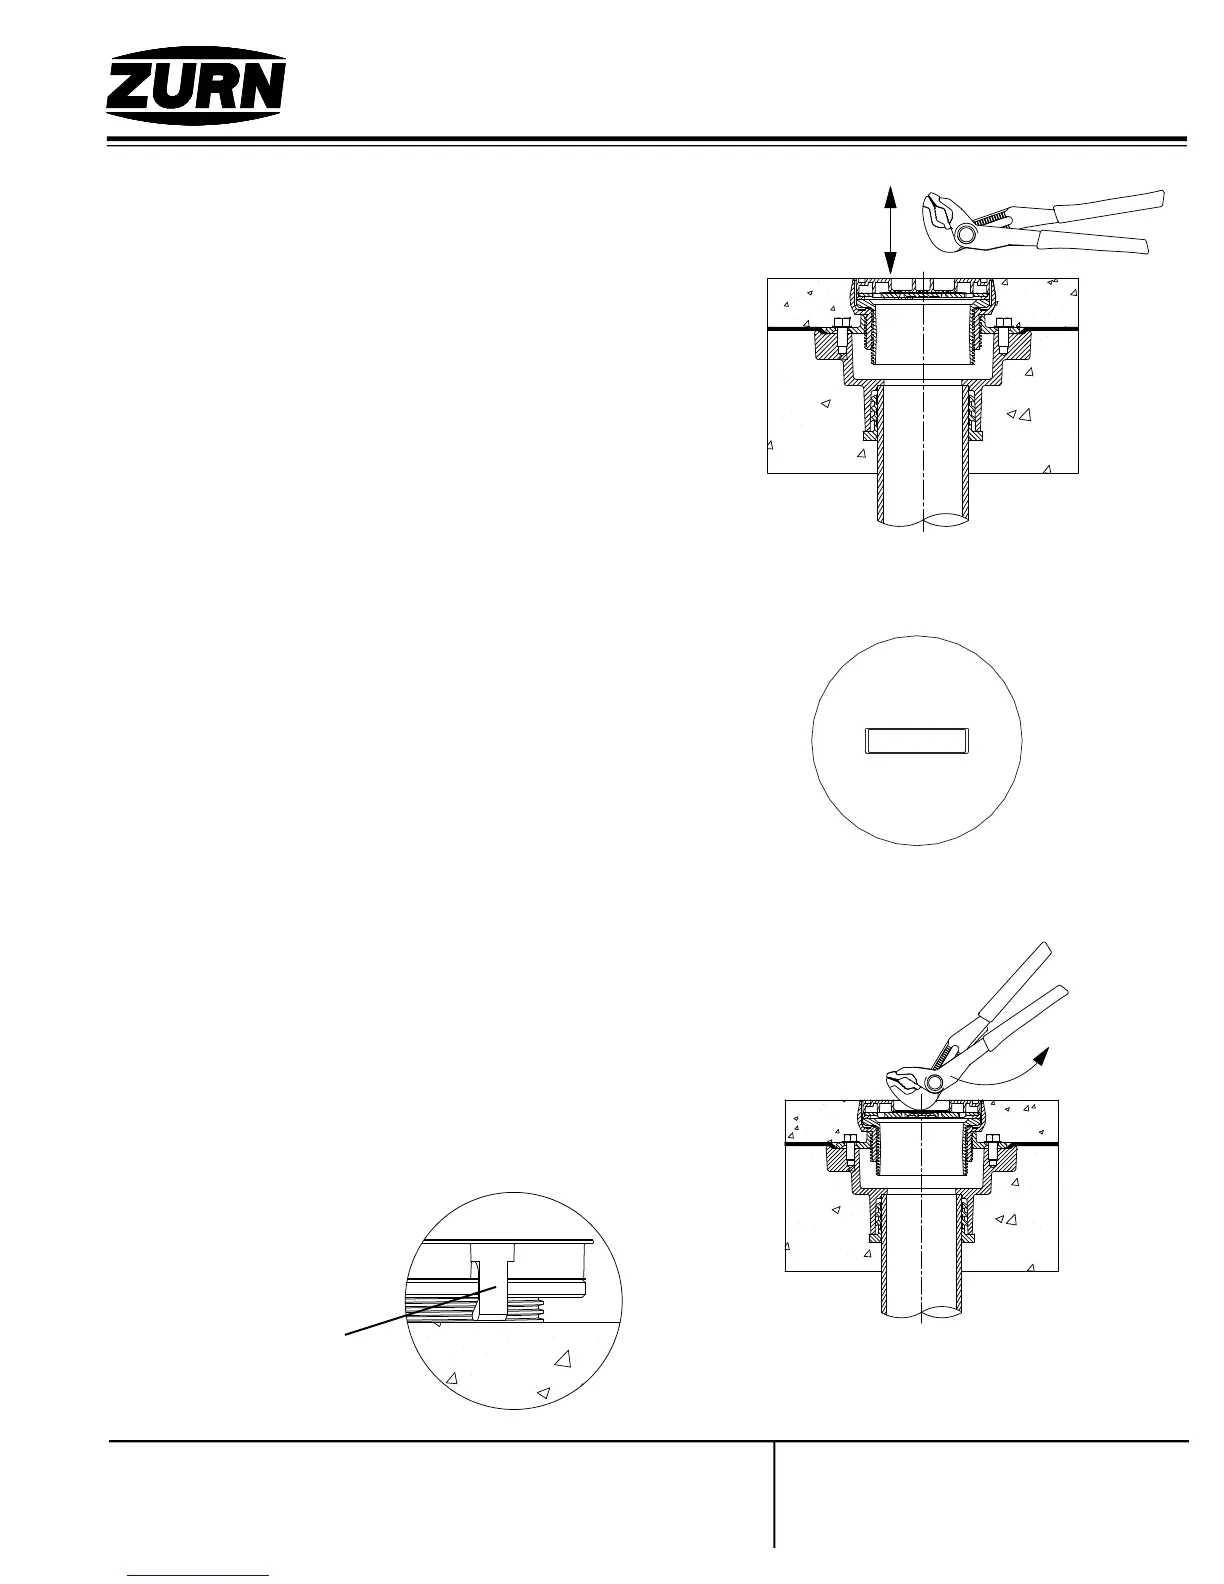
8. Break the protective label in the center of the rough-in cover
to expose a slot. See Fig. 8
Note: Do not remove entire label. Longer screws and
adjustment shims are packaged under the label.
9. Placing the back of the adjustable pliers head in the slot,
unscrew the rough-in cover assembly counterclockwise until
the tabs of the rough-in cover are above the concrete.
See Fig. 9
Fig. 7
Fig. 8
Fig. 9
Above the
concrete
 Loading...