EasyManua.ls Logo

ZyXEL Communications GS1900-24HP User Manual

ZyXEL Communications GS1900-24HP
263 pages
To Next Page IconTo Next Page
Page #1 background imageLoading...
Page #1 background image
Default Login Details
User’s Guide
GS1900 Series
GbE Smart Managed Switch
Copyright © 2021 Zyxel Communications Corporation
IP Address http://192.168.1.1 (In-band ports)
User Name admin
Password 1234
Version 2.60 Edition 2, 02/2021

Table of Contents

Question and Answer IconNeed help?

Do you have a question about the ZyXEL Communications GS1900-24HP and is the answer not in the manual?

ZyXEL Communications GS1900-24HP Specifications

General IconGeneral
ModelGS1900-24HP
PoEYes
PoE Power Budget370W
PoE StandardIEEE 802.3af/at
MAC Address Table8K
Jumbo Frame9KB
VLAN SupportYes
Quality of Service (QoS)Yes
Power SupplyInternal
Weight3.5 kg
Operating Humidity10% to 90% (non-condensing)
TypeManaged Switch
LayerLayer 2
FeaturesIGMP Snooping
ManagementWeb-based
Dimensions (W x D x H)440 x 44 x mm
Operating Temperature0°C to 40°C
Ports24 x 10/100/1000BASE-T ports

Summary

Chapter 1 Getting to Know Your Switch

1.3 Ways to Manage the Switch

1.4 Good Habits for Managing the Switch

Chapter 2 Hardware Installation and Connection

2.1 Safety Precautions

Outlines safety measures to observe before using the switch, including clearance and handling.

2.3 Desktop Installation Procedure

2.4 Wall Mounting

2.5 Rack Mounting

2.5.2 Attaching the Mounting Brackets to the Switch

Chapter 3 Hardware Overview

3.1 Front Panel Connections

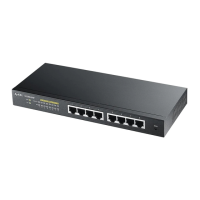
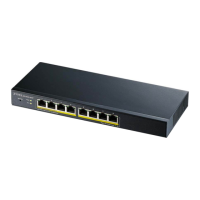
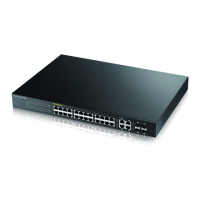
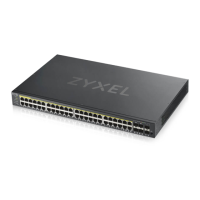
Shows figures of the front panels of various GS1900 switch models.

3.1.1 Ethernet Ports

3.1.2 SFP Slots

3.1.2.1 Transceiver Installation

Details the steps for installing an SFP transceiver, including ESD precautions.

3.2 Rear Panel

3.2.1 Grounding

Explains the importance of grounding for safety and how to properly ground the switch.

3.2.2 Power Connection

3.3 LEDs

3.4 Resetting the Switch

3.5 Resetting the Switch

Chapter 4 ZON Utility

4.1 Zyxel One Network (ZON) Utility Screen

Introduces ZON Utility as a program for deploying and managing networks efficiently.

4.1.1 Requirements

4.1.2 Run the ZON Utility

Guides users on how to launch the ZON Utility and navigate its initial screens.

Chapter 5 Web Configurator

5.2 Access

Provides instructions on how to access the Web Configurator via a web browser.

5.3 Navigating the Web Configurator

Monitor Menu

Configuration Menu

System

Allows configuration of general identification information and time settings for the switch.

Port

Enables configuration of port settings like speed, flow control, and priority.

VLAN

Allows configuration of VLAN, guest VLAN, and voice VLAN settings.

Security

Provides access to configure port security, 802.1X, and DoS settings.

AAA

Management

Maintenance Menu

Firmware

Manages firmware upload and dual image information for the switch.

Configuration

Manages backup, restore, and factory default configuration files for the switch.

Diagnostics

Provides tools to view system logs and perform network tests like port tests and ping tests.

Reboot

Chapter 6 Getting Start

6.2 Getting Start

Describes the initial screen seen after login, displaying device info and status in widgets.

6.2.1 Wizard

Start up

Covers initial setup steps like IP/DNS configuration, user name/password, and viewing results.

VLAN

QoS

Link Aggregation

CHAPTER 7 Monitor: System

7.2 IP

Details the need for an IP address for network management and covers IPv4 and IPv6 settings.

7.2.1 IPv4

Guides on viewing the switch's IPv4 interface status and management IP addresses.

7.2.2 IPv6

CHAPTER 8 Monitor: Port

8.2 Port

Allows viewing switch port settings, including status, port counters, and bandwidth utilization.

8.3 PoE

Details Power over Ethernet (PoE) functionality and related screens, available on specific models.

8.4 Bandwidth Management

Shows how to view bandwidth management settings for incoming and outgoing traffic flows on ports.

8.5 Storm Control

CHAPTER 9 Monitor: VLAN

9.2 VLAN

Allows viewing switch VLAN settings, including VLAN, port, and VLAN port configurations.

9.3 Guest VLAN

Details how to configure a guest VLAN for providing limited network access to unauthenticated users.

9.4 Voice VLAN

CHAPTER 10 Monitor: MAC Table

10.2 MAC Table

Allows viewing static MAC addresses and MAC table settings, including dynamic and static MAC addresses.

CHAPTER 11 Monitor: Link Aggregation

11.2 Link Aggregation

Allows viewing switch link aggregation status, supporting both static and dynamic modes.

CHAPTER 12 Monitor: Loop Guard

12.2 Loop Guard

Allows viewing switch loop guard status and configuring ports to shut down if loops are detected.

CHAPTER 13 Monitor: Multicast

13.2 IGMP

Allows viewing switch multicast features, including IGMP VLAN, statistics, group, profile, and throttling.

CHAPTER 14 Monitor: Spanning Tree

14.2 Spanning Tree

Explains how STP prevents network loops and provides backup links.

14.2.1 CIST

14.2.2 CIST Port

Allows viewing the switch's spanning tree CIST port status and parameters.

14.2.3 MST

14.2.4 MST Port

Allows viewing the switch's spanning tree MST port status and parameters.

14.2.5 STP Statistics

CHAPTER 15 Monitor: LLDP

15.2 LLDP

Allows viewing and configuring LLDP port settings, including statistics, remote information, and overloading.

15.2.1 Statistics

15.2.2 Remote Information

Allows viewing LLDP remote device information, such as chassis ID, port ID, and system name.

15.2.3 Overloading

CHAPTER 16 Monitor: Security

16.2 Port Security

Configures port security to allow only authorized MAC addresses to pass through a port.

16.3 802.1X

Details 802.1X security settings, including port status and authenticated hosts.

16.3.1 Port

16.3.2 Authenticated Hosts

Displays the status of 802.1x authenticated hosts, including username, port, and authentication method.

CHAPTER 17 Monitor: Management

17.2 Syslog

Configures Syslog management, allowing selection of logging targets and viewing system logs.

17.3 Error Disable

CHAPTER 18 Configuration: System

18.2 IP

Details the need for an IP address for network management and covers IPv4 and IPv6 settings.

18.2.1 The IPv4 Screen

Guides on viewing the switch's IPv4 interface status and management IP addresses.

18.2.2 The IPv6 Screen

18.3 Time

Covers system time and SNTP server settings for accurate time synchronization.

18.3.1 The System Time Screen

18.3.2 The SNTP Server Screen

CHAPTER 19 Configuration: Port

19.2 Port

Allows viewing and editing general port settings, including status, speed, and duplex.

19.2.1 The Port Screen

19.2.2 The Port Edit Screen

Allows configuring switch port settings like state, speed, duplex, and flow control.

19.3 EEE

19.4 PoE

Details Power over Ethernet (PoE) support and global settings for power management.

19.4.1 The Global Screen

19.4.2 The Port Screen

Guides on viewing switch port PoE settings and selecting ports for configuration.

19.4.3 The PoE Edit Screen

19.5 Bandwidth Management

Defines maximum allowable bandwidth for incoming and outgoing traffic flows on ports.

19.5.1 The Bandwidth Control Screen

19.6 Storm Control

Explains how storm control limits broadcast, multicast, and DLF packets to reduce network traffic.

19.6.1 The Port Screen

19.6.2 The Port Edit Screen

Allows configuring Storm Control settings for individual ports, including action and limits.

CHAPTER 20 Configuration: VLAN

20.2 VLAN

Allows viewing and configuring VLAN settings, including VLAN, port, and VLAN port configurations.

20.2.1 The VLAN Screen

20.2.2 The VLAN Add Screen

Allows adding new VLAN entries by specifying VLAN IDs and names.

20.2.3 The Port Screen

20.2.4 The Port Edit Screen

Allows configuring port settings for VLANs, including PVID, accepted frame type, and VLAN trunking.

20.2.5 The VLAN Port Screen

20.3 Guest VLAN

20.3.1 The Global Screen

Allows configuring global Guest VLAN settings, including state and guest VLAN ID.

20.3.2 The Port Screen

20.3.3 The Port Edit Screen

Allows configuring guest VLAN port settings, including state and edit options.

20.4.1 The Global Screen

20.4.4 The Port Screen

CHAPTER 21 Configuration: MAC Table

21.2.1 The Static Screen

21.2.4 The Filtering MAC Add Screen

CHAPTER 22 Configuration: Link Aggregation

22.2.1 The Global Screen

22.2.3 The LAG Add Screen

22.2.5 The LAG Port Edit Screen

22.2.7 The LACP Port Edit Screen

CHAPTER 23 Configuration: Loop Guard

Provides information on Loop Guard, designed to protect against network loops on the edge.

23.2.1 The Global Screen

23.2.3 The Port Edit Screen

CHAPTER 24 Configuration: Mirror

24.2.1 The Mirror Screen

CHAPTER 25 Configuration: Time Range Group

25.2.1 The Time Range Group Screen

25.2.3 The Time Range Edit Screen

CHAPTER 26 Configuration: Multicast

26.2.1 The Global Screen

26.2.3 The Edit IGMP Screen

26.2.5 The Add or Edit Router Port Screen

26.2.7 The Add or Edit Profile Screen

26.2.9 The Edit Throttling Screen

CHAPTER 27 Configuration: Spanning Tree

27.2.1 The Global Screen

27.2.3 The STP Port Edit Screen

27.2.4 The CIST Screen

27.2.6 The CIST Port Edit Screen

27.2.8 The Add or Edit MST Screen

27.2.10 The MST Port Edit Screen

CHAPTER 28 Configuration: LLDP

28.2.1 The Global Screen

28.2.3 The Port Edit Screen

28.2.5 The Local Information Edit Screen

28.2.7 The MED Network Policy Add or Edit Screen

28.2.9 The MED Port Edit Screen

CHAPTER 29 Configuration: QoS

29.2.1 The Port Screen

29.2.3 The Queue Screen

29.2.5 The DSCP Mapping Screen

29.3 Trust Mode

29.3.3 The Trust Mode Edit Screen

CHAPTER 30 Configuration: Security

30.2.1 The Global Screen

30.2.3 The Port Edit Screen

30.3.1 The Protected Port Screen

30.4 802.1X

30.4.2 The Port Screen

30.5 DoS

30.5.2 The Port Screen

CHAPTER 31 Configuration: AAA

31.2.1 The Auth Method Screen

31.3 RADIUS

31.3.2 The RADIUS Add or Edit Screen

31.4.1 The TACACS+ Screen

CHAPTER 32 Configuration: Management

32.2.1 The Global Screen

32.2.3 The Local Add or Edit Screen

32.3.1 The Global Screen

32.3.3 The Community Add Screen

32.3.5 The Group Add Screen

32.3.7 The User Add Screen

32.3.9 The Trap Destination Screen

32.3.10 The Trap Destination Add Screen

32.4.1 The Error Disable d Screen

32.5.1 The HTTP Screen

32.6 Telnet/ SSH

32.7 Users

32.8 Remote Access Control

CHAPTER 33 Maintenance

33.3 Backup a Configuration File

33.3.3 Backup configuration or log files to your computer

33.4 Restore a Configuration File

Allows restoring a previously saved device configuration from a server or computer.

33.4.3 Restore the configuration from a file on your computer

33.5.1 Overview

33.6 Reset to Factory Defaults

Allows resetting the switch to its original factory settings.

33.6.1 Overview

33.6.2 Reset the Switch to Factory Defaults

Provides steps to reset the switch to factory defaults using the Restore button.

33.7 Network Diagnostics

33.7.3 IPv6 Ping Test

33.8 Reboot

CHAPTER 34 Troubleshooting

34.3 Switch Configuration

Safety Warnings

Related product manuals