3DGence DOUBLE P255 - maintenance activities | version 07.2021
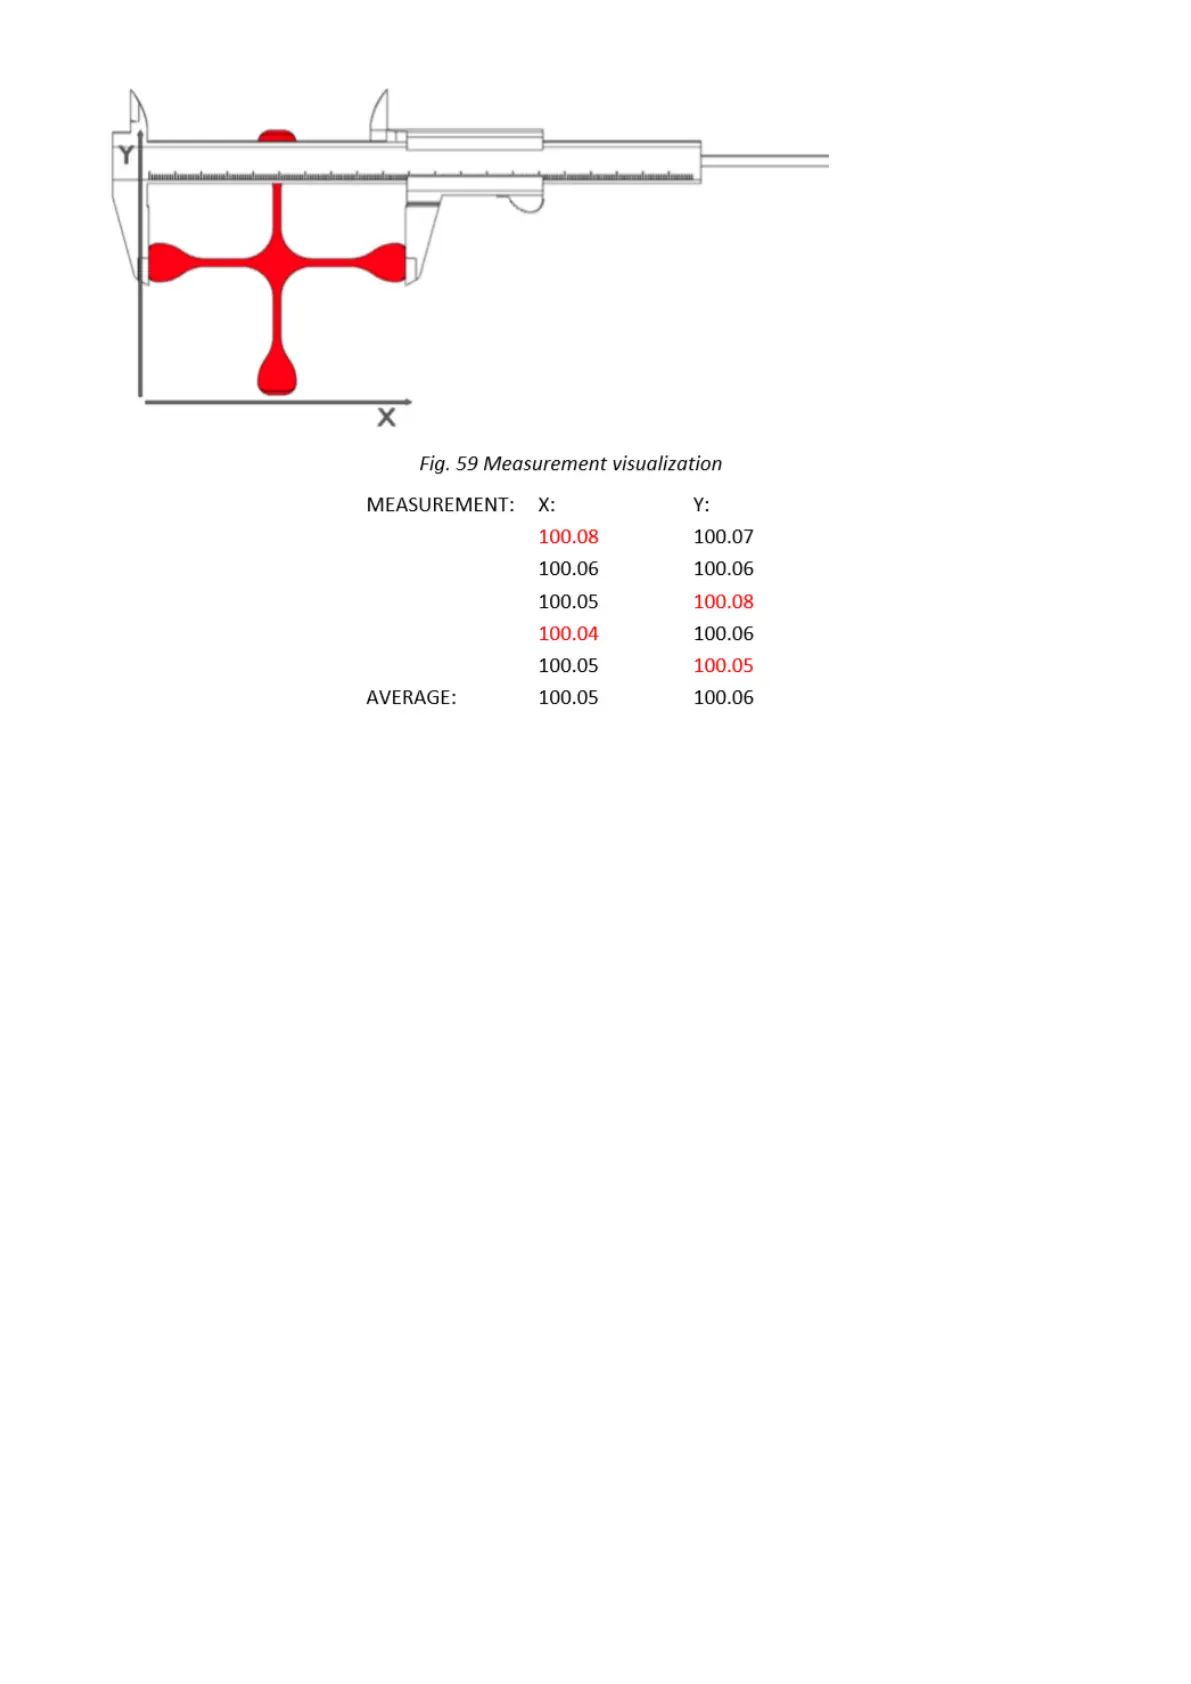
Fig. 60 Table of measurements for X axis and Y axis
The result of such action will be the basis for further operations:
1. Go to MENU → ADVANCED → XY CALIB. (fig. 25).
2. Choose ORIGIN X and use –/+ keys to enter the value of the dimension given to the model in X axis. In the
case of Dimmension_Calibration.stl file downloaded from the website, this value is 100,00 mm.
3. Choose PRINT X and use –/+ keys to enter the value measured on the cross in X axis.
4. Choose ORIGIN Y and use –/+ keys to enter the value of the dimension given to the model in Y axis. In the
case of Dimmension_Calibration.stl file downloaded from the website, this value is 100,00 mm.
5. Choose PRINT Y and use –/+ keys to enter the value measured on the cross in Y axis.
6. Confirm the changes with the Save key. Additionally, in order to verify correct axis calibration, you can print
the Dimmension_Calibration.stl model downloaded from the website once again and measure it. Thanks to
this procedure, the next printout of the material for which calibration was performed will be printed with
compensation of material shrinkage along X and Y axes.