5
www.3GCardio.com
3G
CARDIO
®
拆箱 & 組裝
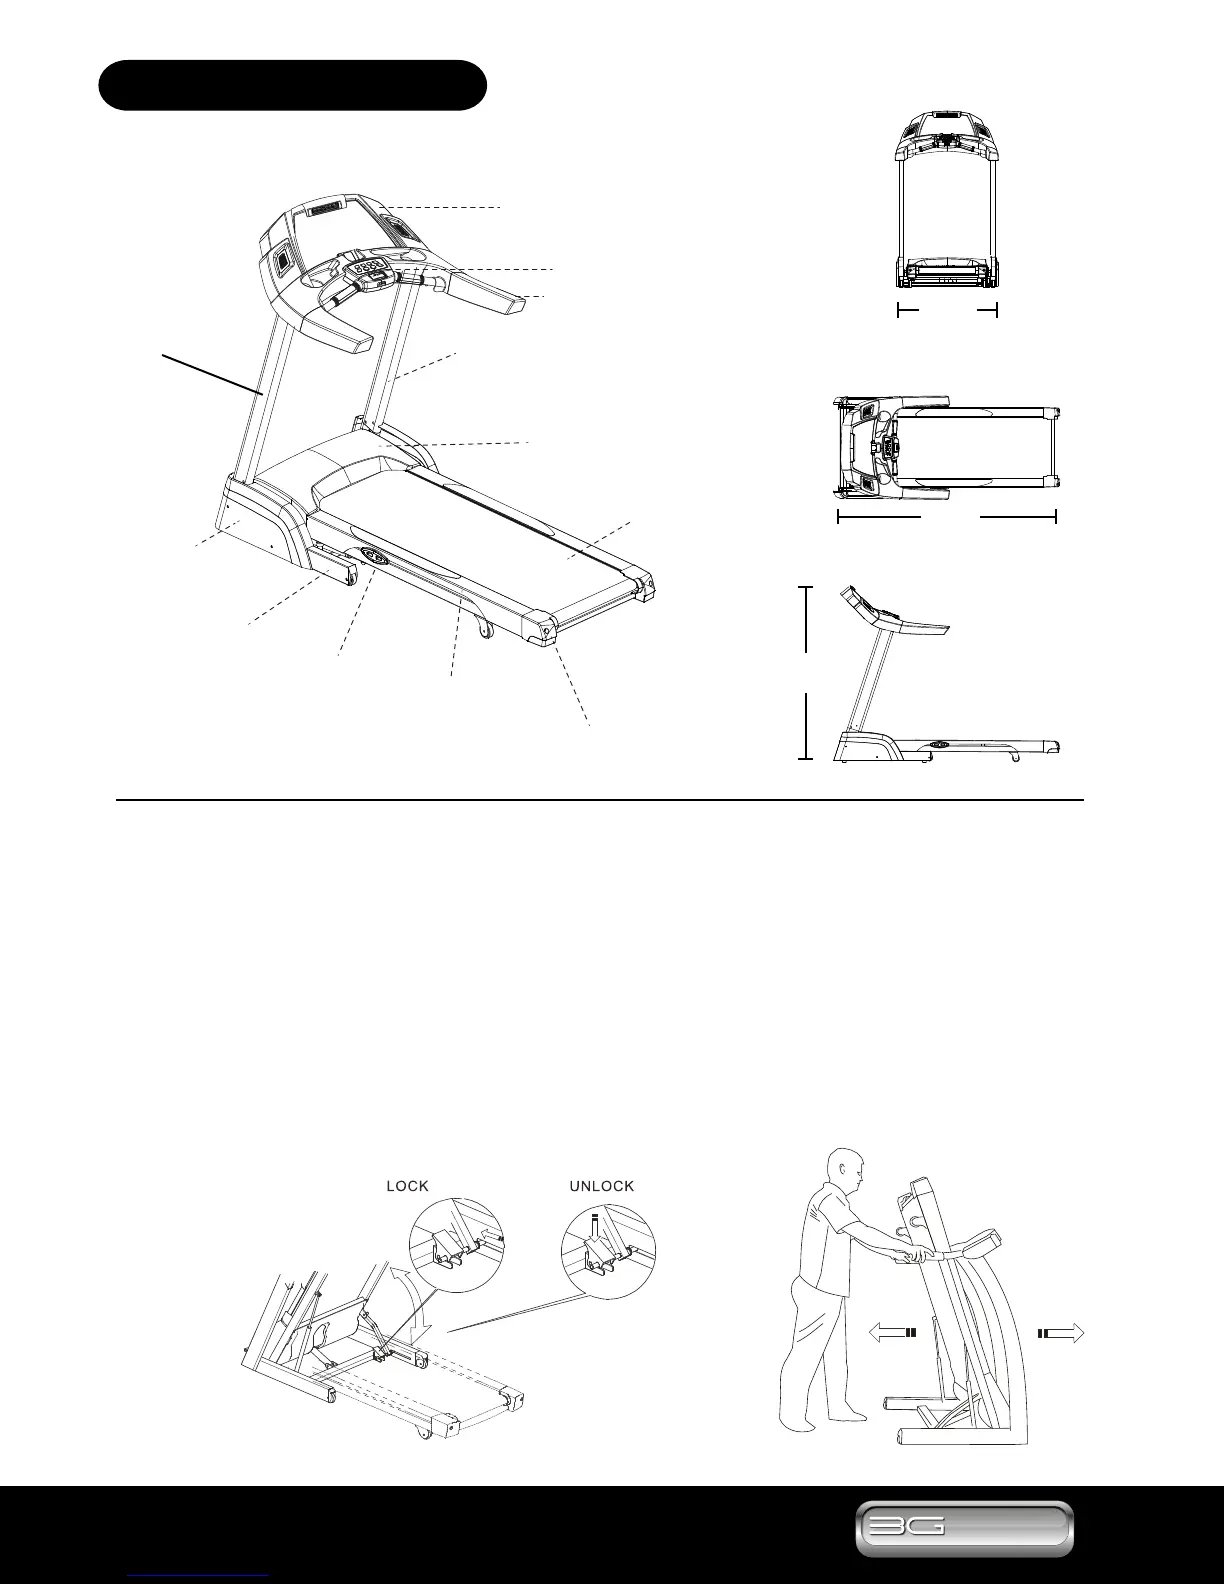
ASSEMBLY DRAWING
5
Console set
Safe key
Handle ber
Instructions for moving Treadmill:
This treadmill is designed with wheels for easier movement.
1. Make sure the treadmill elevation is at the lowest level of 0%
2. Turn off treadmill, unplug the power cord from the wall and from the base of the treadmill. Failure to do so will result in
damage to the power cord and power inlet.
3. Fold up treadmill and make sure the treadmill deck LOCKS into position. Once the treadmill is locked into a folded “up”
position, facing the treadmill, hold onto the handlebars to move the treadmill forward or backwards. Be careful not to “drag”
the treadmill as it may damage your ooring. If your treadmill is not easily rolling, inspect underneath the treadmill frame to
determine if the rubber oor levelers are touching the oor. If the oor levelers are touching the oor, you may need to adjust
them up higher to allow the treadmill to move easier.
4. Once the treadmill is moved into the desired position, unfold the treadmill by releasing the lock (as shown in the illustration)
and allow the treadmill deck to lower to the ground. Once unfolded, plug in the treadmill, turn on the power toggle switch and
you are ready to go. IMPORTANT: make sure that the treadmill is in a safe, secure and level position.
拆箱 & 組裝
ASSEMBLY DRAWING
5
Console set
Safe key
Handle ber
ASSEMBLY INSTRUCTIONS
Upper Console
Safety Key
Handle Bar
Console Mast
(Right Up-Right Tube)
Console Mast
(Left Up-Right Tube)
Motor Cover
Running Belt
Rear Roller
Side Rails
Rubber
Cushion
Base Frame
Side Protective
Cover
76”
34.5”
58”