EasyManua.ls Logo

3M CFS717 User Manual

3M CFS717
2 pages
To Next Page IconTo Next Page
Page #1 background imageLoading...
Page #1 background image
3M Water Filtration Products Models CFS717 &
CFS717LS come with step-by-step instructions to con-
nect the CFS717 to your incoming cold water line.
You can count on your 3M Water FIltration Products
Models CFS717 & CFS717LS to reduce the problem of
lime and scaling, and extend the life of your equipment.
And each filter gives you up to six months of great-tast-
ing water. After 6 months, just replace the filter. So
start enjoying tastier beverages today.
INSTALLATION PRECAUTIONS
Do not install on line pressure above 125 psi
(8.62 Bar).
CAUTION: To reduce the risks associated with
water leakage, which, if not avoided, may result
in property damage check with your plumb-
ing professional to verify that water pressure is
less than 125 psi.
Do not use wicking or pipe dope sealer for fitting
connections into head of filter.
Protect from freezing. Drain filter when room tem-
perature drops below 32°(0°C).
Activated carbon filters are not intended for use
where water is microbiologically unsafe or with wa-
ter of unknown quality.
Do not install in direct sunlight.
Installation must comply with existing state or local
plumbing codes.
,
,
,
,
INSTALLATION
& OPERATING
INSTRUCTIONS
FOR
3M
Water Filtration Products
CFS717 & CFS717LS
WATER FILTER
PROCEDURE FOR INSTALLING THE FILTER WITH 1/4” COMPRESSED FITTINGS
Read all instructions carefully before beginning to install your filter.
IMPORTANT: Failure to follow instructions may result in voidance of warranty.
For use on 1/4” copper or plastic tubing.
1 Shut-off your
water source
2 Locate an easily accessible section of tubing.
Shut-off valve must be on inlet side of filter.
3 Cut and remove a 6” section of
tubing making sure ends are cut
square.
4 Unscrew nuts from compression
fittings (not included) and slip
ferrules and nuts over tubing
ends. If your tubing is plastic,
install the tube inserts
into ends of tube.
Flow
Filter
Inlet
Note: 1/4” NPT and 1/4” compression fittings (not included), other appropriate fittings may be required for installation.
,
,
Question and Answer IconNeed help?

Do you have a question about the 3M CFS717 and is the answer not in the manual?

3M CFS717 Specifications

General IconGeneral
Brand3M
ModelCFS717
CategoryWater Filtration Systems
LanguageEnglish

Summary

Installation Precautions

Pressure Limit

Do not install on line pressure above 125 psi (8.62 Bar). Verify pressure is less than 125 psi.

Sealer and Fitting Instructions

Do not use wicking or pipe dope sealer for fittings. Tighten fittings snuggly, but do not over tighten.

Environmental Protection

Protect from freezing by draining filter when room temperature drops below 32°F (0°C). Do not install in direct sunlight.

Water Quality Limitations

Activated carbon filters are not for use where water is microbiologically unsafe or of unknown quality.

Plumbing Code Compliance

Installation must comply with existing state or local plumbing codes.

Filter Installation Procedure

Shut-off and Tubing Preparation

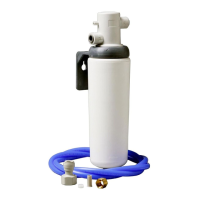
Shut off the water source and locate an accessible section of tubing. Cut and remove a 6" section of tubing square.

Fitting Assembly

Prepare tubing ends, attach ferrules and nuts, and thread fittings into the filter body. Hand tighten nuts onto fittings.

Initial Flush and Connection

Turn on water supply to flush filter. Connect outlet port to equipment. Tighten nuts or fittings if leaks occur.

Mounting and Securing Filter

Use plastic mounts and straps to secure the filter, especially for non-rigid tubing, ensuring correct filter positioning.

Specifications

CFS717 Model Performance

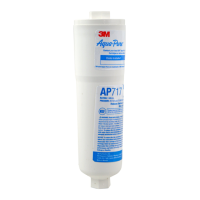
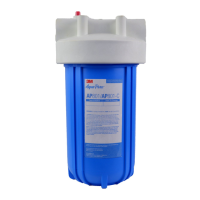
Details service flow rate, service life, maximum pressure, and maximum temperature for the CFS717 model.

Limited Warranty

Warranty Coverage and Claims

Details warranty period for product and cartridge, exclusions, and procedure for obtaining warranty service.

Related product manuals