Integrating the EX II Controllers 13
3M Touch Systems Proprietary Information
• (EX II 7720SC only) Internal power +5V to +12 V DC though the 2-pin power input
connector pin 2 (+5V to 12 V) and pin 1 (RTN). A square pin indicator on the bottom
of the board marks pin 1.
• Internal power (+5V to +12V DC) through a custom serial cable configuration.
• External power (+5 V DC) from a wall-mount power supply.
Note: To avoid possible damage to one or both of the power supplies, do not supply
both internal power and external power to the controller. Power from two sources could
cause damage.
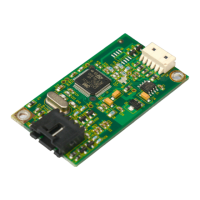
Using an Internal Power Supply (+5V to +12V) to JP3
Provide power directly to the controller using JP3 (Molex 22-05-3021). Use a mating 2-
pin connector and connect Pin 2 to power (between +5V and +12V) and Pin 1 to the
return. (Mating connector is the Molex housing 22-01-3027 with 08-50-0114 contacts).
Using a Custom Serial Cable Design
When creating a custom serial cable connection, you can provide power to the controller
through the mating Molex connector: (refer to Table 12 for more information on actual
cable connections).
1. Obtain a 7-pin Molex connector 51004-0700.
2. Attach power and ground to the connector, (Pin 6: +5V to +12V, Pin 7: Ground).
Using an External Wall-Mount Power Supply
If you are using a standard 3M Touch Systems RS-232 serial cable (P/N 7310101),
consult your applications engineer for power supply specifications.
Mounting the Touch Screen
There are several methods for mounting the touch screen depending on your application
(CRT displays or flat panel displays, each in a variety of sizes). If you need instructions
or recommendations from 3M Touch Systems on how to incorporate a touch screen into
your design, refer to the ClearTek II Touch Screen Integration Guide (P/N 19-278v02).
All 3M Touch Systems documentation is available from the corporate website at
www.3Mtouch.com
.
Turning On Your System
Before you turn on your custom system, ensure that all cables are connected properly and
that the controller is properly mounted. Be sure to tighten all cable connector screws.
To start up your system:
1. Turn on your monitor and computer.
2. Adjust the contrast and brightness to suit your personal preference and working
environment.
 Loading...