3
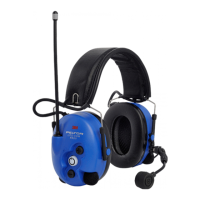
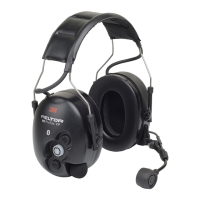
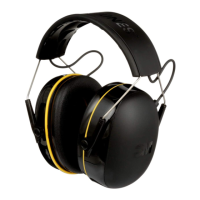
INSTRUCTIONS FOR USE/SETTINGS
ON/OFF/MODE
Switch the Lite-Com Pro II on and off by pressing and holding the ON/OFF/MODE button for approximately two seconds. A voice
message conrms that the unit has been switched on or off. A slowly ashing LED on the button shows that the Lite-Com Pro II is
switched on. When the unit is transmitting or receiving, the LED ashes faster.
Press ON/OFF/MODE (Θ) briey to move through the menu. Press the button slowly, one step at a time,
to conrm each step in a voice message. If you press the button faster, you will only receive voice
conrmation of the function where you stop.
Current settings are stored when the unit is switched off.
SURROUND (ambient sound level)
When the Lite-Com Pro II is used as an “active hearing protector”, the amplication of ambient sound is adjusted by pressing the UP
(+) and DOWN (–) buttons. The change is conrmed with a voice message. There are normally 5 sound levels and an off mode. On
level 5 the maximum sound pressure is reduced to approximately 82 dB, which allows a maximum exposure time of 8 hours to protect
damaging your hearing.
Amplication of ambient sound can also be switched off by reducing the volume to its lowest position using the DOWN (–) button and
holding the button for about two seconds. A voice message “surround off” conrms that the function has been switched off.
WARNING! When this function is switched off the ambient sound may become inaudible by the hearing protector! To re-activate
the function, press UP (+) and the Lite-Com Pro II again works as an “active hearing protector” that limits the sound level.
Note: With special software there is a possibility to further increase the amplication of the ambient sound. Two more
sound levels can be added, where level 6 is approximately 87 dB and level 7 is approximately 89 dB.
WARNING! The exposure time should be reduced accordingly to protect damaging your hearing!
VOLUME
Use the UP (+) and DOWN (–) buttons to set the incoming volume from the built-in communication radio. A voice message conrms
the new setting each time you press the button. There are normally 5 volume steps and an off mode. To access off mode, press and
hold the DOWN (–) button for two seconds when at the lowest volume. A voice message conrms “volume off”.
WARNING! No radio communication is audible in the off mode.
To switch the radio back on, press the UP (+) button. You start receiving at the lowest volume level.
Note: With special software there is a possibility to further increase the amplication of the volume. Two more sound levels can be
added, where level 6 is approximately 87 dB and level 7 is approximately 89 dB.
WARNING! The exposure time should be reduced accordingly to protect damaging your hearing!
CHANNEL
Use the UP (+) and DOWN (–) buttons to select a channel (radio frequency) for the communication radio. A voice message conrms
the new setting each time you press the button.
VOX (Voice-operated transmission)
“VOX” means that the Lite-Com radio transmits when sounds of a certain volume reach the microphone
– hands-free transmission.
Use the UP (+) and DOWN (–) buttons to set the sensitivity for voice-operated transmission. A voice
message conrms the new setting each time you press the button. There are ve VOX levels and an
off mode. To access off mode, press and hold the DOWN (–) button for two seconds. A voice message
conrms “volume off”. If you want to transmit, you must use the PTT button. To switch VOX on again,
press the UP (+) button.
NOTICE! For maximum noise cancelling, the speech microphone of the headset should be positioned
very close to your mouth (3 - 5 mm)!
The use of a wind shield is also recommended (see “ACCESSORIES AND SPARE PARTS” below).
SQUELCH (hiss reduction)
“Squelch” means that the background hiss in the earphones is prevented when the incoming signal is below a set level. When someone
speaks, the amplication returns instantly to the selected level.
 Loading...