4
Use the UP (+) and DOWN (–) buttons to set the squelch level. A voice message conrms the new setting each time you press the
button. There are ve squelch levels and an off mode. Level 1 is most sensitive and opens the receiver at the lowest incoming signal.
To access off mode, press and hold the DOWN (–) button for two seconds in volume step one. A voice message conrms “squelch off”.
To switch squelch on again, press the UP (+) button.
SELECTIVE SQUELCH (Sub tones)
“Selective squelch” means that a certain tone or code must be transmitted along with the speech in order to “open” the receiver. This
allows multiple groups of users to use the same channel without listening to the other groups.
Notice! Any other radio communication, which does not include the selected tone or code, will be blocked by the lter!
Use the UP (+) and DOWN (–) buttons to set the programmed sub-tone. A voice message conrms the new setting each time you
press the button. If the function is switched to OFF, all communication on the channel can be monitored.
When BCLO or BTLO (busy channel or tone lockout) is enabled, VOX operation is not possible if the channel is already in use.
A warning tone may be heard in the speaker, when BCLO or BTLO is active (This function can be disabled). This prevents unwanted
interference with other muted communication on the actual channel.
POWER (output)
There are three output power levels: High, medium and low. Use the UP (+) and DOWN (–) buttons to
select the output power level. A voice message conrms the new setting each time you press the button.
Medium power is recommend, where possible.
NOTICE: The operating time depends to a great extent on the condition of the ACK08 and how the Lite-Com Pro II is used.
PTT (Push-to-talk)
Press PTT to transmit manually using the Lite-Com Pro II radio.
Notes:
1. Switch voice control (VOX) on and off by pressing the button briey twice. A voice message, “VOX on” or “VOX off”
conrms the setting.
2. The Lite-Com Pro II has BCLO and BTLO (busy channel and busy tone lockout) to block transmissions on busy channels.
See above “Selective squelch”.
ASSEMBLY / CONFIGURATION
BATTERIES
Notice!
When using the Lite-Com Pro II in environments with a risk for explosions, 3M Peltor ACK08 must be used!
Never change or charge ACK08 in an explosive environment!
Only the 3M Peltor ACK08 batteries are currently approved for use with the Peltor Lite-Com Pro II in
explosive environments:
The Peltor ACK08 Li-Ion rechargeable battery should be charged with a Peltor FR08 / AL2AH only.
One unit of each is included with the product.
Never change or charge ACK08 in an explosive environment!
ASSEMBLY
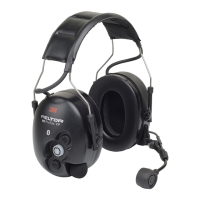
Headband (Fig. J)
1. Slide the cups out and place the headset over your ears so that the ear cushions t snugly.
2. Adjust the height of the cups to a snug, comfortable t by sliding the cup up or down while pressing the headband down.
3. The headband should lie across the top of the head.
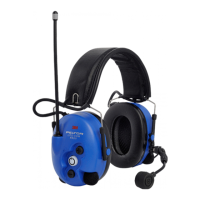
Helmet attachment (Fig. K)
Snap the helmet attachment into the slot on the helmet (1).
The cups can be set in two positions: Ventilation position (2) or working position (3).
When in use, the cups must be placed in working position!
Press the headband wires inwards until you hear a click on both sides and ensure that the shell or the headband wires do not press
against the lining or edge of the helmet, which could cause noise leakage.
 Loading...