Do you have a question about the 3M V-100 and is the answer not in the manual?
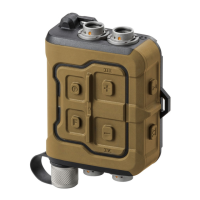
Procedure to replace the vortex generator and o-ring on the V-100 assembly using the V-115 kit.
Steps to replace the foam pad and fastener on the V-100 assembly.
Procedure to replace the cold muffler and generator for the V-200 assembly using the V-215 kit.
Instructions for replacing the o-ring in the upper tube assembly of the V-200.
Procedure to replace the disc-muffler and screen for the V-300 assembly using the W-3036 kit.
Steps to replace the o-rings on the control knob of the V-300 assembly.
Procedure to replace the disc muffler and screen for the V-400 assembly using the W-3036 kit.
This document outlines the maintenance procedures for 3M™ V-Series Air Control Valves, which are components of a continuous flow supplied air respirator system. The V-Series includes several models designed for different pressure applications and functionalities, such as cooling, heating, and general air regulation.
The 3M™ V-Series Air Control Valves are integral to a continuous flow supplied air respirator system, providing regulated airflow to the user's headgear. These valves ensure a consistent supply of breathable air, with some models offering additional functionalities like air cooling or heating to enhance user comfort in various environmental conditions. They connect the supplied air hose to the breathing tube and headgear, acting as the control point for the air delivery.
The V-Series air control valves are designed for use with 3M L-Series Headgear, providing a continuous flow of supplied air. The system is modular, allowing for replacement of individual components like the breathing tube or waist belt if damaged. The different valve models cater to specific user needs, offering either temperature control (cooling or heating) or simple air regulation based on the pressure of the supplied air. The design emphasizes user comfort and safety by ensuring a steady and controlled air supply.
The V-Series air control valves are designed with minimal moving parts, primarily the control valve itself, to reduce wear and maintenance needs. Proper filtration of compressed air is crucial to keep the muffler clean and maintain its acoustic efficiency. Spare parts kits are available for overhauling and maintaining the air regulating valves.
The document emphasizes that the L-122 Breathing Tube and W-2963 Waist Belt should be replaced entirely if they develop a leak, tear, or become damaged, rather than being repaired. This highlights the importance of maintaining the integrity of critical components for user safety.
| Brand | 3M |
|---|---|
| Model | V-100 |
| Category | Control Unit |
| Language | English |