NEED HELP? GIVE US A CALL 877.333.7108
Faucet Connect
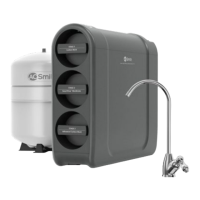
1. Connect the pre-installed 1/4" red tubing
(smaller tubing) on the faucet to the
system manifold. Push red tubing into the
red inlet port on the back of the system
manifold, labeled, ‘waste’.
2. Connect the pre-installed 1/4" blue tubing
on the faucet to the system manifold.
Push blue tubing into the blue inlet port
on the back of the system manifold,
labeled, ‘pure’.
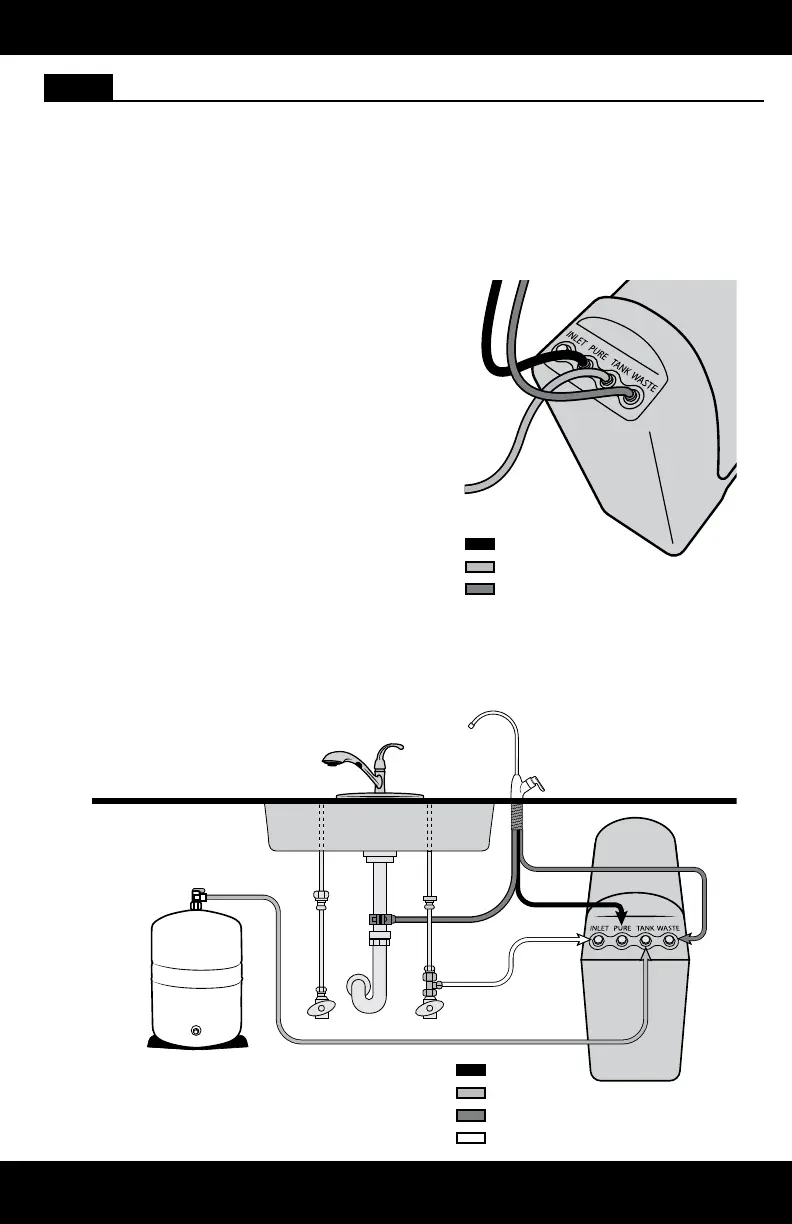
3. Connect the pre-installed 3/8" red tubing
(larger tubing) on the faucet to the open
port of the drain saddle.
Inlet Tee Valve Connect
1. Locate the white tubing connected to the inlet tee valve. Using a utility knife or scissors,
cut the white tubing to the length needed to reach the back of the system manifold.
2. Push white tubing into white inlet port on the back of the system manifold, labeled, ‘inlet’.
STEP 7 Connect Tubings
Notes: Insert tubing completely to ensure connection. A fully connected tube
can be inserted up to an inch.
Wet end of tubing for easier insertion.
If cutting the tubing due to excess length, cut the tubing straight across, not
at an angle.
Connect tubing to system in a way that does not bend, crimp, or kink tubing
as this will affect system performance.
FAUCET
TANK
HOT COLD
BLUE
YELLOW
RED
WHITE
BLUE
YELLOW
RED
INSTALLATION GUIDE
6
 Loading...