18 • Commercial Electric Water Heater Use and Care Guide
INSTALLATION
Do not turn electrical power
on unless you are sure all of the air
is out of the tank and the tank is
completely full of water. If power is
applied before the tank is completely
full of water, the upper element will
burn out (Dry Fire).
1
Be sure the electrical power
to the water heater is turned
OFF at the circuit breaker
panel (or remove the circuit’s fuses).
2
Using a non-contact circuit
tester, check the wiring to
make certain the power is OFF.
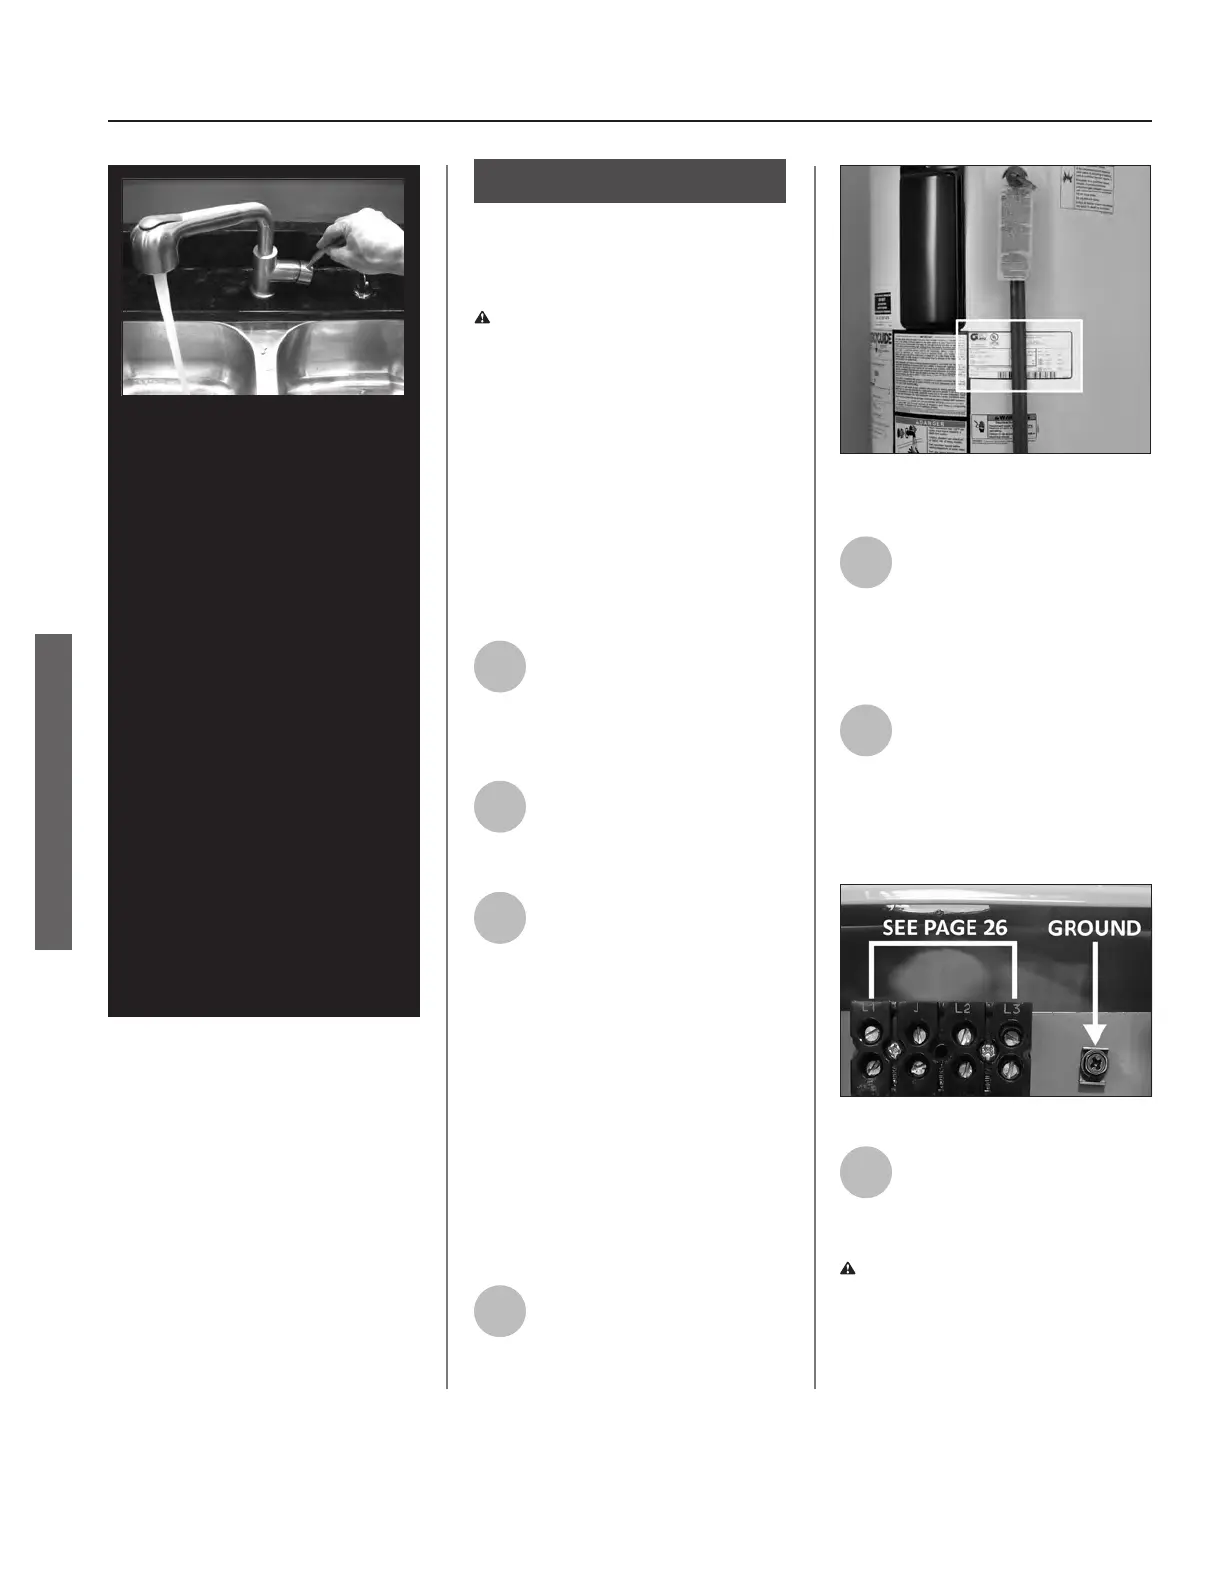
3
Check the water heater’s
data plate and ensure that
the voltage, wiring size
(ampacity) and circuit breaker rang
and type are correct for this water
heater. Refer to the wiring diagram
located on the water heater for the
correct electrical connecons. Ensure
that wire sizes, type, and connecons
comply with all applicable local codes.
In the absence of local/provincial
codes, follow the “Canadian Electrical
Codes” CSA C22.1 current.
4
Open the upper access panel
and fold away the insulaon
to access the electrical
juncon box.
Figure 18 - The water heater’s electrical
requirements can be determined from the data
plate.
5
Install wiring in an approved
conduit (if required by local
codes). Use a UL listed or CSA
approved strain relief to secure the
electrical wiring to the water heater.
6
Connect the ground wire to
the green ground screw.
Connect the power wires to
the terminal block for single-phase or
3-phase operaon as desired (see
page 10).
Figure 19 - Connecting the electrical wires.
Fold the insulaon back in
place, close the upper access
panel and secure with the
screw provided.
INSTALLATION
7
 Loading...