MAINTENANCE
26 • Residenal Hybrid Electric Heat Pump Water Heater Use and Care Guide
Roune maintenance will help your
water heater last longer and work bet-
ter. If you can’t perform these roune
maintenance tasks yourself, contact a
qualied person.
Water Heater Mainte-
nance
Aer the rst six months, drain and
ush the water heater and inspect the
anode rod. Depending on the hardness
of your water, repeat this process at
least annually, or more frequently if
needed. From me to me you may
need to replace a heang element or
a thermostat. All three maintenance
tasks are described below
the Water Heater
Tap water contains minerals that can
form lime deposits on heang ele-
ments or sediment in the boom of
the tank. The amount of lime deposits
or sediment depends on the hardness
of your tap water. The rate at which
sediment builds up depends on water
quality and hardness in your area,
the temperature sengs, and other
variables. We recommend draining and
ushing the water heater aer the rst
six months of operaon to determine
the amount of sediment build up.
Draining sediment extends the life of
the tank, heang elements, and drain
valves.
• In areas with very hard water,
remove and check the heating
elements whenever you drain
the tank. If you have heavy lime
deposits on heating elements,
you will need to replace them
more often.
• Sediment may form large masses that
can prevent the tank from draining.
Have a qualified person use a de-lim-
ing agent suitable for potable water
to remove the sediment buildup.
• In most cases, it is easier and less
expansive to replace lime-encrusted
elements than trying to remove
heavy lime deposits.
1
Locate the water heater’s
circuit breaker and turn it OFF
(or remove the circuit’s fuses).
Figure 31 - Circuit Breaker
2
Open a hot water faucet and
let the hot water run unl it is
cool.
Figure 32 - Water Faucet
3
Connect a garden hose to the
drain valve and place the
other end of the hose in a
drain, outside, or in buckets.
4
Turn the cold water supply
valve OFF.
5
Open the drain valve on the
water heater.
Figure 33 - Drain Valve
6
Open a hot water faucet to
help the water in the tank
drain faster.
NOTICE! DO NOT turn electrical power
back on unless the tank is completely
full of water. This is an addional pre-
cauon to protect the elements against
dry re. Dry re occurs when power is
supplied to the electric elements with-
out sucient water in the heater. Dry
ring the unit will result in immediate
failure of the element. While this unit
is equipped with dry re protecon the
recommended pracce is to ensure the
tank is lled with water prior to supply-
ing power to the unit.
7
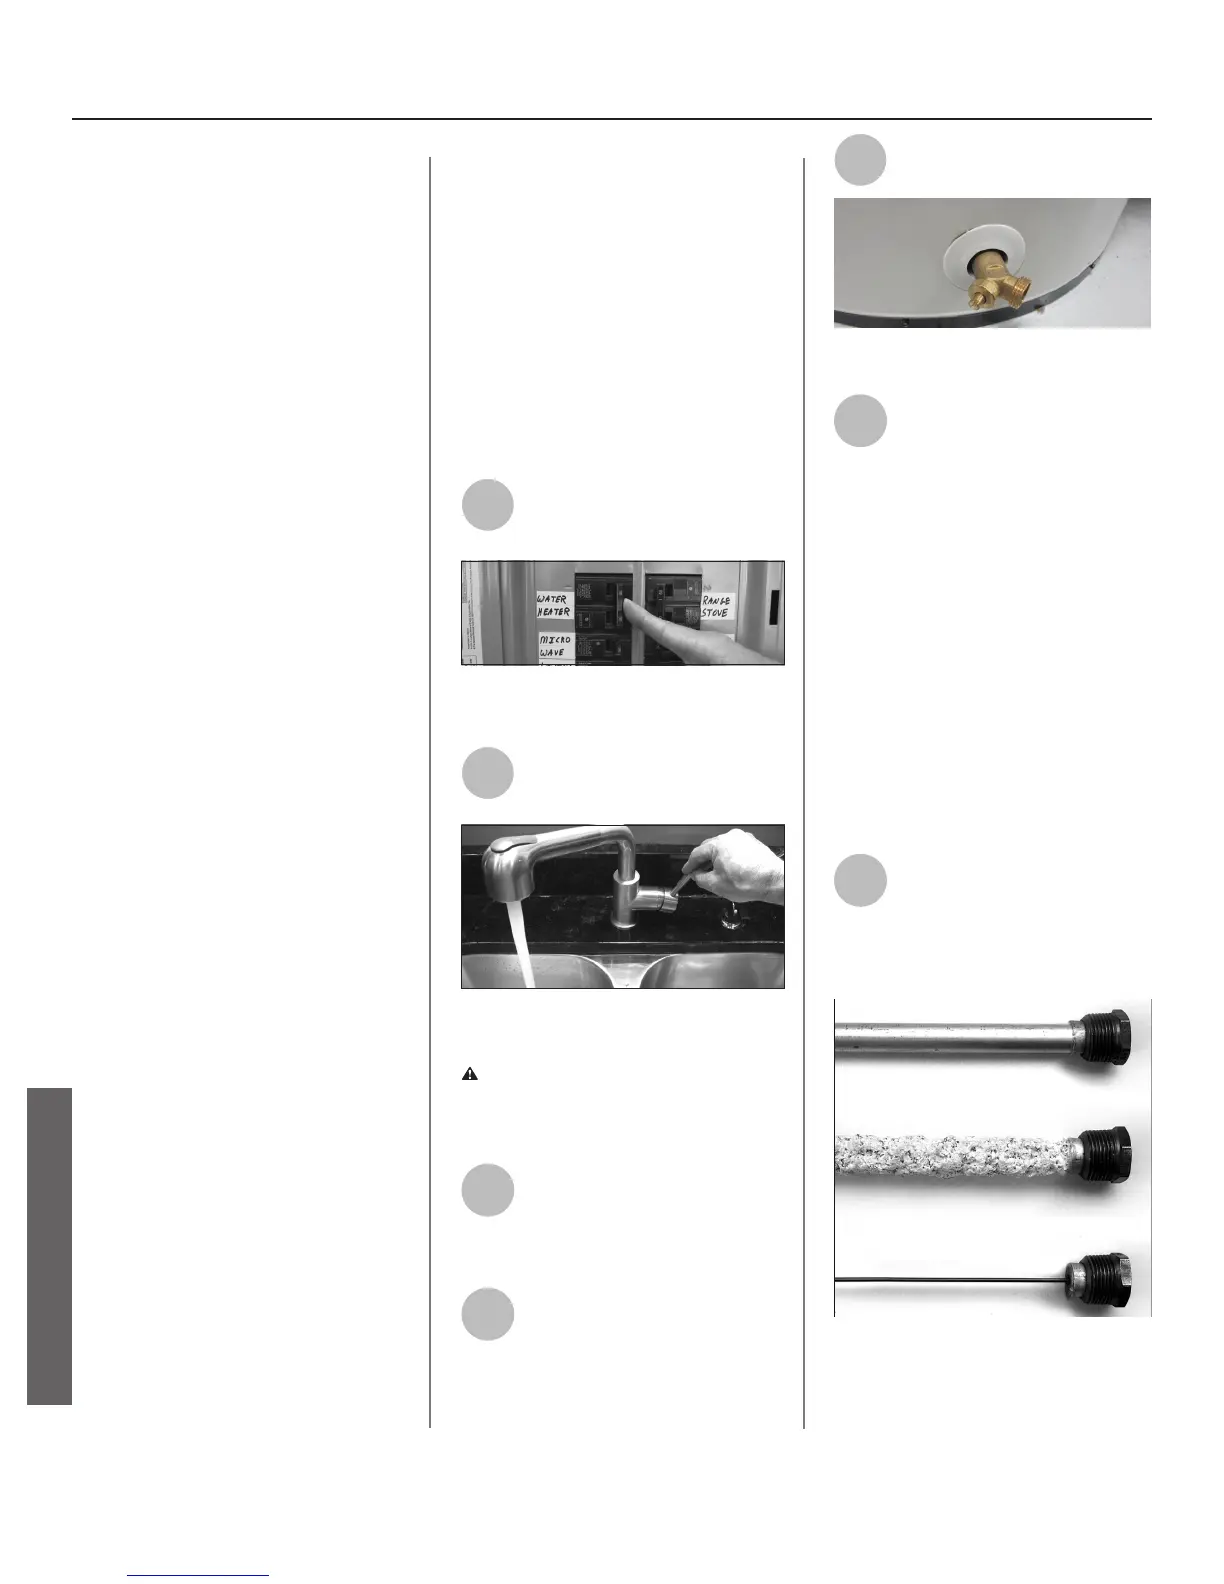
Remove and inspect the
anode rod (see Repair Parts
Illustraon on back cover for
locaon of the anode rod). Replace the
anode rod if it is depleted.
Figure 34 - Anode Rods from new (top)
to parally depleted (middle) to fully
depleted stages (boom)
MAINTENANCE