Do you have a question about the Aastra Vista 200 and is the answer not in the manual?
Connect the receiver cord and the power adaptor to the phone base.
Attach the wedge-shaped base in either desk or wall mount position.
Attach the language faceplate, receiver card, lens, and memory key card.
Fit the Discovery Card and locate the OPTIONS key for further setup.
Follow display prompts for language selection and cord connection tests.
Use the contrast button to improve display readability in different lighting.
Manually set the current time and date using the dial pad and OPTIONS key.
Place the Discovery Card on the phone to learn key functions.
Save phone numbers into memory keys using the SAVE button.
Associate names with saved numbers for Call Display functionality.
Clear saved numbers from memory keys by pressing specific key combinations.
Insert pauses into numbers for systems requiring a second dial tone.
Save telephone company feature codes for easy access.
Assign feature ON/OFF codes to memory keys with indicator light functionality.
Lock memory keys to prevent accidental erasure or modification.
Use HOLD to interrupt calls or transfer them to another extension.
Use LINK to manage Call Waiting and Three-Way Calling.
Press REDIAL to automatically redial the last number dialed.
Use RECALL to call the last person who contacted you.
The Callers List stores up to 15 incoming calls with time and caller info.
Review calls, switch between number/name, and dial directly from the list.
Save numbers from the Callers List directly to memory keys.
Understand various messages displayed for incoming calls.
Visual indicators for new voice messages may appear on the display.
The display shows when another extension is in use.
Press the left side of the volume bar to turn the ringer off.
Use the volume bar to increase or decrease the caller's voice volume.
Select between English and French for phone display messages.
Re-set time and date, especially after power failures.
Choose from four ringer tones and adjust volume levels.
Turn off the reminder light for features if not needed.
Enter your area code to omit it from incoming local calls.
Configure the Callers List to record all calls or only unanswered calls.
Assign a memory key to time call durations.
Check line cord and receiver connections if no dial tone is present.
Ensure the ringer is not turned off and adjust volume settings.
Verify receiver cord connection for clear audio during calls.
Check power adaptor connection for blank displays or low ringer volume.
Unlock memory keys by pressing OPTIONS, HOLD, then [#].
Caller ID requires subscription; 'Unknown number' means info is unavailable.
Phone functions as a regular telephone during power failures, display is inactive.
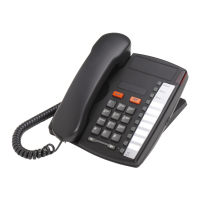
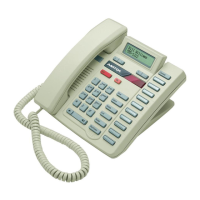
The Vista 200 offers flexibility and reliability for modern lifestyles.
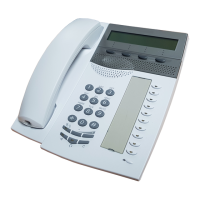
The display guides users through all phone functions.
See caller information on the display before answering.
Works with call management and messaging services from your telephone company.
Index of phone features and their corresponding page numbers in this guide.