22
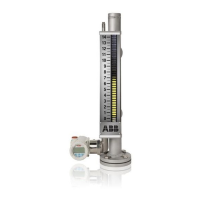
KM26 | MAGNETIC LEVEL GAUGE | OI/KM26-EN REV I
... 5 Service and maintenance
Equipment and tools
• open-end wrenches or an adjustable wrench to fit the
process studs / nuts. A torque wrench is also
recommended.
• flat-blade screwdriver or 5/16 in. nut driver
• digital multimeter or digital volt / ammeter if
transmitters or switches are attached
• level
• gasket for mating flanges
• Teflon® (registered trademark of DuPont) tape and ‘never
seize’ for threaded units
• pipe wrench for threaded units
• alan Wrench (5/32 in.)
Placing an MLG in service (startup)
Removing an MLG from service
Close the BOTTOM process isolation valve to prevent further
filling of the MLG. Then close the TOP process connection
isolation valve to completely isolate the MLG from the process
pressure.
Attach proper vapor collection equipment to the MLG vent if
required. Open the top vent to relieve pressure in the MLG and
allow air to flow when the bottom drain is opened.
Attach proper liquid collection equipment to the bottom
drain and remove liquid. After all process fluid is completely
drained, the MLG is ready to be removed from service.
Maintenance
1 Most KM26 MLGs are supplied with ½ in. vent and drain
plugs (and associated valves) in the top and bottom of
the float chamber to allow cleaning and removal of the
process fluid as required. MLGs should be cleaned and
inspected based on the severity of the service.
To perform cleaning procedure:
A. Block in the float and chamber with the process
connection isolation valves or ensure the associated
vessel/tank is empty or out of service. Follow steps
outlined in ‘removing an MLG from service’.
B. Following a complete fluid drain from the MLG, remove
the drain flange and allow the float to slide out of the
chamber bottom. Be sure to examine the float for any
excessive wear and clean as needed.
C. Clean the chamber inside wall with a bottle brush or
scrubbing tool. Some processes may require a solvent of
some type for cleaning.
D. If the MLG is located where the bottom drain is near
the floor or other equipment where it is difficult to reach,
it is possible to configure an instrument with the top
flange in place of a standard weld cap/ vent plug. This
allows the MLG to be cleaned and serviced through the
chamber top end.
2 After cleaning the MLG chamber, replace the float and
drain flange. A new flange gasket may be required.
3 Note
Use gaskets compatible with process fluid.
4 Verify that the stainless steel pipe/gear clamps are tight
and ensure that the scale assembly has the ‘positive zero’
in the correct location relative to the chamber and float.
5 Use a permanent magnet or KTEK magnet tool to attract
the ‘shuttle’ until it is again coupled to float inside the
chamber. (This step is not required if a magnetic
bargraph type indicator is utilized.)
6 Magnetic traps are available to reduce magnetic
particulate travel from the tank / vessel to the chamber.
Consult the ABB factory for ordering information and
configuration details.
The float chamber should be closed with no openings to the
atmosphere. Check to see that all drain and vent plugs are
securely in place and all vent and drain valves are closed.
The following procedural sequence is critical in pressurized
applications.
When the MLG is mounted and ready to be applied to the
liquid service, the TOP process connection valve should be
opened FIRST and should be opened very slowly to allow
pressure to equalize. This allows process fluid or vapor to
enter the MLG at a slow and controlled rate that is reasonable
and ultimately allows the MLG to reach operating pressure
and temperature in a safe fashion.
When the MLG has reached process pressure, then the
BOTTOM process connection can be opened slowly. Once this
is accomplished, the startup procedure has been completed.
Vent or drain valves should not be used during startup for
pressure relief from the process under any circumstances.
This has the potential to permanently damage the
instrument and is a hazard to personnel.
Ensure that the operating conditions (temperature,
pressure, and specific gravity, etc) are within the
maximum ratings of the MLG. At the bottom area of each
MLG is a nameplate that indicates all of the relevant
process specifications, serial number, and tag number.
Install the MLG float (this should have been accomplished
in pre-installation steps). The float is marked ‘>>>> UP
>>>>’ to insure proper orientation when placing float
inside chamber. For a KM26T MLG (a top mount style),
remove the float and guide rod. For a KM26S MLG (a side
mount style), the MLGs are supplied with float start and
stop springs. Verify these are installed at top and bottom
locations.
CAUT ION
CAUT ION
 Loading...