23
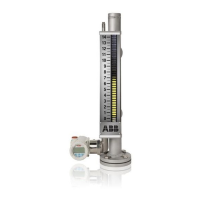
KM26 | MAGNETIC LEVEL GAUGE | OI/KM26-EN REV I
MLG replacement / spare parts
When ordering replacement or spare parts for a KM26 MLG,
the following information is a minimum requirement:
• serial number
• item description
Typical float chamber parts (reference
‘MLG parts’ section)
• vent and drain plug
• drain flange and spring
• float
• vent flange and spring
5.6.2 Typical indicator assembly parts
(reference ‘MLG parts’ section)
• scale/channel assembly
• indicator tube (glass or polycarbonate)
• stainless steel gear clamps
• name plate
• indicator tube holders (top and bottom)
Replacement glass installation procedure
(retrofit or replacement)
KM26 shuttle replacement glass
installation procedure (refer to figures 27
and 28)
1 Remove old glass tube and tube holders from scale.
2 Assemble new bottom tube holder to scale using a #6-32
machine screw. Note the orientation of grooves in tube
holder that interface with matching feature on scale
channel.
3 Insert tall rubber bumper into bottom tube holder. The
flat face on tall rubber bumper should rest flat in holder
cavity.
4 Carefully align replacement glass with shuttle indicator
into scale channel and lower into bottom tube holder.
Ensure the glass tube rests flat on rubber bumper and is
firmly seated. The nipple on bottom end of glass tube
should protrude through the slot in the rubber bumper.
5 Place rubber bumper on top of glass tube.
6 Align top tube holder with scale channel and slide down
until top surface of the holder is flush with top of scale
channel. The screw hole should align with the hole in the
holder.
7 Use a #6-32 machine screw to lock top tube holder in
place.
8 Tighten nut and install a second nut to lock tube holders
in place.
... 5 Service and maintenance
KM26 magnetic bargraph glass
installation procedure (refer to figures 29
and 30)
1 Remove old glass tube and tube holders from scale.
2 Assemble new bottom tube holder to scale using a #6-32
machine screw. Note the orientation of grooves in tube
holder that interface with the matching feature on the
scale channel.
3 Insert one (1) rubber bumper into the bottom tube
holder. The rubber bumper should rest flat in the holder
cavity.
4 Carefully align new glass with bargraph indicator into
scale channel and lower into the bottom tube holder. The
flat faces on the glass tube should register with the
corresponding flat faces in the cavity of the bottom tube
holder. Ensure that the glass tube rests flat on the rubber
bumper and is firmly seated. The nipple on the bottom
end of the glass tube should protrude through the slot in
the rubber bumper.
5 Place one (1) rubber bumper on the top of the glass tube.
6 Align the top tube holder with scale channel and slide
down until the top surface of the holder is flush with the
top of the scale channel. The screw hold should align
with the hold in the holder.
7 Use a #6-32 machine screw to lock the top tube holder in
place.
8 Tighten nut and install a second nut to lock tube holders
in place.