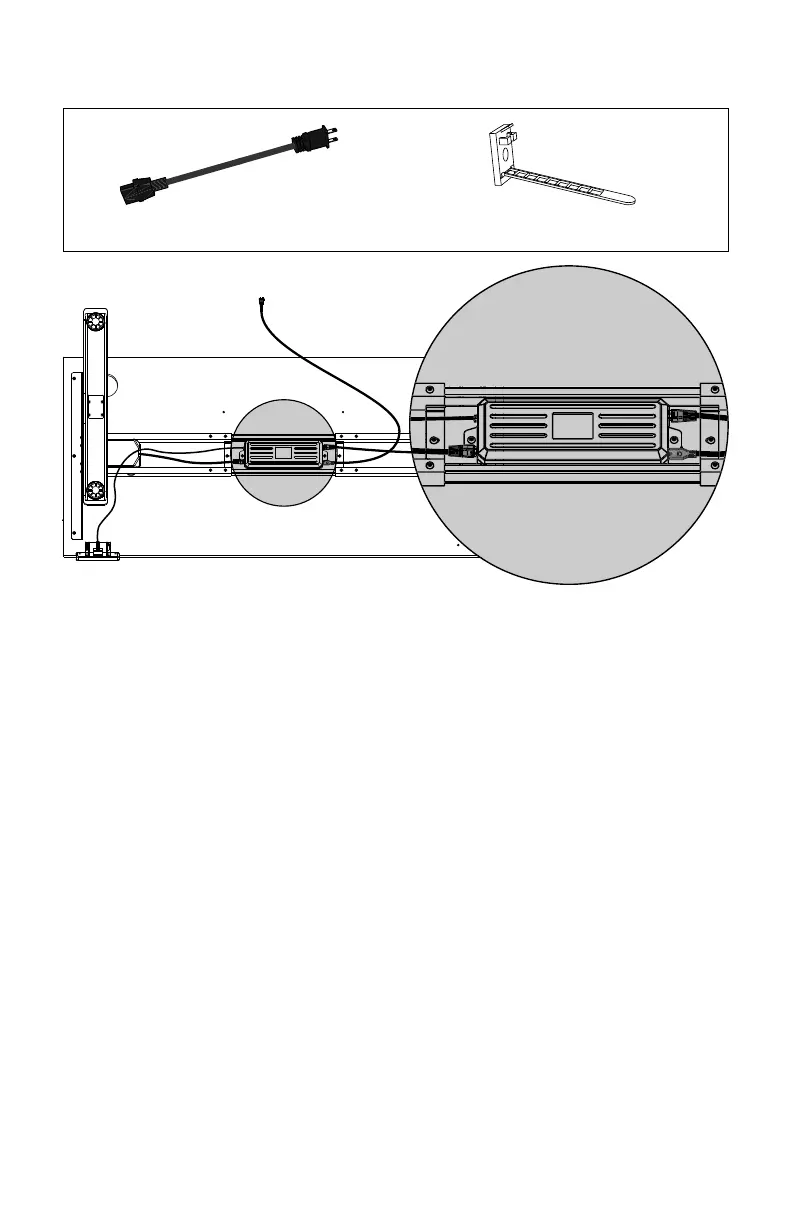
Power cable (1x) Cable clips (optional)
Step 10
:
Insert cables to the control box
Step 11
:
Secure frame components before standing
1. Check that all screws are tight and that the entire frame is secure.
2. Flip the desk onto it’s feet.
3. If the desk is on an uneven floor, use the leveling glides to stabilize the desk.
4. Connect the power cable to a nearby outlet.
The control box is now ready to calibrate.
1. Connect the cables from both legs to the control box. Follow labels for M1 and M2.
2. Connect the cable from the handset to the control box. Follow the label for HS.
3. Connect the power cable to the control box. Follow the label for AC.
Optional:
Use cable clips to manage and organize cables. Adhesives work better on the desk frame
than the desk top.
Step 12
:
Calibrate the control box using the handset
1. Press and hold DOWN until desk reaches the lowest height position. Release.
2. Press DOWN again but hold until the display flashes RST. Release.
(NOTE: The RST readout may look like AS
r
)
3. Press and hold DOWN once more until the desk lowers and rises slightly.
DO NOT release the DOWN button until after these motions have finished.
Your desk is now ready to use. Proceed to page 12 for setting memory presets.
11