22
ADJUSTMENTS (Continued)
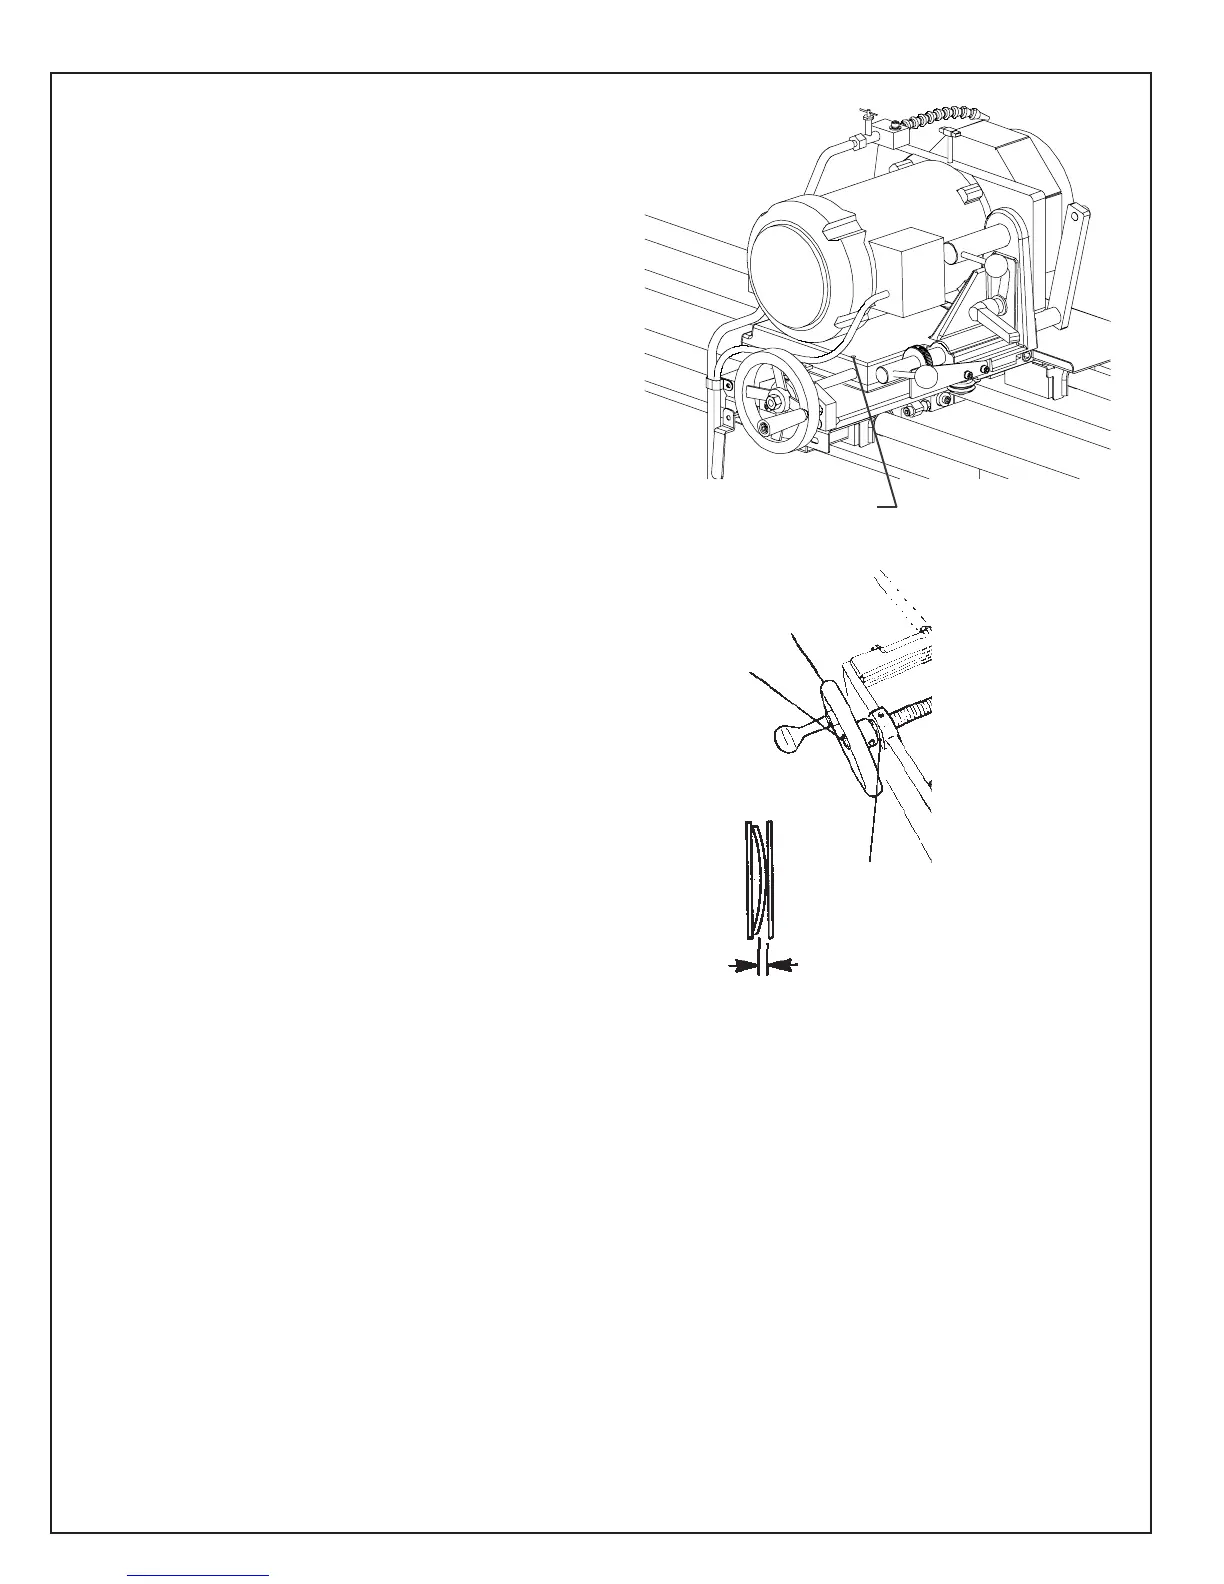
TO ELIMINATE INFEED HANDWHEEL
BACKLASH
If there is backlash in the Grinder Head Infeed
handwheel (FIG. 35A), there are two adjustment
points on each to check:
1. Washers behind the handwheel:
A. Remove the setscrew holding the calibration
ring to the handwheel.Go through the set
screw hole and loosen the setscrew holding
the handwheel to the shaft (about one-half turn).
B. Tighten the hex lock nut which secures the
handwheel to 100 in. lbs. [1.15 kg-m], then
back off 1/2 turn.
C. Check for .015 in. [.04mm] gap between
the wave washer and the flat washer. See FIG.
35B.Readjust the hex lock nut if necessary.
D. Tighten the setscrew holding the handwheel
to the shaft. Install and tighten the calibration
ring setscrew.
2. Check the nylon ball tension on the adjustment
shaft threads at the grinding head slide. See FIG.
35A. When you turn the handwheel there should
be no free play in the handwheel before the
grinding head slide moves. If there is free play,
tighten the setscrew that pushes the nylon ball
against the acme thread of the adjustment shaft.
The nylon ball preloads the free play out of the
threaded joint between the adjustment shaft and
the tooling bar slide block. Apply tension only
enough to zero the free play. DO NOT over ten-
sion as the adjuster will be difficult to turn.
FIG. 35A
Setscrew with nylon ball
FIG. 35B
Infeed
Handwheel
Wave and
flat washers
.015 in.
gap
Hex Nut