EasyManua.ls Logo

Acer Chromebook 515 - User Manual

Acer Chromebook 515
15 pages
Print Icon
To Next Page IconTo Next Page
Loading...
USER’S MANUAL
Acer Chromebook 515
Acer Chromebook Enterprise 515
Question and Answer IconNeed help?

Do you have a question about the Acer Chromebook 515 and is the answer not in the manual?

Summary

Getting Started

Turn on Your Chromebook

Instructions for powering on the Chromebook and the initial welcome screen.

Select Language and Input Settings

Guide to choosing the default language and keyboard input method.

Connect to Network

Steps to connect the Chromebook to a Wi-Fi network.

Accept Terms and System Updates

Process of accepting terms and receiving system updates.

Initial Sign-in and Account Options

Details on initial sign-in, creating a Google Account, or browsing as a guest.

Enterprise Enrollment

Optional procedure for enrolling the Chromebook into an enterprise environment.

Sign in to Google Account

Instructions for signing in with an existing Google Account.

Your Acer Chromebook Tour

Front View Components

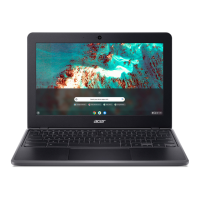
Identifies microphones, webcam, and screen on the front of the device.

Keyboard and Input Devices

Details on power button, keypad, fingerprint reader, touchpad, and keyboard.

Function Keys and Shortcuts

Explanation of dedicated function keys and common keyboard shortcuts.

Touchpad Operation

Describes actions like clicking, two-finger tap, and drag-and-drop on the touchpad.

Left Side Ports and Connections

Details on USB Type-C, HDMI, and headset/speaker jacks.

Right Side Ports and Indicators

Identifies battery indicator, MicroSD slot, USB port, USB Type-C, and lock slot.

Rear and Bottom Views

Describes ventilation, cooling fan, and speakers on the rear and bottom.

Frequently Asked Questions

Software and App Usage

Explains software compatibility and getting apps from Google Play Store.

Microsoft Office Software Use

Clarifies usage of Microsoft Office software on Chromebooks.

File Management and Transfer

Guides on finding local files and transferring them using external storage.

Google Account Integration

Explains why a Google Account is needed for Chromebook functionality and services.

Parental Controls Setup

Information on setting up parental controls using a child's Google Account.

Support and Further Information

Resources for obtaining further assistance, like Chromebook Help and Chrome OS support.

Overview

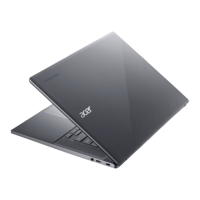
This document is a user's manual for the Acer Chromebook 515 and Acer Chromebook Enterprise 515, covering models CB515-1W and CB515-1WT, revised in September 2021. It provides essential information for setting up and using the Chromebook, including an overview of its physical features, basic operations, and frequently asked questions.

Getting Started

To begin using your Chromebook, simply press the power button. Upon the first boot-up, a "Welcome" screen will appear, prompting you to select your preferred language settings. You can choose your default language from a drop-down list. If multiple typing methods are available for your chosen language, you may also be asked to select a keyboard input method.

Connecting to a network is the next step. From the "Connect to network" list, select your desired network. If the network is protected, you will need to enter an access password. Once connected, you must accept the Terms of Service. Your Chromebook will then automatically download any available system updates, ensuring you have the latest Chrome OS features.

For first-time sign-in, you have several options. You can create a new Google Account if you don't already have one. A Google Account grants access to various Google web services like Gmail, Google Drive, and Google Calendar. Alternatively, you can browse as a guest without a Google Account. If you already have a Google Account, you can sign in by entering your username and password. For Chromebook Enterprise devices, there's an option for Enterprise enrollment, accessible via "More options" during sign-in. It's crucial to sign in with your primary Google Account, as this account will be designated as the owner and will be the only one able to modify certain Chrome settings.

Your Acer Chromebook Tour

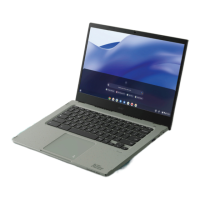
The manual provides a detailed tour of the Chromebook's physical features, starting with the front view. On the front, you'll find:

  • Microphones: Internal microphones for sound recording.
  • Webcam shutter: A physical slider that allows you to cover the webcam for privacy. Slide it to the left to cover and to the right to open.
  • Webcam: A camera designed for video communication. A light next to the webcam indicates when it is active.
  • Screen: The display for computer output, available in both touch and non-touch options.

The keyboard view highlights key components:

  • Power button: Used to turn the computer on and off.
  • Numeric keypad: A separate keypad for numeric data entry, enhancing productivity for tasks requiring number input.
  • Fingerprint reader: Located on the keyboard, this feature allows for unlocking your computer using your fingerprint, providing a secure and convenient login method.
  • Touchpad / click button: A touch-sensitive pointing device that functions like a computer mouse. Pressing down anywhere on the pad acts as a left-click. Pressing down anywhere with two fingers functions as a right-click.
  • Keyboard: The primary input device for entering data into your computer.

Function Keys and Common Keyboard Shortcuts

The Chromebook incorporates dedicated function keys and key combinations to control various hardware and software functions, such as screen brightness and volume.

  • Previous: Navigates to the previous page.
  • Reload: Reloads the current page.
  • Full-screen: Opens the page in full-screen mode.
  • Next window: Switches to the next window.
  • Screenshot: Captures a screenshot of the display.
  • Brightness down/up: Decreases or increases the screen brightness.
  • Mute: Turns off audio output.
  • Volume down/up: Decreases or increases the volume.
  • Launcher: Launches the Apps panel.

Common keyboard shortcuts include:

  • Ctrl + Screenshot: Takes a screenshot.
  • Alt + Caps Lock: Toggles caps lock on or off.
  • Alt + Project: Projects your screen. For a comprehensive list of keyboard shortcuts, users can press Ctrl + Alt + /.

Touchpad Gestures

The built-in touchpad is a pointing device that senses finger movement on its surface, controlling the cursor.

  • Click: Press down on any part of the touchpad.
  • Two-finger tap (or alt-click): Tapping with two fingers or pressing and holding Alt while tapping with one finger simulates a right-click.
  • Two-finger swipe: Placing two fingers on the touchpad and moving them up/down scrolls vertically, while moving them left/right scrolls horizontally.
  • Drag and drop: Select an item with one finger, then use a second finger to move it. Release both fingers to drop the item. This gesture is applicable for files, not windows or icons.

Left View

The left side of the Chromebook features:

  • USB Type-C port with DC-in: This versatile port connects to the provided USB Type-C power adapter for charging and to USB devices with a Type-C connector. It also supports DisplayPort™ over USB-C™.
  • HDMI port: For high-definition digital video connections, allowing you to connect to external displays.
  • Headset/speaker jack: Connects to audio devices such as speakers, headphones, or a headset with a microphone.

Right View

The right side of the Chromebook includes:

  • Battery indicator: An LED light that shows the computer's battery status. It glows amber when charging and blue when fully charged in AC mode.
  • MicroSD card slot: For inserting a microSD card, expanding storage or transferring files.
  • USB port: Connects to USB devices.
  • USB Type-C port with DC-in: Similar to the left side, this port connects to the power adapter and USB devices, supporting DisplayPort™ over USB-C™.
  • Kensington lock slot: For connecting a Kensington-compatible security lock, providing physical security for your device.

USB 3.2 Gen 1 and USB Type-C Information

  • USB 3.2 Gen 1: Compatible ports are typically blue. They are compatible with USB 3.2 Gen 1 and earlier devices. For optimal performance, it is recommended to use USB 3.2 Gen 1-certified devices. This standard is defined by the USB 3.2 Gen 1 specification (SuperSpeed USB).
  • USB Type-C: Supports DisplayPort™ audio/video output and delivers up to 3 A at 5 V DC for USB charging. The DC-in requires a power adapter or power source providing 45 W at 5~20 V. For optimal performance, users should use a certified Acer power adapter or USB Power Delivery device.

Rear View

The rear of the Chromebook features:

  • Ventilation and cooling fan: These components allow the computer to stay cool. It is important not to cover or obstruct these openings to ensure proper airflow.

Bottom View

The bottom of the Chromebook includes:

  • Ventilation and cooling fan: Similar to the rear, these are crucial for maintaining optimal operating temperature. Users are advised not to cover or obstruct them.
  • Speakers: Deliver stereo audio output.

Frequently Asked Questions

The manual addresses common questions:

  • Software: Chromebooks primarily use apps from the Google Play Store and web applications, rather than traditional software. These apps cover productivity, creativity, entertainment, and gaming.
  • Getting apps: Apps can be downloaded from the Google Play Store by clicking the Launcher icon and searching for "Play Store."
  • Microsoft Office: Chromebooks are compatible with Microsoft® Word, Excel®, and PowerPoint®. These apps can be downloaded from the Google Play Store or used via the web. Additional functionality may be available with a Microsoft 365 subscription.
  • Finding files: All files are stored in the Files app, which can be found by clicking the Launcher icon and searching for "Files."
  • Transferring local files: Local files can be transferred using compatible storage devices such as USB thumb drives or removable hard drives.
  • Google Account: A Google Account is required to sign in to your Chromebook. It's the same account used for other Google services like Gmail and Drive, and it automatically signs you into apps and services.
  • Parental controls: To set up parental controls, sign in with your child's personal Google Account. If they don't have one, it can be created during the sign-in process. A child's school account can be added after device onboarding.

Help and Information

For further assistance, users can:
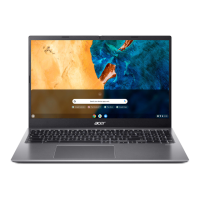
  • Access Chromebook Help by opening the Explore app on their Chromebook.
  • Visit google.com/support/chromebook/ for more information on Chrome OS.

Acer Chromebook 515 Specifications

General IconGeneral
Display Size15.6 inches
Resolution1920 x 1080 pixels
ProcessorIntel Core i3-1115G4
RAM8 GB
Storage128 GB SSD
Operating SystemChrome OS
Battery LifeUp to 10 hours
GraphicsIntel UHD Graphics
WirelessWi-Fi 6 (802.11ax)
BluetoothBluetooth 5.0
Weight1.7 kg
Ports2 x USB-C, 2 x USB-A, HDMI, microSD card reader

Related product manuals