This document provides comprehensive information regarding the Acer LCD monitor, covering its functions, usage, and maintenance. It begins with special notes pertinent to LCD monitors, followed by essential safety and comfort guidelines, unpacking instructions, and details on connecting the monitor and adjusting its display. The document also delves into power saving features, DDC protocol, connector pin assignments, standard timing tables, and troubleshooting.
Function Description
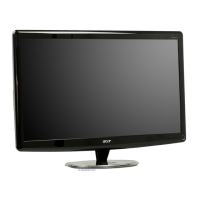
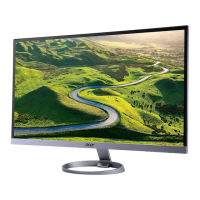
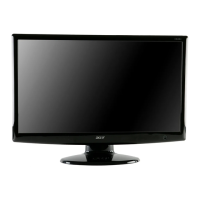
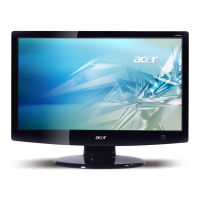
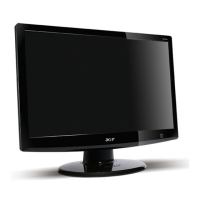
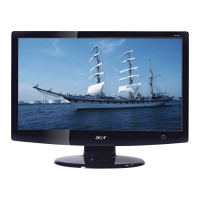
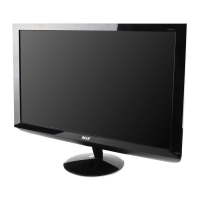
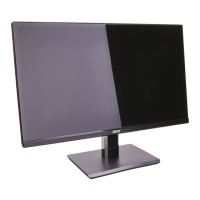
The Acer LCD monitor is designed to display visual information from a host system. It supports various video input types, including VGA, DVI, and HDMI, allowing for flexible connectivity with different computers and devices. The monitor is capable of displaying a range of resolutions and refresh rates, as detailed in the standard timing table, ensuring compatibility with common graphics adapters.
A key function of this monitor is its "Power Saving" mode, which is activated by a control signal from the display controller. In this mode, the power LED changes to an amber color, indicating reduced power consumption. The monitor remains in this state until a control signal is detected or the keyboard or mouse is activated, with a recovery time of approximately 3 seconds to return to the ON state.
The monitor also supports the DDC (Display Data Channel) protocol, which facilitates Plug and Play functionality. This means the monitor can automatically communicate its capabilities, such as supported resolutions and timing, to the host system, simplifying installation and configuration. The monitor specifically supports the DDC2B standard.
Usage Features
The Acer LCD monitor offers several features designed to enhance user experience and comfort.
Unpacking and Setup:
Upon unpacking, users should verify the presence of all included items: the LCD monitor itself, an AC power cord, and optionally, an HDMI cable, power adapter, D-Sub cable, DVI cable, audio cable, user manual, and quick start guide. It is recommended to retain the packing materials for future shipping or transport needs.
Attaching/Removing the Base:
The base can be easily attached by aligning it with the stand and pushing it towards the top of the monitor, then tightening a screw clockwise. Removal is the reverse process. Users are advised to place the monitor face-down on a stable, cloth-covered surface during this process to prevent screen scratches.
Screen Position Adjustment:
For optimal viewing, the monitor's tilt can be adjusted. Users can hold the edges of the monitor with both hands to tilt it up to 15 degrees or down to 5 degrees.
Connecting the Power Cord:
The monitor features a universal power supply, compatible with both 100/120V AC and 220/240V AC voltage areas, requiring no user adjustment. The power cord should be connected to the AC Inlet on the monitor and then to a proper AC outlet. Specific cord set requirements are provided for 120V AC (UL Listed Cord Set, Type SVT wire, 10 A/125 V plug) and 220/240V AC (H05VV-F cord, 10 A, 250 V plug).
Connecting Video and Audio Cables:
The installation process involves connecting the video cable (VGA, DVI, or HDMI, depending on the model) from the monitor to the computer. For dual-input models, a 24-pin DVI cable can be used. For HDMI-input models, an HDMI cable is required. It is crucial to ensure both the monitor and computer are powered off before connecting cables. An optional audio cable can also be connected for audio-input models. After connecting, the power adapter and power cord are connected to the monitor and a grounded AC outlet. The recommended power-on sequence is to turn on the monitor first, then the computer.
User Controls and OSD:
The monitor features a power switch/power LED for turning it ON/OFF and indicating its power status. A shortcut menu, accessed via a function button, provides quick access to commonly used settings.
- Empowering Key (e): Opens the Acer eColor Management OSD, offering various scenario modes.
- Auto Adjust (AUTO): Activates the Auto Adjustment function to set HPos, VPos, Clock, and Focus.
- MENU: Opens the OSD menu for detailed adjustments.
- Volume Up/Down: Adjusts the volume (for audio-input models only).
- Input Key (INPUT): Selects between different video sources (VGA, DVI, HDMI). When switching inputs, messages like "VGA," "DVI," or "HDMI" appear on the screen. If a selected input cable is not connected, a "No Cable Connect" or "No Signal" dialog box will appear.
Acer eColor Management:
This feature, accessed via the Empowering Key, allows users to select from various scenario modes to optimize display settings.
- User mode: Allows fine-tuning of settings to suit any situation.
- ECO mode: Adjusts settings to reduce power consumption.
- Standard mode: Reflects the native display capability.
- Graphic mode: Enhances colors and emphasizes fine detail, making pictures and photographs appear vibrant.
- Movie mode: Displays scenes in clearest detail, providing great visuals even in unsuitably-lit environments.
Users can navigate these modes using directional keys and confirm their selection with the "Adjust/Exit" key.
OSD Settings:
The OSD (On-Screen Display) menu provides extensive control over picture quality and general settings.
- Picture Menu: Adjusts Brightness, Contrast, Colour Temp, H. Position, V. Position, Focus, Clock, and Auto Config. Users navigate using arrow keys and enter sub-menus to adjust sliding scales.
- OSD Timeout: Configures how long the OSD remains visible on screen.
- Setting Menu: Adjusts Wide Mode (Full), DDC/CI (On/Off), ACM (On/Off), Input (VGA/DVI/HDMI), Language, and Reset options.
- Information Menu: Displays basic LCD monitor information, including resolution, H/V frequency, input type, and serial number.
Safety and Comfort Guidelines:
The manual emphasizes safety precautions, such as avoiding water, unstable surfaces, and blocked ventilation slots. It also warns against inserting objects into the cabinet slots or spilling liquids. Recommendations for safe listening are provided, including gradually increasing volume, limiting listening time at high volumes, and turning down volume in noisy surroundings.
Tips for comfortable use are also provided, focusing on reducing eyestrain and physical injury during prolonged computer use. These include:
- Product Servicing: Advising against self-servicing and referring to qualified personnel for repairs, especially if the power cord is damaged, liquid is spilled, or the product is dropped.
- LCD Pixel Statement: Explaining that minor pixel blemishes (black or red dots) are normal and do not constitute a malfunction.
- Tips for Comfortable Use: Suggesting adjustments to monitor viewing angle, using a footrest, and raising sitting height. It also recommends taking short rests, avoiding tensing muscles, and installing external peripherals properly.
- Taking Care of Your Vision: Advising frequent eye rests, looking away from the monitor, blinking frequently, keeping the display clean, and adjusting brightness/contrast. It also suggests minimizing glare by positioning the display away from light sources, using drapes/blinds, task lighting, glare-reduction filters, or display visors.
- Developing Good Work Habits: Encouraging regular short breaks, stretching exercises, fresh air, and maintaining a healthy body. It specifically warns against using the product on a couch or bed for extended periods.
Maintenance Features
Cleaning Your Monitor:
The document provides clear guidelines for cleaning the monitor:
- Always unplug the monitor before cleaning.
- Use a soft cloth to wipe the screen and the cabinet's front and sides.
Troubleshooting:
A comprehensive troubleshooting section is included to help users diagnose and resolve common issues before seeking professional servicing. This section is divided by problem type (No Picture, Unstable Picture, Abnormal Sound) and current status (LED ON, LED OFF, LED displays amber color, Display is missing/shifted/sized incorrectly, No sound/low sound level).
For "No Picture" issues:
- If the LED is ON, adjust brightness and contrast via OSD to maximum or reset to default settings.
- If the LED is OFF, check the power switch and ensure the AC power cord is properly connected.
- If the LED displays an amber color, check if the video signal cable is properly connected and if the computer system is ON.
For "Unstable Picture" issues:
- Check if the graphics adapter and monitor specifications are compliant to avoid input signal frequency mismatch.
For "Abnormal Picture" issues (missing, center shift, too small/large display size):
- Use OSD to adjust RESOLUTION, CLOCK, CLOCK-PHASE, H-POSITION, and V-POSITION for non-standard signals.
- If a full-screen image is missing, select a different resolution or vertical refresh timing via OSD.
- Allow a few seconds after adjusting image size before changing/disconnecting the signal cable or powering off the monitor.
- Check if the audio cable is connected to the host PC.
- Verify if the host PC's volume is at a minimum position and try raising it.
The document concludes with a Declaration of Conformity and Federal Communications Commission Declaration of Conformity, providing regulatory information about the device.