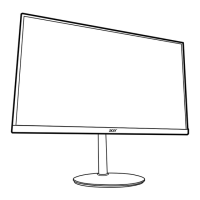
This document serves as a Quick Start Guide for the Acer LCD Monitor NITRO XV0 Series/XV340CK, providing essential information for its setup, operation, and maintenance.
The Acer LCD Monitor is designed for video and visual display of information obtained from electronic devices, offering a high-quality visual experience for various applications, from everyday computing to more demanding tasks like gaming or professional work. Its primary function is to serve as an output display for computers and other compatible electronic devices, presenting visual content with clarity and precision.
Usage Features:
The monitor is equipped with several external controls to facilitate easy interaction and customization of its display settings. These controls are strategically placed for user convenience.
- Power Button: Located on the monitor, this button serves the fundamental function of turning the monitor on and off. A simple press initiates or terminates the power supply to the display.
- OSD Functions/Down/Right Button: This multi-functional button allows users to access the On-Screen Display (OSD) menu. When pressed, it brings up the OSD, which is a graphical interface for adjusting various monitor settings. In the OSD menu, this button is used to navigate and select desired items, typically moving downwards or to the right within the menu structure.
- Input Source Switching/Up/Left Button: This button acts as an INPUT hotkey, providing quick access to the input select function. Users can press it to cycle through available input sources (e.g., DP, HDMI) to connect to different devices. Within the OSD menu, it also functions for navigation, moving upwards or to the left to select desired items.
- Volume Key: This dedicated key allows for direct adjustment of the monitor's audio output volume, providing a convenient way to control sound levels without needing to access the OSD menu.
- Enter Button: This button is crucial for confirming selections within the OSD menu. When a desired setting or option is highlighted, pressing "Enter" applies the change. Additionally, it has a secondary function related to OSD Lock: pushing it for 3 seconds disables the Lock function, which prevents accidental changes to settings.
- Empowering Key: This key is designed to select different scenario modes, which are pre-configured display settings optimized for various content types (e.g., gaming, movie, text). This allows users to quickly switch between display profiles to suit their current activity.
- Exit Button: When the OSD menu is active, this button serves as the exit key, allowing users to close the OSD menu and return to the normal display.
Connectivity:
The monitor offers a range of connectivity options to ensure compatibility with various devices:
- DP (DisplayPort) and HDMI Inputs: The monitor provides both DP and HDMI input sockets, allowing users to connect their computer's graphics card using either of these high-definition digital interfaces. This flexibility ensures broad compatibility with modern graphics cards.
- USB Upstream/USB Downstream (Battery Charger)/USB Downstream Ports: The monitor includes USB ports for enhanced functionality. The USB upstream port connects the monitor to the computer, enabling the downstream ports to function. The USB downstream ports can be used to connect peripheral devices such as keyboards, mice, or external drives. One of these ports is also designated as a Battery Charger, providing 5V/2.1A output, which can be used to charge compatible devices even when the monitor is on. It's important to note that the USB downstream port does not provide power when the monitor switch is off.
Advanced Display Features:
- FreeSync: The monitor supports FreeSync technology, which allows a compatible graphics source to dynamically adjust the display refresh rate. This feature is designed to synchronize the monitor's refresh rate with the frame rate of the graphics card, resulting in a smoother, tear-free, and stutter-free visual experience. This is particularly beneficial for gaming and other fast-paced content, enhancing power efficiency and reducing display latency.
Maintenance Features:
Proper maintenance is crucial for the longevity and optimal performance of the LCD monitor. The guide provides clear instructions for cleaning and handling:
- Cleaning the LCD Monitor Screen:
- Power Off and Unplug: Before cleaning, it is essential to turn off the LCD monitor and unplug its power cord to prevent electrical hazards and potential damage to the display.
- Gentle Cleaning Solution: A non-solvent cleaning solution should be sprayed onto a clean rag, not directly onto the screen. This prevents liquid from seeping into the monitor's internal components.
- Gentle Wiping: The screen should be cleaned gently with the moistened rag. Applying excessive pressure can cause permanent damage to the LCD screen.
- Environmental Considerations:
- Avoid Moisture and Sunlight: The monitor should not be placed near a window or in direct sunlight, as exposure to rain, moisture, or prolonged sunlight can severely damage the unit.
- Temperature Range: The monitor should be stored in a room with a temperature range of -20° to 60°C (-4° to 140°F). Operating or storing the monitor outside this range can lead to permanent damage.
- Handling Precautions:
- No Excessive Pressure: Avoid applying excessive pressure to the LCD screen, as this can cause permanent damage to the display panel.
- No Unauthorized Servicing: Users should not attempt to remove the cover or service the unit themselves. Any servicing should be performed by an authorized technician to ensure proper repair and prevent further damage.
- Emergency Procedures:
- Immediate Unplugging: In case of specific incidents, such as a frayed or damaged signal cable, liquid spills onto the monitor, exposure to rain, or physical damage to the monitor or its case, the monitor should be immediately unplugged. An authorized technician should then be contacted for assistance.
Assembly and Installation:
The guide provides step-by-step instructions for attaching the monitor to its stand and connecting it to a computer:
- Attaching to the Stand:
- Unpack Components: Remove the monitor bracket and base from the packaging and place them on a stable, level workspace.
- Attach Monitor to Bracket: Align the front-end of the bracket with the corresponding screw holes on the back of the display. Replace the four screws that secure the monitor to the bracket and tighten them firmly.
- Attach Footstand to Base: Attach the footstand to the base by turning it clockwise to lock. Ensure the base is securely locked onto the stand.
- Secure Base to Stand: Secure the base to the stand by turning the screw using the integrated tab or a suitable coin.
- Connecting to a Computer:
- Power Off Computer: Turn off the computer and unplug its power cord before making any connections.
- Connect Signal Cable: Connect the signal cable (DP and/or HDMI) to the input socket of the monitor and the output socket of the graphics card on the computer. Tighten any thumbscrews on the signal cable connector firmly.
- Connect USB Cable: Connect one end of the USB cable to the USB terminal of the monitor (upstream port) and the other end to an appropriate USB port on the computer.
- Insert Power Cables: Insert the monitor power cable into the power port at the back of the monitor, and then plug the power cords of both the computer and the monitor into power outlets.
Regulatory Compliance:
The monitor complies with various regulations and safety notices, including FCC rules for Class B digital devices, CE declaration of conformity (EMC, Low Voltage, RoHS, and Ecodesign Directives), and Canadian ICES-3(B)/NMB-3(B) standards. It emphasizes the use of shielded cables for connections to other computing devices to maintain EMC compliance. The guide also includes information on the proper disposal of waste electrical and electronic equipment in the European Union, highlighting the importance of separate collection and recycling to conserve natural resources and protect human health and the environment.