EasyManua.ls Logo

Acer XZ271U - User Manual

Acer XZ271U
2 pages
Print Icon
To Next Page IconTo Next Page
Loading...
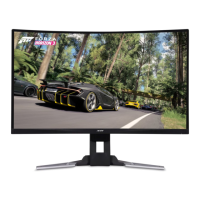
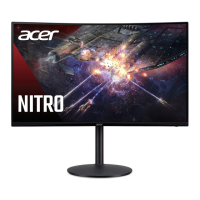
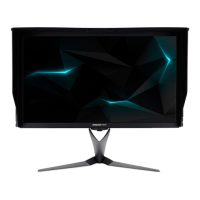
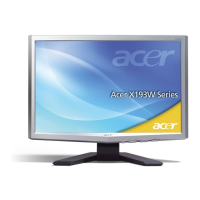
LCD Monitor Quick Setup Guide
Acer LCD Monitor Quick Start Guide (QSG)
Important safety instructions
Please read the following instructions carefully.
• To clean the LCD monitor screen: Be sure that your monitor is electrically rated to operate with the AC power available in your
location.
• Turn off the LCD monitor and unplug the power cord.
• Spray a non-solvent cleaning solution onto a rag and clean the screen gently.
• NEVERSPRAYORPOURANYLIQUIDDIRECTLYONTOTHESCREENORCASE.
• DONOTUSEANYAMMONIAORALCOHOL-BASEDCLEANERSONTHELCDDISPLAYSCREENORCASE.
• Acer will not be liable for damage resulting from use of any ammonia or alcohol-based cleaners.
• Do not place the LCD monitor near a window. Exposing the monitor to rain, moisture or sunlight can severely damage it.
• Do not apply pressure to the LCD screen. Excessive pressure may cause permanent damage to the display.
• Do not remove the cover or attempt to service this unit yourself. An authorized technician should perform servicing of any nature.
• Store the LCD monitor in a room with a temperature of -20° to 60°C (-4° to 140°F). Storing the LCD monitor outside this range may
result in permanent damage.
• Immediately unplug your monitor and call an authorized technician if any of the following circumstances occur:
• Monitor-to-PC signal cable is frayed or damaged.
• Liquid spills onto the LCD monitor or the monitor is exposed to rain.
• The LCD monitor or case is damaged.
Package contents
LCD monitor Power cord
HDMI cable
(Optional)
DP cable
(Optional)
Quick start guide Adapter
Attaching/Removing the base
1. Remove the monitor from the package.
2. Place the monitor face down on a flat and stable surface covered by a protective sheet and then install secure the stand to the
monitor.
3. Fasten the captive screw on the base to secure the base to the stand.
4. Reverse the steps when you want to remove the base.
Connecting your monitor to a computer
1. Connect the power cord to the power adapter.
2. Connect the monitor to your computer using an HDMI or DP cable.
3. Connect the power adapter to the DC-in port on the monitor.
4. Fully insert the power cord plug into the power outlet socket.
Using the joystick
Turning on/off the monitor:
• When the monitor is off, press the joystick to turn on the monitor. When the monitor is turned on, press and
hold the joystick for about 5 seconds to turn off the monitor.
Configuring the monitor:
• Press the joystick to open the OSD menu.
• Toggle the joystick up/down/left/right to navigate the OSD menu.
• Press the joystick to confirm selections.
• Toggle the joystick left/right to adjust settings.
• Press the joystick to confirm changes.
HDMIDP
HDMI1 /
HDMI2
DP
HDMI1
HDMI2
DP IN
XZ271U
360°
120mm
ͲϱΣΕϮϱΣ
HDMI
DP
Product Information for EU Energy
KWWSVZZZDFHUFRP
;=8; ;=83
0&9=
0
Question and Answer IconNeed help?

Do you have a question about the Acer XZ271U and is the answer not in the manual?

Overview

This document serves as a Quick Start Guide (QSG) for an Acer LCD monitor, providing essential information for setup, usage, and maintenance.

Function Description

The Acer LCD monitor is designed for video and visual display of information from electronic devices. It supports FreeSync Premium technology (HDMI/DP Only), which allows compatible graphics sources to dynamically adjust the display refresh rate. This feature aims to provide power-efficient, virtually stutter-free, and low-latency display updates, enhancing the visual experience.

Important Technical Specifications

While specific technical specifications like resolution or panel type are not detailed, the guide mentions several operational parameters and compliance standards:

  • Operating Temperature: The monitor should be stored in a room with a temperature range of -20° to 60°C (-4° to 140°F). Storing outside this range can lead to permanent damage.
  • Power: The monitor is electrically rated to operate with the AC power available in the user's location.
  • Connectivity: It supports HDMI and DisplayPort (DP) connections for video input.
  • Compliance: The device complies with FCC Class B digital device limits (Part 15 of the FCC rules), CE declaration of conformity (EMC Directive 2014/30/EU, Low Voltage Directive 2014/35/EU, RoHS Directive 2011/65/EU, and Ecodesign Directive 2009/125/EC), and Canadian ICES-003(B) / NMB-003(B) standards. Shielded cables are required for all connections to other computing devices to maintain EMC compliance.
  • FreeSync Premium: This feature is available only when connected via HDMI or DP.

Usage Features

The monitor is designed for user-friendly operation with a joystick control for navigation and settings adjustment.

  • Package Contents: The package includes the LCD monitor, power cord, quick start guide, and adapter. HDMI and DP cables are optional and may or may not be included.
  • Attaching/Removing the Base:
    1. Remove the monitor from its packaging.
    2. Place the monitor face down on a flat, stable, and protected surface.
    3. Secure the stand to the monitor.
    4. Fasten the captive screw on the base to secure it to the stand.
    5. To remove the base, reverse these steps.
  • Connecting to a Computer:
    1. Connect the power cord to the power adapter.
    2. Connect the monitor to the computer using either an HDMI or DP cable.
    3. Connect the power adapter to the DC-in port on the monitor.
    4. Fully insert the power cord plug into a power outlet socket.
  • Turning On/Off the Monitor:
    • To turn on, press the joystick when the monitor is off.
    • To turn off, press and hold the joystick for approximately 5 seconds when the monitor is on.
  • Configuring the Monitor (OSD Menu): The monitor features a joystick for intuitive menu navigation.
    • Press the joystick to open the On-Screen Display (OSD) menu.
    • Toggle the joystick up/down/left/right to navigate through the OSD menu options.
    • Press the joystick to confirm selections.
    • Toggle the joystick left/right to adjust settings.
    • Press the joystick to confirm changes.

Maintenance Features

The guide provides clear instructions for safe handling and cleaning to ensure the longevity of the device.

  • Cleaning the LCD Monitor Screen:
    1. Ensure the monitor is electrically rated for the available AC power.
    2. Turn off the monitor and unplug the power cord.
    3. Spray a non-solvent cleaning solution onto a rag.
    4. Gently clean the screen with the dampened rag.
    • Important Cleaning Precautions:
      • NEVER spray or pour any liquid directly onto the screen or case.
      • DO NOT use ammonia or alcohol-based cleaners on the LCD display screen or case. Acer will not be liable for damage caused by such cleaners.
  • General Safety and Handling:
    • Do not place the LCD monitor near a window, as exposure to rain, moisture, or sunlight can severely damage it.
    • Do not apply pressure to the LCD screen, as excessive pressure can cause permanent damage.
    • Do not remove the cover or attempt to service the unit yourself; servicing should only be performed by an authorized technician.
    • Do not lift the monitor by its base to prevent damage.
  • Troubleshooting (When to Unplug and Call Technician): Immediately unplug the monitor and contact an authorized technician if any of the following occur:
    • Monitor-to-PC signal cable is frayed or damaged.
    • Liquid spills onto the LCD monitor or the monitor is exposed to rain.
    • The LCD monitor or case is damaged.
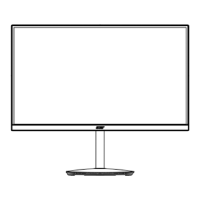
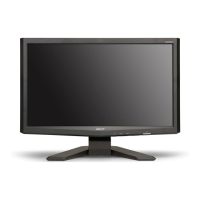
  • Shock Hazard Prevention:
    • Do not remove the covers.
    • Do not operate this product unless the stand is attached.
    • Do not connect or disconnect this product during an electrical storm.
    • The power cord plug must be connected to a properly wired and grounded power outlet.
    • Any equipment attached to this product must also be connected to properly wired and grounded power outlets.
    • To isolate the monitor from the electrical supply, remove the plug from the power outlet. The power outlet should be easily accessible.
  • Disposal of Waste Equipment: The product bears a symbol indicating it should not be disposed of with household waste. Users are responsible for handing it over to a designated collection point for the recycling of waste electrical and electronic equipment. This practice helps conserve natural resources and protects human health and the environment. Information on recycling points can be obtained from local city offices, waste disposal services, or the shop where the product was purchased.

Acer XZ271U Specifications

General IconGeneral
BrandAcer
ModelXZ271U
CategoryMonitor
LanguageEnglish

Related product manuals